
Putting up a metal building is a process, one that moves from planning and permits all the way to installing the final trim. Successful completion hinges on meticulous planning long before a single bolt is tightened.
Your Essential Pre-Construction Checklist
Before any steel goes up, the real work begins. This isn't just about a simple checklist; it's about tapping into the practical wisdom of seasoned builders. The decisions you make right now will directly shape your timeline, budget, and the quality of the final structure. Think of it as building a rock-solid project plan to head off expensive mistakes and legal headaches before they even have a chance to start.
Thinking through every last detail now will save you a world of frustration later. From triple-checking local zoning laws to making sure your site is graded just right, each step is a critical building block. A well-thought-out plan is truly the difference between a smooth, efficient build and one that’s bogged down by delays and surprise costs.
Navigating Building Codes and Permits
One of the very first hurdles is getting a handle on local regulations. Every town, city, and county has its own rulebook for construction, and metal buildings are definitely included. These codes will dictate everything from how deep your foundation needs to be to required snow load ratings and how far you must build from your property lines.
Trying to skip this step can backfire in a big way, leading to hefty fines or, in the worst-case scenario, being forced to tear your new building down. Your first call should be to your local planning or building department. Ask for their information packet on accessory structures or pre-engineered buildings—it will lay out the entire permitting process for you.
You'll almost certainly need a few key documents:
- Site Plan: A clear drawing showing where the building will sit on your property, including distances to property lines and other structures.
- Foundation Plans: Detailed schematics for the concrete foundation. Your building manufacturer or an engineer can usually provide these.
- Engineered Drawings: Before you even think about breaking ground, having detailed construction drawings is non-negotiable for a smooth and efficient build.
To help you stay organized, here's a look at the key planning stages and what you should focus on during each.
Table: Key Planning Stages and Considerations
This table breaks down the essential pre-construction phases. Following this roadmap helps ensure nothing critical falls through the cracks.
| Planning Stage | Primary Objective | Key Considerations |
|---|---|---|
| Zoning & Permitting | Gain legal approval from local authorities | Research setbacks, height limits, and use restrictions. Prepare all required documents like site plans and engineered drawings. |
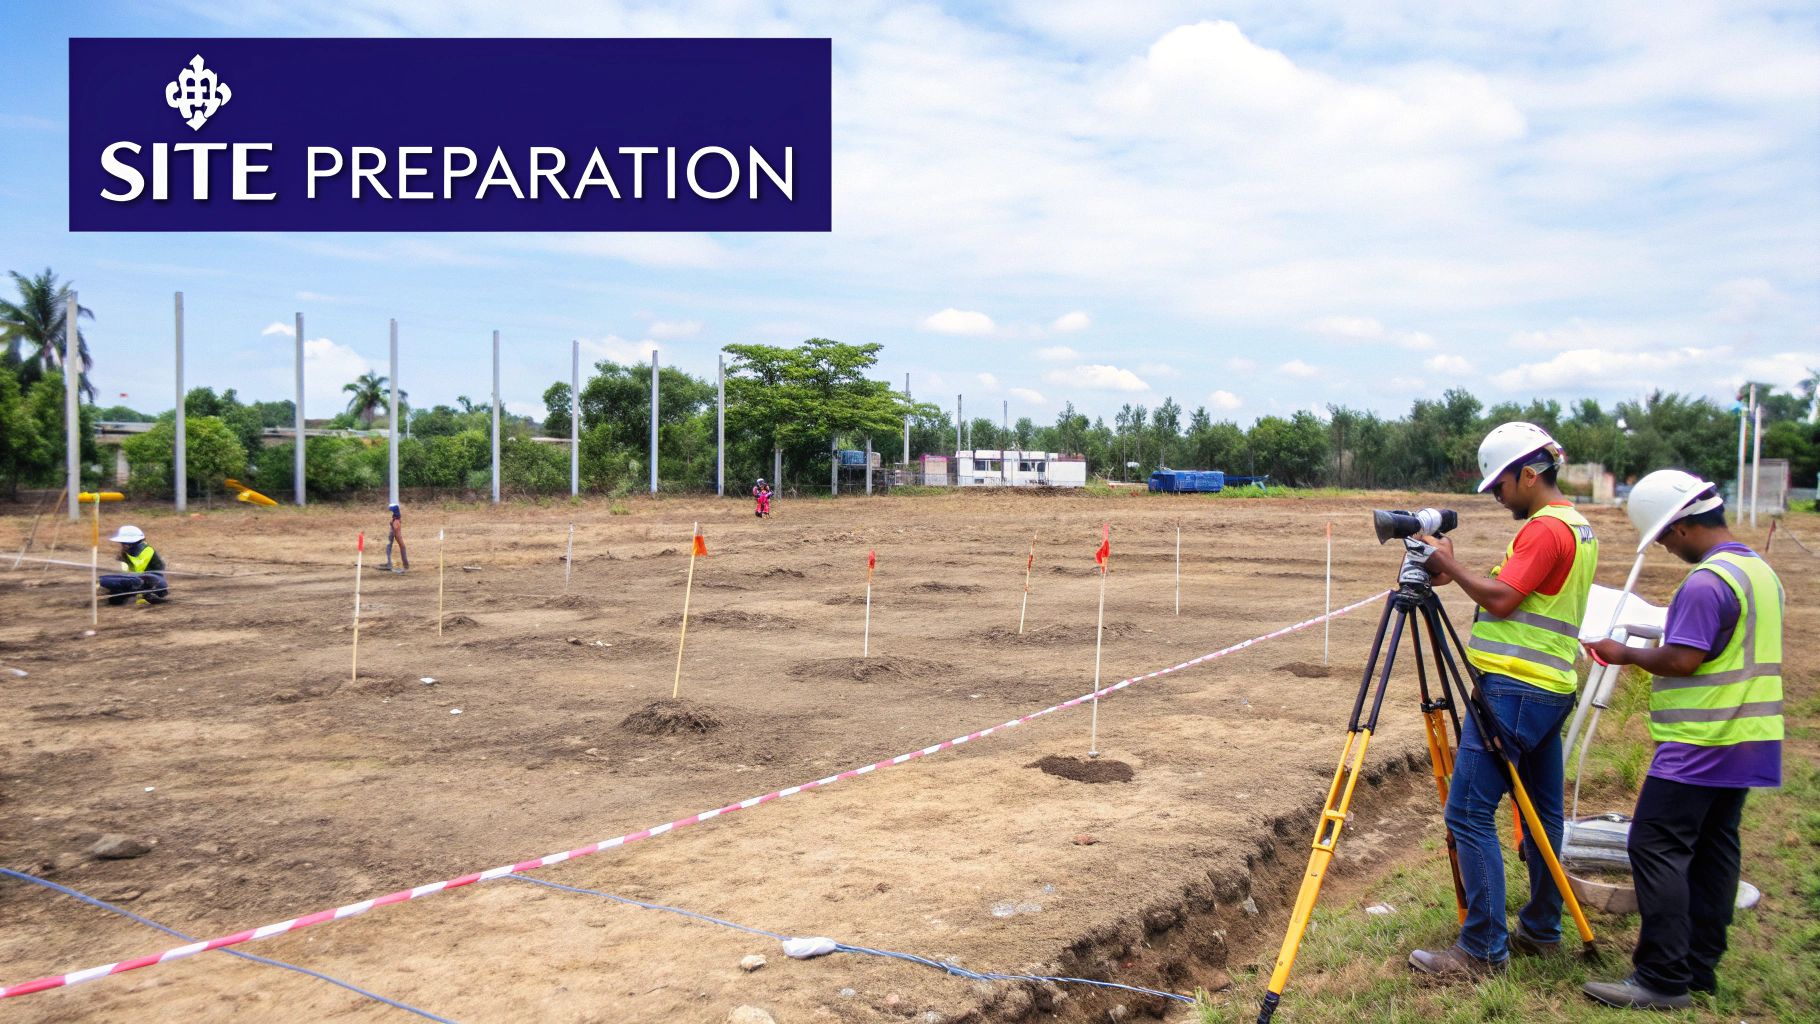
| Site Preparation | Create a stable and accessible construction area | Grade for proper drainage, clear all vegetation and debris, and ensure access for heavy equipment and delivery trucks. |
| Foundation Design | Plan a foundation that meets code and supports the building | Consult with an engineer to design a slab or footer system appropriate for your soil type and building load requirements. |
| Budget & Financing | Secure funds and account for all project costs | Go beyond the kit price—include site work, concrete, labor, equipment rental, and a contingency fund. |
Getting these four pillars right from the start sets the stage for a much smoother construction process down the road.
Budgeting Beyond the Building Kit
A classic rookie mistake is only budgeting for the metal building kit itself. While that's a major line item, it's just one piece of a much larger financial puzzle. A truly realistic budget must account for all the associated costs to prevent a financial crunch midway through the project.
Don't forget to factor in these often-overlooked expenses:
- Foundation Work: Concrete is a big one. This includes excavation, formwork, rebar, the pour itself, and the labor to get it done.
- Site Preparation: The cost to clear land, grade the site for good drainage, and create a solid access road can add up quickly.
- Equipment Rental: Unless you own one, you'll likely need to rent a forklift, scissor lift, or maybe even a small crane.
- Labor Costs: If you aren't doing a 100% DIY build, you'll need to pay for a contractor or a professional erection crew.
- Permit Fees: These can run from a few hundred to several thousand dollars, depending on where you live and the scope of your project.
Pro Tip: Always build a contingency fund of 10-15% into your total budget. This buffer is your safety net for tackling unexpected issues, material price hikes, or those small changes you decide to make along the way.
The good news is that the rise of pre-engineered buildings (PEBs) has made budgeting more predictable. These systems are a huge part of a booming industry, with the global pre-engineered buildings market valued at USD 16.5 billion in 2024 and projected to soar to USD 40.94 billion by 2033. This incredible growth is fueled by the demand for fast, cost-effective construction, but smart budgeting is still the key to success. You can also explore options for custom steel buildings to find a solution that's a perfect match for your project and budget.
Building a Rock-Solid Foundation
The foundation is the unsung hero of your metal building. While the gleaming steel frame gets all the attention, it’s the concrete base beneath that dictates stability, longevity, and ultimately, the success of your entire project. Getting this part right is non-negotiable. Even minor mistakes here can mushroom into major structural problems down the road.
Before a single bag of concrete is mixed, the first critical step is picking the right foundation for your specific needs. This isn't an arbitrary choice—it's a calculated decision based on your building's size, your local climate, and the unique characteristics of your soil.
Choosing Your Foundation Type
For most DIY projects and standard-sized workshops or garages, a monolithic slab foundation is usually the go-to. It’s a single, thick pour of concrete that serves as both the floor and the footing, making it cost-effective and relatively straightforward to build. This approach is perfect for level sites with stable soil conditions.
On the other hand, if you're planning a larger structure or dealing with uneven terrain or poor soil, a perimeter wall or pier foundation might be what you need. A perimeter wall involves pouring a continuous footing around the building's edge, with a separate floor slab poured inside. Piers are individual concrete columns set at key structural points, a common solution in areas with expansive clay soils or on sloped ground.
To help you decide, here’s what to consider:
- Building Size: Smaller buildings (under 3,000 sq ft) are often a perfect match for a monolithic slab.
- Soil Type: Sandy or loamy soils provide great support, but heavy clay might call for a more robust, engineered solution like piers.
- Climate: In regions with a deep frost line, your footings absolutely must be poured below that depth to prevent heaving. This often makes a perimeter wall design the better choice.
The Critical Process of Pouring and Curing
Once you’ve nailed down the design, the real work begins. This whole process is a sequence of precise steps where accuracy is everything. It all starts with careful excavation to the specified depth, making sure the ground is perfectly level and compacted.
Next, you'll build wooden forms to create the mold for your foundation. Inside these forms, a grid of steel rebar is laid out to give the concrete its tensile strength. This is also the time to place any plumbing or electrical conduits that need to run under the slab.
Job Site Reality Check: Pouring a foundation is not the place to cut corners. A slab that’s out of level by even half an inch can turn the steel erection into a nightmare, causing columns to lean and bolt holes to misalign. Always double-check your forms with a laser level before that concrete truck pulls up.
After the concrete is poured, it needs to be screeded (leveled) and finished. But the job isn't done. The curing process that follows is just as important as the pour itself. Concrete doesn't just "dry"—it undergoes a chemical reaction called hydration. To reach its full design strength, it has to cure slowly for up to 28 days, which means keeping it moist and protected from extreme temperatures.
Anchor Bolt Placement Perfection
The single most critical detail in your foundation work is placing the anchor bolts. These are large, J-shaped bolts set directly into the wet concrete, and they are the connection points for your building's main columns. Their placement has to match your engineered drawings down to the millimeter.
There is absolutely zero room for error here. If your anchor bolts are off, your steel columns simply won't fit. This mistake leads to expensive and time-consuming fixes, like drilling new holes or even cutting and re-welding the column base plates. It’s why so many builders create a wooden template from the blueprints to hold the bolts in their exact positions during the pour.
While some experienced builders might tackle this themselves, the precision required often makes it a job for specialists. If you need help ensuring a perfect base, exploring a professional concrete service for your building is a smart investment that pays for itself throughout the rest of the project.
Assembling the Primary Steel Frame
Once your foundation has cured and the anchor bolts are ready, the most exciting part of the build begins: raising the steel frame. This is where that stack of beams and columns transforms into the skeleton of your building. From my experience, a little organization here goes a long way, ensuring the whole process is safe, smooth, and efficient.
Before you even think about lifting the first column, take the time to unpack everything. Lay out all the components and do a thorough inventory against your manufacturer’s packing list. I always recommend grouping parts by assembly—all the columns with their matching rafters, girts with their designated bays, and so on. It might seem tedious, but it saves a ton of headaches later when you’re not scrambling to find a specific bolt or bracket with a heavy steel beam hanging in the air.
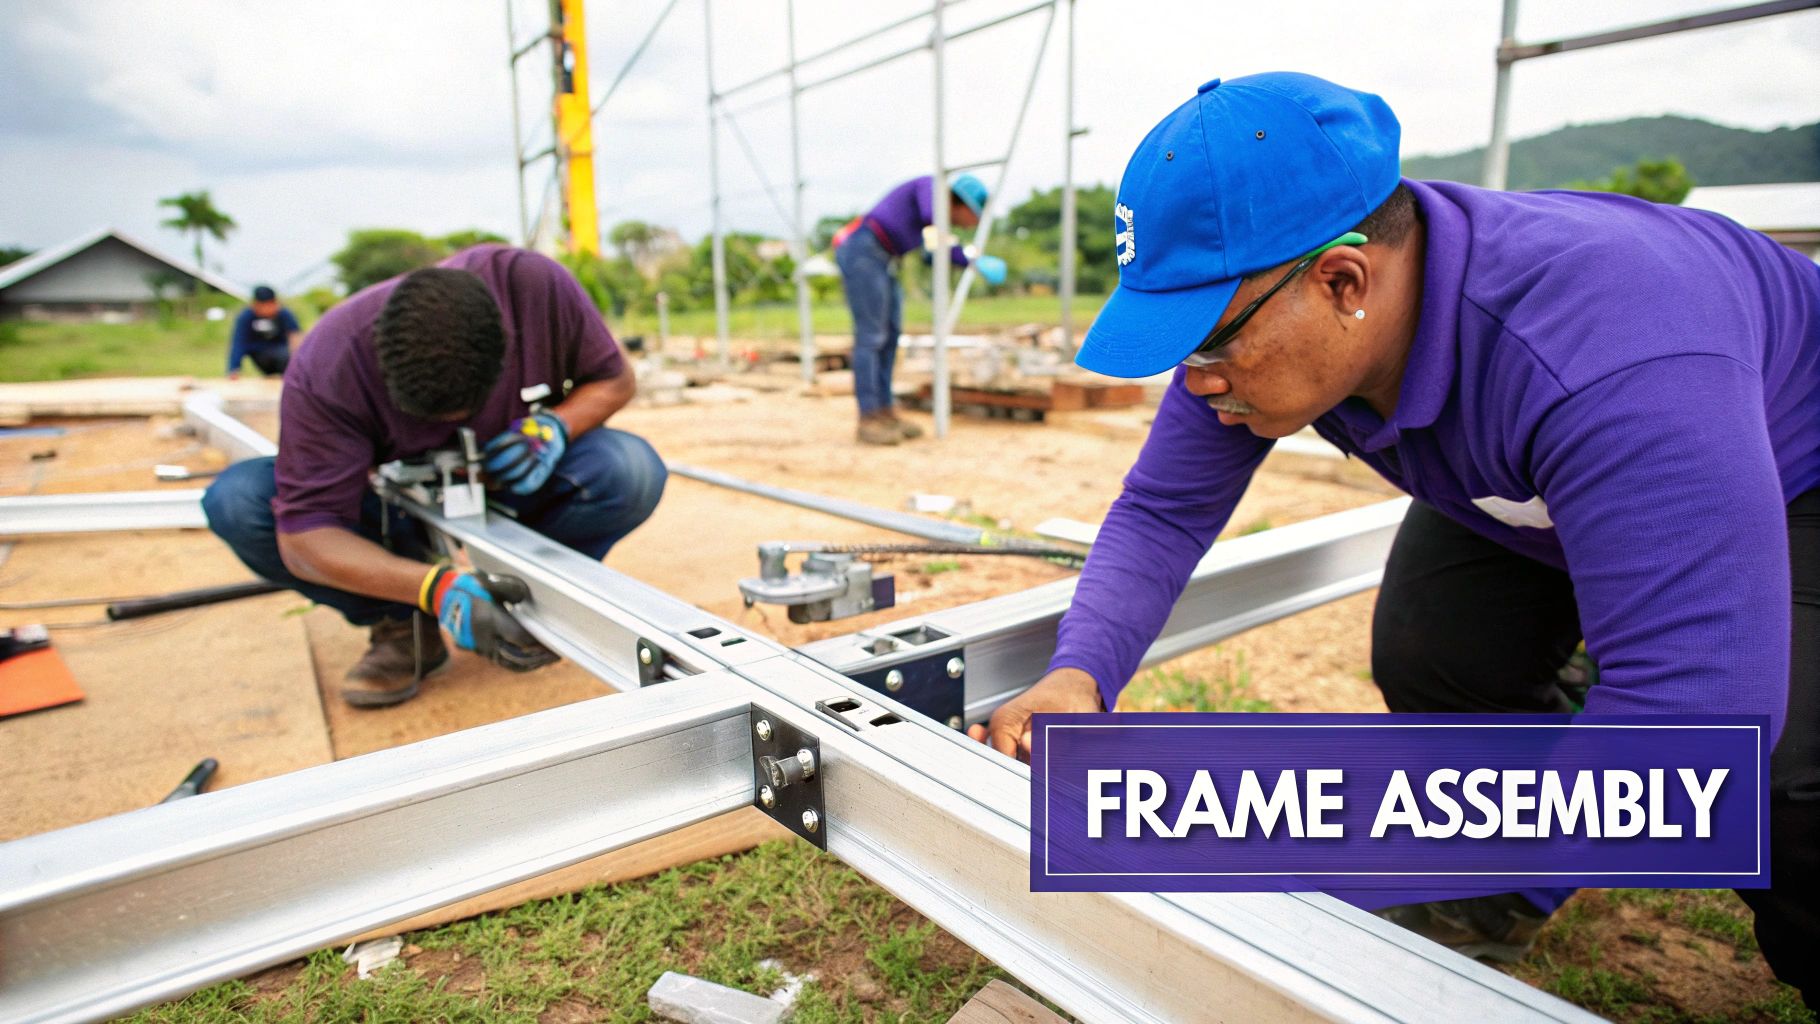
A Methodical Approach to Raising Steel
When it's time to get started, always begin with a single bay at one end of the building. A bay is simply two columns connected by a rafter. Trying to raise columns one by one without connecting them is not only slow but also dangerously unstable.
Here’s the sequence we follow on-site for that first critical bay:
- First, lift one column onto its anchor bolts. Just get the nuts on loosely for now; you don’t need it perfectly straight just yet.
- Next, do the same for the second column in that bay.
- Assemble the corresponding rafter on the ground. Trust me, it’s far easier and safer to bolt the sections together on solid earth than trying to do it up in the air.
- With the rafter ready, lift it into place and connect it to the two columns you’ve already raised.
- Immediately install temporary bracing. This is a non-negotiable safety step that keeps the frame stable while you work.
With that first frame up and braced, you’ll just repeat the process. The next bay goes up and gets connected to the first one with roof purlins and wall girts. It creates a domino effect where each completed section provides stability for the next one.
One of the most common rookie mistakes is torquing down all the bolts too soon. Keep the connections a little loose until an entire section is assembled and squared up. This gives you the wiggle room needed to make small adjustments and get everything perfectly plumb and aligned before you lock it all down.
The image below gives you a sense of how each step in the process builds upon the last, from the ground up—a principle that applies just as much to the frame as it does to the foundation.
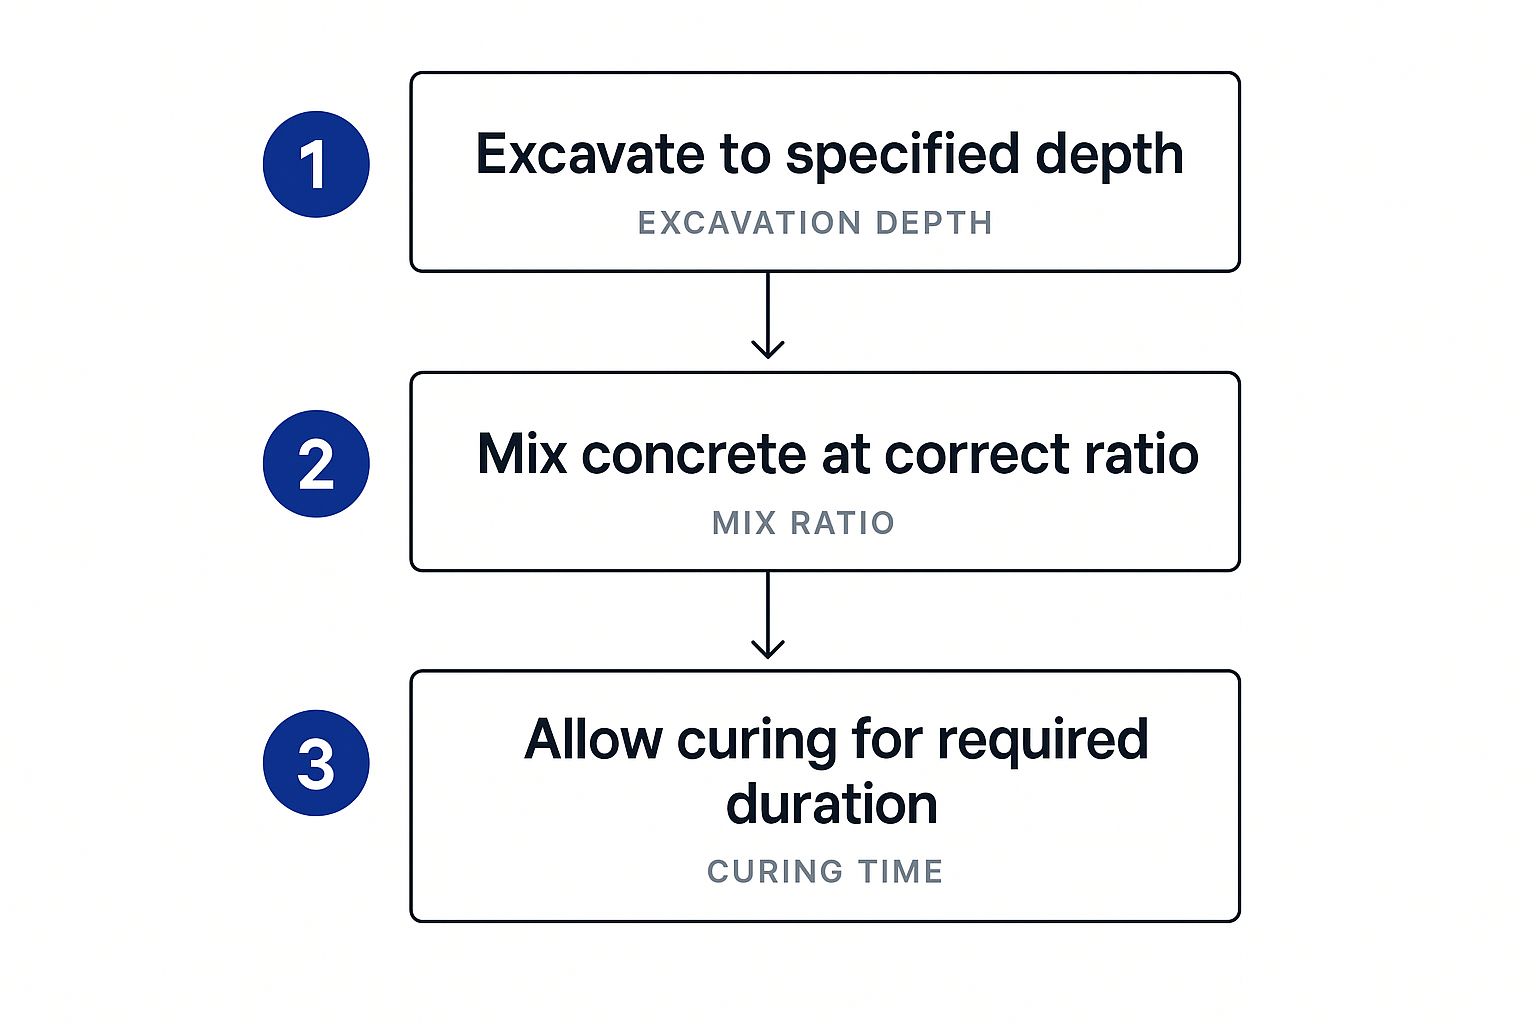
This systematic flow is the key to a successful build. The structured assembly of the steel frame sitting on top of that perfectly cured foundation is what gives the building its strength.
Safety and Equipment for Lifting
Unless you're putting up a tiny shed, you're going to need some machinery to lift these heavy steel parts. For most projects, a forklift with a boom attachment or a telehandler will do the job. On larger commercial builds, a crane is often necessary. Whatever you use, safety is the top priority. Make sure your equipment operators are certified, and establish a clear rule: nobody stands under a suspended load. Ever.
Temporary bracing is also essential. Use heavy-duty cables or ropes, secured to the frame and staked firmly into the ground, to keep the structure from swaying as you add more pieces. As soon as you can, install the permanent bracing shown in your engineering plans to give the building its final rigidity. To get a better feel for all the components involved, you can learn more about the different parts of a metal building frame.
Precision Checks: Plumb, Square, and Torque
As you erect each bay, you need to be constantly checking for two things: plumb and square.
- Plumb means the columns are perfectly vertical. You can check this with a long level or a traditional plumb bob.
- Square ensures your bay isn't leaning. The easiest way to check this is by measuring the diagonals of the bay—from the top of one column to the base of the opposite one. If the two measurements are identical, you're square.
You can make small adjustments using your temporary bracing or by shifting the columns on their anchor bolts before you do the final tightening. Once a section is perfectly aligned, it's time to break out the torque wrench and tighten the bolts to the manufacturer’s exact specifications. Don't guess on this—the right torque is what guarantees the structural integrity of every connection. This level of precision is why modern steel building systems are so reliable.
Installing Wall and Roof Panels
Once the primary steel frame is standing tall, you're ready for the part that really makes it look like a building. Installing the wall and roof panels is where the steel skeleton gets its skin, transforming it into a recognizable, weatherproof structure. This phase is less about brute strength and more about being precise, patient, and detail-oriented.
Before you even think about hanging the first sheet, a little prep goes a long way. Handle these panels with care—you don’t want to scratch the finish or ding up the edges. A scratch isn’t just a cosmetic issue; it's an invitation for rust to set in down the road. I always recommend starting with the walls, beginning at a corner and working your way around. This helps establish a square and true base for everything else.
Mastering the Art of Sheeting
The secret to a professional-looking, leak-proof building is all in the installation sequence and how you fasten the panels. Your manufacturer's manual is your bible here, but a tried-and-true method is to install the wall panels first, leaving the very top row off until the roof is on. This lets the roof panels overlap the wall, creating a much better seal against the elements.
When you’re ready to get started, set the first wall panel flush with a corner and make sure it’s perfectly plumb. A few clamps can hold it in place while you drive in the first screws.
Here’s what you need to nail during the installation:
- Proper Overlap: Every panel is designed to overlap the next one. Keep that overlap consistent and make sure it’s oriented to shed water away from the joint.
- Fastener Placement: Always drive the self-drilling screws through the flat part of the panel, never on the high point of the ribs. The little neoprene washer on the screw should compress just enough to form a seal without being so tight that it “mushrooms” out.
- Sealant Application: This is non-negotiable. Apply a bead of high-quality butyl tape or sealant along the seam of each panel overlap before you fasten them together. This simple step is your number one defense against leaks.
The incredible durability of these systems has fueled massive demand, contributing to a global metal building materials market valued at roughly USD 30.5 billion in 2024. This market is only expected to grow as more people choose strong, efficient construction.
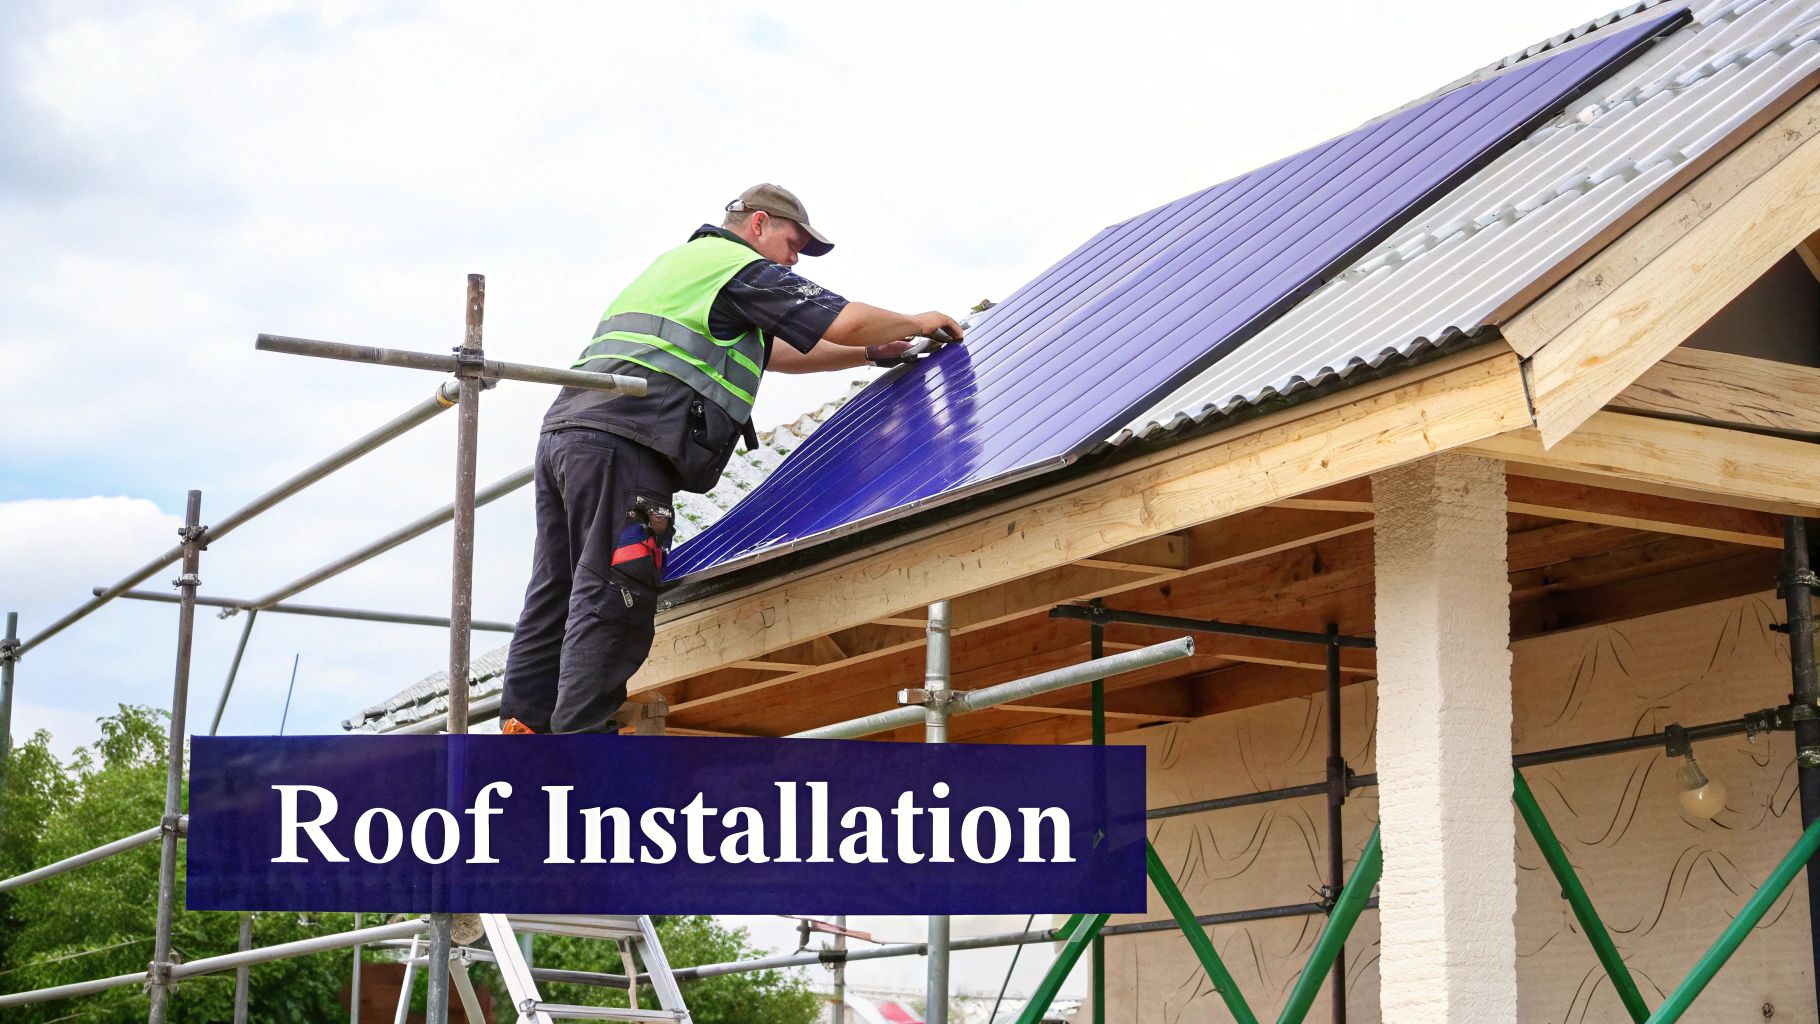
Ensuring a Watertight Roof
Putting on the roof panels follows a similar process, but the stakes are higher—there’s zero room for error. You’ll want to start at the eave (the bottom edge of the roof) and work your way up to the ridge, or peak. Whether you work left-to-right or right-to-left often depends on the prevailing winds in your area, so double-check your manual for their recommendation.
Gravity is working against you here, so every seam needs to be perfectly sealed. Pay close attention to the overlaps, using sealant tape and the right fasteners every single time.
A Lesson from the Field: One of the most common leak sources I've seen is improperly installed roof screws. Under-tighten them, and the washer won't seal. Over-tighten them, and you can damage the washer or even dimple the panel, creating a small basin for water to pool. The goal is a "snug" fit where the washer is just slightly compressed.
The Finishing Touch of Trim
Trim is what elevates your project from a metal box to a finished, sharp-looking structure. It’s not just for aesthetics, either. Trim covers the sharp panel edges and seals up the gaps at corners, eaves, and the roof peak.
These are the essential pieces you'll be working with:
- Corner Trim: Covers the vertical joint where two walls come together.
- Eave Trim: Finishes the edge where the top of the wall meets the roofline.
- Rake Trim: Covers the angled edges of the roof on the gable ends.
- Ridge Cap: This is the V-shaped piece that seals the very peak of the roof.
Installing trim calls for patience and a good pair of metal snips. Each piece has to be cut to fit just right and fastened securely with color-matched screws. It’s the final step in creating a fully sealed, weather-resistant shell. To learn more about how versatile these buildings can be, check out our ultimate guide to steel building kits, which explores everything from residential to commercial applications.
Finishing Your Build for Functionality
With the frame up and the panels locked in place, your structure finally looks like a proper building. But it's this last stage that really turns that metal shell into a space you can actually use. Finishing touches—like installing doors, windows, and insulation—are what bring it all together for function, energy efficiency, and comfort.
This is where your building truly gets its personality. Whether you're setting up a workshop, a garage for your prized vehicles, or a simple storage facility, how well you handle these final steps will make all the difference in its daily use and long-term value.
Installing Doors and Windows
Adding doors and windows to a steel building demands precision. You can't just cut a hole wherever you feel like it, which is something you might get away with in wood construction. Metal buildings are engineered systems that rely on pre-planned framed openings. Messing this up can compromise the wall's structural integrity, so it's critical to get this right during the initial design phase.
For standard walk-in doors and windows, you'll be working with a steel sub-frame that fits inside the opening created by the wall girts. This gives you a solid, square mounting point.
- Framing: Double-check that the framed opening matches the door or window manufacturer's specs to the letter.
- Sealing: Before you even think about putting the unit in, use high-quality flashing tape and a good bead of caulk around the entire opening. This is your first and best line of defense against weather.
- Securing: Fasten the unit into the sub-frame, making sure it's perfectly plumb and level. A slightly off-kilter window or door will be a constant annoyance.
Putting in a big roll-up garage door is a whole different beast. These things are heavy and require their own track system, springs, and hardware that must be mounted directly to the building's main steel frame for support. Always, always follow the manufacturer's instructions, as the steps can vary wildly between models. To get an idea of what's possible, you can explore a wide variety of custom metal building accessories, from different door styles to window options that fit your project perfectly.
Choosing and Installing Insulation
Insulation is easily one of the most important finishing steps, especially if people will be spending time in the building or if you're storing anything sensitive to temperature swings. Without it, a steel building is just a metal box—scorching hot in the summer and freezing in the winter. Good insulation also tackles condensation, which is the arch-nemesis of steel, preventing rust and moisture damage down the road.
There are a handful of go-to insulation options out there, and each one has its place.
Key Insight: Don't think of insulation as just a "comfort" feature. It's a serious investment in energy efficiency. A well-insulated building can slash your heating and cooling costs by up to 50%. That protects your wallet and makes the space usable all year long.
Getting familiar with the different types of insulation will help you nail the right choice for your climate and your budget.
Insulation Type Comparison for Metal Buildings
When you're deciding on insulation, you're balancing cost, performance (R-value), and how you plan to use the space. This table gives you a quick rundown of the most common choices to help you figure out what makes the most sense for your build.
| Insulation Type | Average R-Value per Inch | Cost Comparison | Best For |
|---|---|---|---|
| Fiberglass Batts | R-3.1 to R-3.7 | Low | Cost-effective DIY projects and standard workshops where maximum thermal performance isn't the top priority. |
| Rigid Foam Board | R-4.0 to R-6.5 | Moderate | Walls requiring a high R-value in a thin profile; provides a continuous thermal break and good moisture resistance. |
| Spray Foam | R-6.0 to R-7.0 | High | Achieving a complete air and moisture seal; ideal for complex shapes and preventing condensation in any climate. |
| Insulated Panels | R-7.0+ | Very High | Commercial applications where superior insulation, a finished interior look, and fast installation are required from the start. |
After you've picked your insulation, proper installation is everything. For fiberglass batts or rigid foam boards, you'll fit them between the wall girts and roof purlins. They're usually held in place by a vapor barrier or an interior finishing material like plywood or drywall. Spray foam is a different story; it’s professionally applied and expands to fill every single crack and crevice, creating an airtight barrier that’s incredibly effective.
These final details are what make the building truly yours, transforming it from a simple structure into a valuable, functional asset.
Common Questions About Metal Building Erection
Even with the best plans in hand, questions always come up once the steel hits the site. Getting ahead of these common queries can save you a ton of headaches and keep your project rolling smoothly from foundation to finish.
One of the first things everyone wants to know is the timeline. While every project has its own pace, a good benchmark for a small-to-medium building—say, around 30×40 feet—is about 3 to 6 days for a four-person crew to get the frame up and the panels on. This assumes your concrete foundation is already poured, cured, and ready for action.
What Kind of Equipment Will I Need?
You've got your basic hand tools like wrenches, drills, and levels, but putting up a steel building calls for some heavier hitters. Having the right equipment isn't just about avoiding delays; it's about keeping everyone on site safe.
Here's the gear you'll absolutely need to have lined up:
- Lifting Machinery: A forklift with a boom attachment, a telehandler, or a small crane is non-negotiable for lifting heavy steel columns and rafters safely into place.
- Power Screw Gun: You'll want an impact driver with an adjustable clutch. This is the key to fastening panels perfectly, getting screws tight enough for a solid seal without stripping them or denting the panels.
- Safety Gear: This one is mandatory. Hard hats, steel-toed boots, safety glasses, and sturdy gloves are a must for every single person on the job site.
Beyond that, having scaffolding or a scissor lift will make working up high much safer and more efficient than trying to balance on ladders all day.
A Critical Safety Reminder: Construction's biggest risk is falls from height. Always use proper fall protection gear. If you're renting equipment like a scissor lift, make sure it's operated by someone who is properly trained.
Can I Really Build It Myself?
The short answer is yes, but it comes with a big "it depends." For smaller buildings, usually anything under 3,000 square feet, a DIY build is definitely achievable for someone with a solid construction background. These pre-engineered kits are designed to go together like a giant erector set, with numbered parts and clear instructions.
However, this is the time for an honest self-assessment. Erecting a steel building means dealing with heavy components that demand precision. If you're not comfortable managing a construction site or operating heavy machinery, hiring a professional steel erector is a smart move. They'll get the job done right, safely, and almost always much faster than you could on your own.
Ready to start your project with a team you can trust? The experts at Icon Steel Buildings are here to guide you through every step, from design to delivery. Find the perfect high-quality, American-made building for your needs at https://iconsteelbuildings.com.
Article created using Outrank