
Before you even think about suppliers or cool features, the most important work happens right at your desk with a pen and paper. Getting this first part right will save you a world of headaches and unexpected costs down the road.
Defining Your Needs and Setting a Realistic Budget
It all starts with a simple question: What is this building's main job?
A structure meant for storing an RV has a completely different set of needs than a commercial workshop or a barn for housing livestock. The answer to that one question will shape every decision you make, from the building's size and door placement to whether you need insulation.
Thinking through these details from the start is the best way to prevent expensive changes halfway through the project.
Pinpoint Your Core Requirements
Now, let's turn that "main job" into a practical checklist. This isn't just a thought exercise—it gives your potential suppliers the exact information they need to give you a quote that's actually accurate.
- Dimensions and Layout: How much wide-open, column-free space do you need? Don't just think about the footprint, like a 40' x 60' space. Remember to consider ceiling height, especially if you plan on installing equipment like a vehicle lift.
- Access Points: Figure out the number, size, and type of doors you'll need. A commercial garage absolutely requires large roll-up doors, but a small personal workshop might be perfectly fine with just a single walk-in door.
- Climate Control: Will the building need to be heated or cooled? This is a huge factor, as it determines the R-value of the insulation you'll need. Skimping here can lead to sky-high energy bills later on.
Budgeting Beyond the Sticker Price
Here’s where many people get into trouble. They see the price for the building kit and base their entire budget on that number. In reality, a successful project budget accounts for all the other expenses, which can easily add 30-50% or more to your total cost.
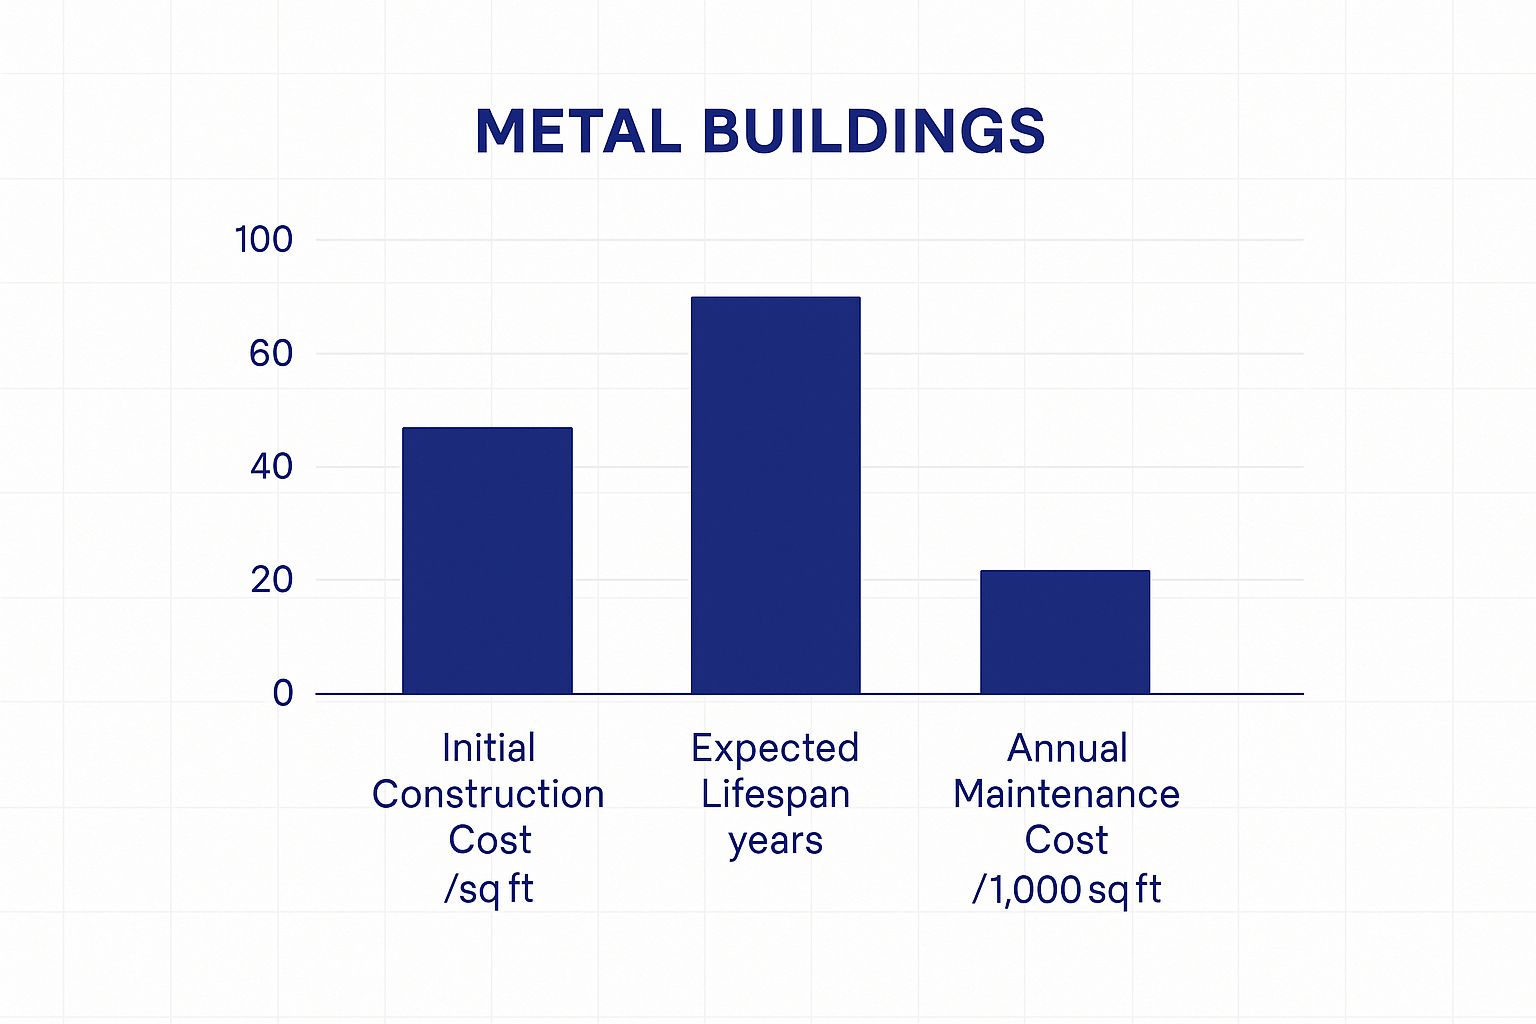
This image really drives home the long-term value of a metal building. While the upfront cost is one piece of the puzzle, the incredibly long lifespan and minimal maintenance make it a smart financial move over the long haul.
To build a budget you can actually stick to, you have to include these other costs.
Crucial Insight: Your total project cost will almost always be higher than the price of the building kit. A complete budget includes site prep, foundation, labor, permits, and finishing touches to avoid unexpected financial strain.
So, what should you expect? Here's a quick look at some typical cost ranges to help you get started.
Estimated Cost Per Square Foot by Building Type
This table gives you a breakdown of what you might expect to pay for different types of metal buildings. Remember, these are estimates—your final cost will depend on your specific design, location, and finishes.
| Building Type | Kit Only (per sq. ft.) | Fully Installed (per sq. ft.) |
|---|---|---|
| Basic Garage/Carport Kit | $15 – $25 | $24 – $38 |
| Workshop/Storage Building | $18 – $28 | $30 – $43 |
| Agricultural Barn | $20 – $30 | $35 – $48 |
| Small Commercial/Retail | $22 – $35 | $40 – $55+ |
As you can see, the price for a fully installed building is significantly higher than just the kit alone. Prefabricated steel building kits often run from $15 to $25 per square foot for just the materials. But a fully turnkey structure, which includes labor and site work, typically falls between $24 and $43 per square foot. For more specialized industrial buildings, the costs can climb even higher.
For a deeper dive into financial planning, our guide on commercial metal building costs provides a ton of valuable information.
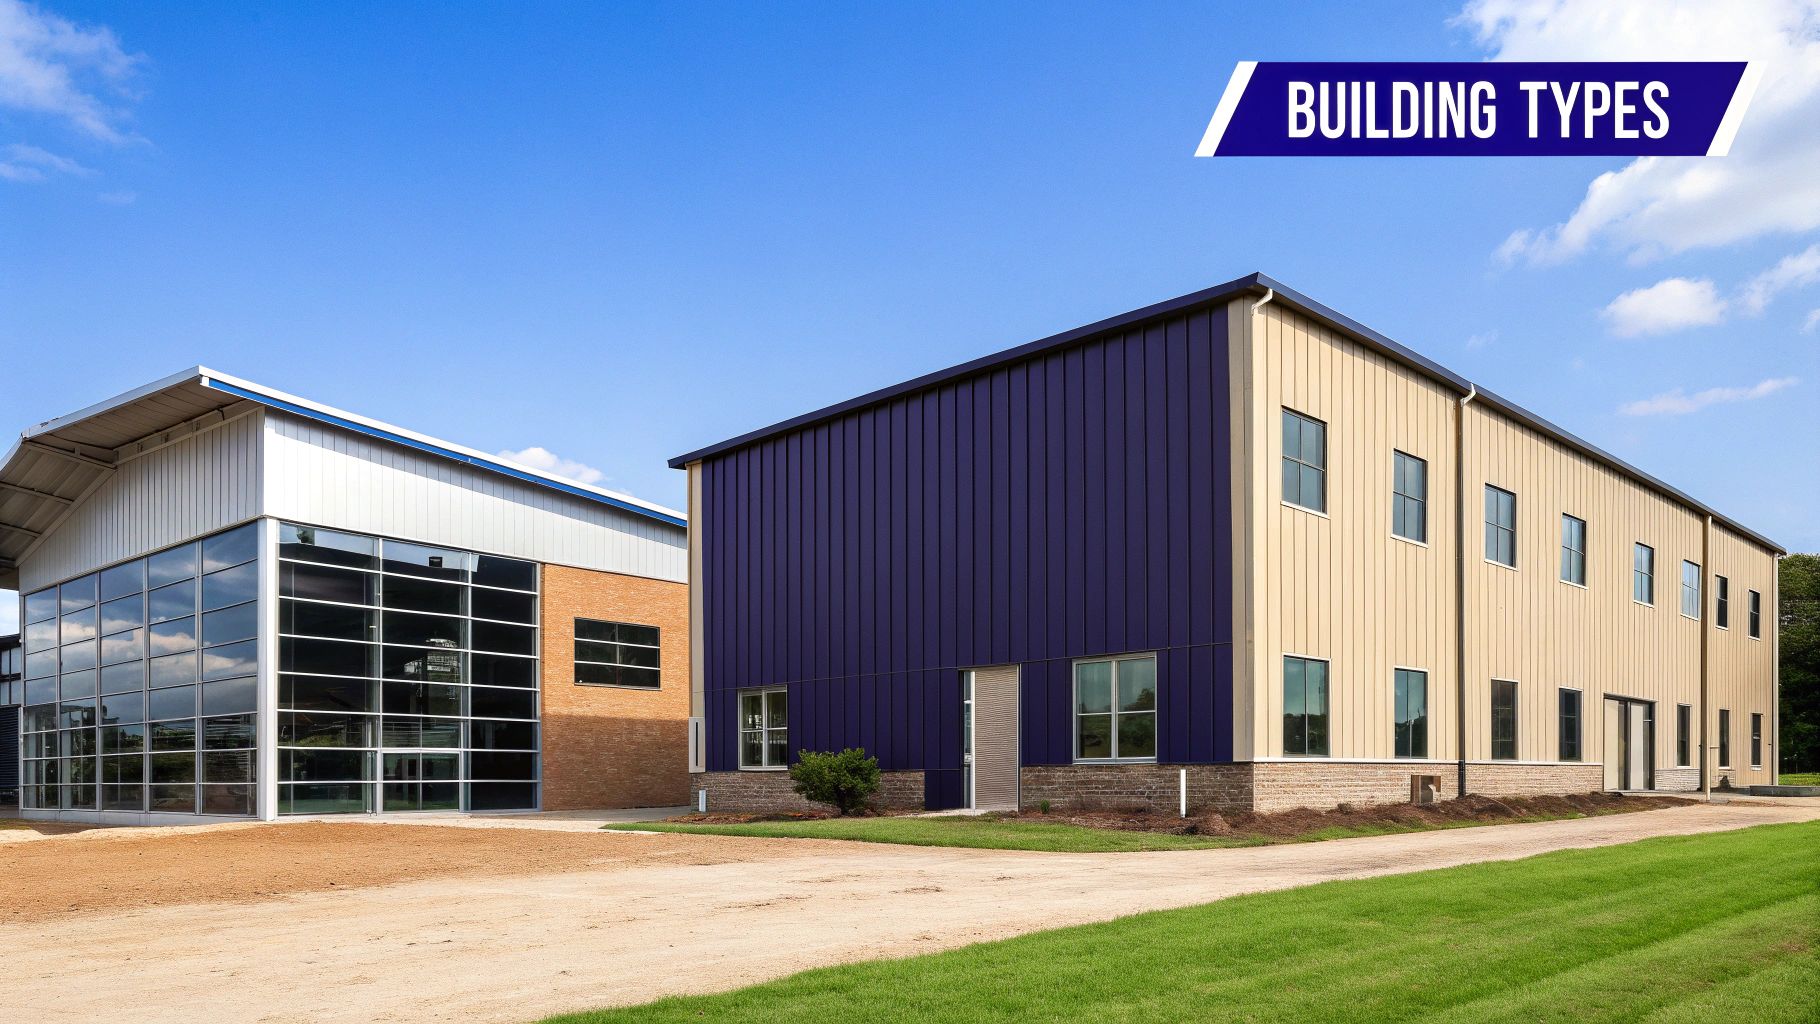
Making the Critical Design and Customization Choices
Once you've nailed down the purpose and general dimensions for your building, the real fun begins: tailoring its features to your exact needs. This is where a metal building project gets exciting. You get to choose the components that directly impact how your structure functions, holds up over time, and affects your long-term costs. Every decision, from the roof style to where you place the windows, is a critical piece of the puzzle.
The true strength of a pre-engineered structure is its adaptability. You aren't just picking a size from a catalog; you're designing a purpose-built tool.
Choosing the Right Roof Style
The roof does a lot more than just keep the rain out. Its design is fundamental to how well your building handles the local weather, making this one of the most important decisions you'll face.
- Regular Roof: This is your most economical option, easily identified by its rounded eaves. It’s a solid choice for areas with mild weather and not much rain or snow.
- A-Frame (Boxed-Eave): If you're looking for a more traditional, residential look, the A-Frame is it. It features squared-off, overhanging eaves and performs better than a regular roof in moderate weather.
- Vertical Roof: This is the premium choice for a reason. The vertical roof has panels that run from the ridge to the eaves, allowing rain, snow, and debris to slide right off. This design is essential for places with heavy snowfall or frequent rain, as it dramatically reduces stress on the structure and cuts down on maintenance.
Honestly, for most applications, investing in a vertical roof is a smart move, especially if your climate sees anything more than light, occasional rain.
Doors, Windows, and Insulation
Beyond the roof, your choices for access and climate control will define how you use the building every single day. Think about your workflow. A mechanic needs high-clearance roll-up doors to get vehicles in and out, while a woodworker might want a wall of windows to flood the space with natural light.
Let's look at a couple of real-world examples:
- A classic car enthusiast might spec a large 10'x10' roll-up door for easy vehicle access but also add a separate walk-in door for grabbing tools without opening the main bay.
- Someone building a home gym or workshop will get huge benefits from multiple windows on the south-facing wall to maximize daylight and slash their electricity bill.
Pro Tip: Don't sleep on the long-term value of a good insulation package. It adds to the upfront cost, sure, but proper insulation can drastically cut your heating and cooling expenses over the building's life. It often pays for itself in just a few years.
Getting these features right from the start is key, because making changes later is always more expensive and complicated. Taking the time now to explore all your options ensures the building is perfect for its job from day one. A great way to get ideas is to see what others have done by exploring the world of custom steel buildings. This planning phase is what turns a good building into a great one.
How to Choose a Reputable Metal Building Supplier
Let’s be honest—the quality of your metal building project comes down to one thing: the supplier you choose. It’s incredibly tempting to jump on the cheapest quote you find, but I’ve seen that movie before. It almost always ends with low-grade materials, questionable engineering, and a building that just won’t hold up over time.
You're not just buying steel; you're looking for a partner. A top-tier supplier will be upfront about their materials, engineering specs, and warranty details right from the first call. They should have zero hesitation in proving their buildings are engineered to handle the specific snow and wind loads in your area.
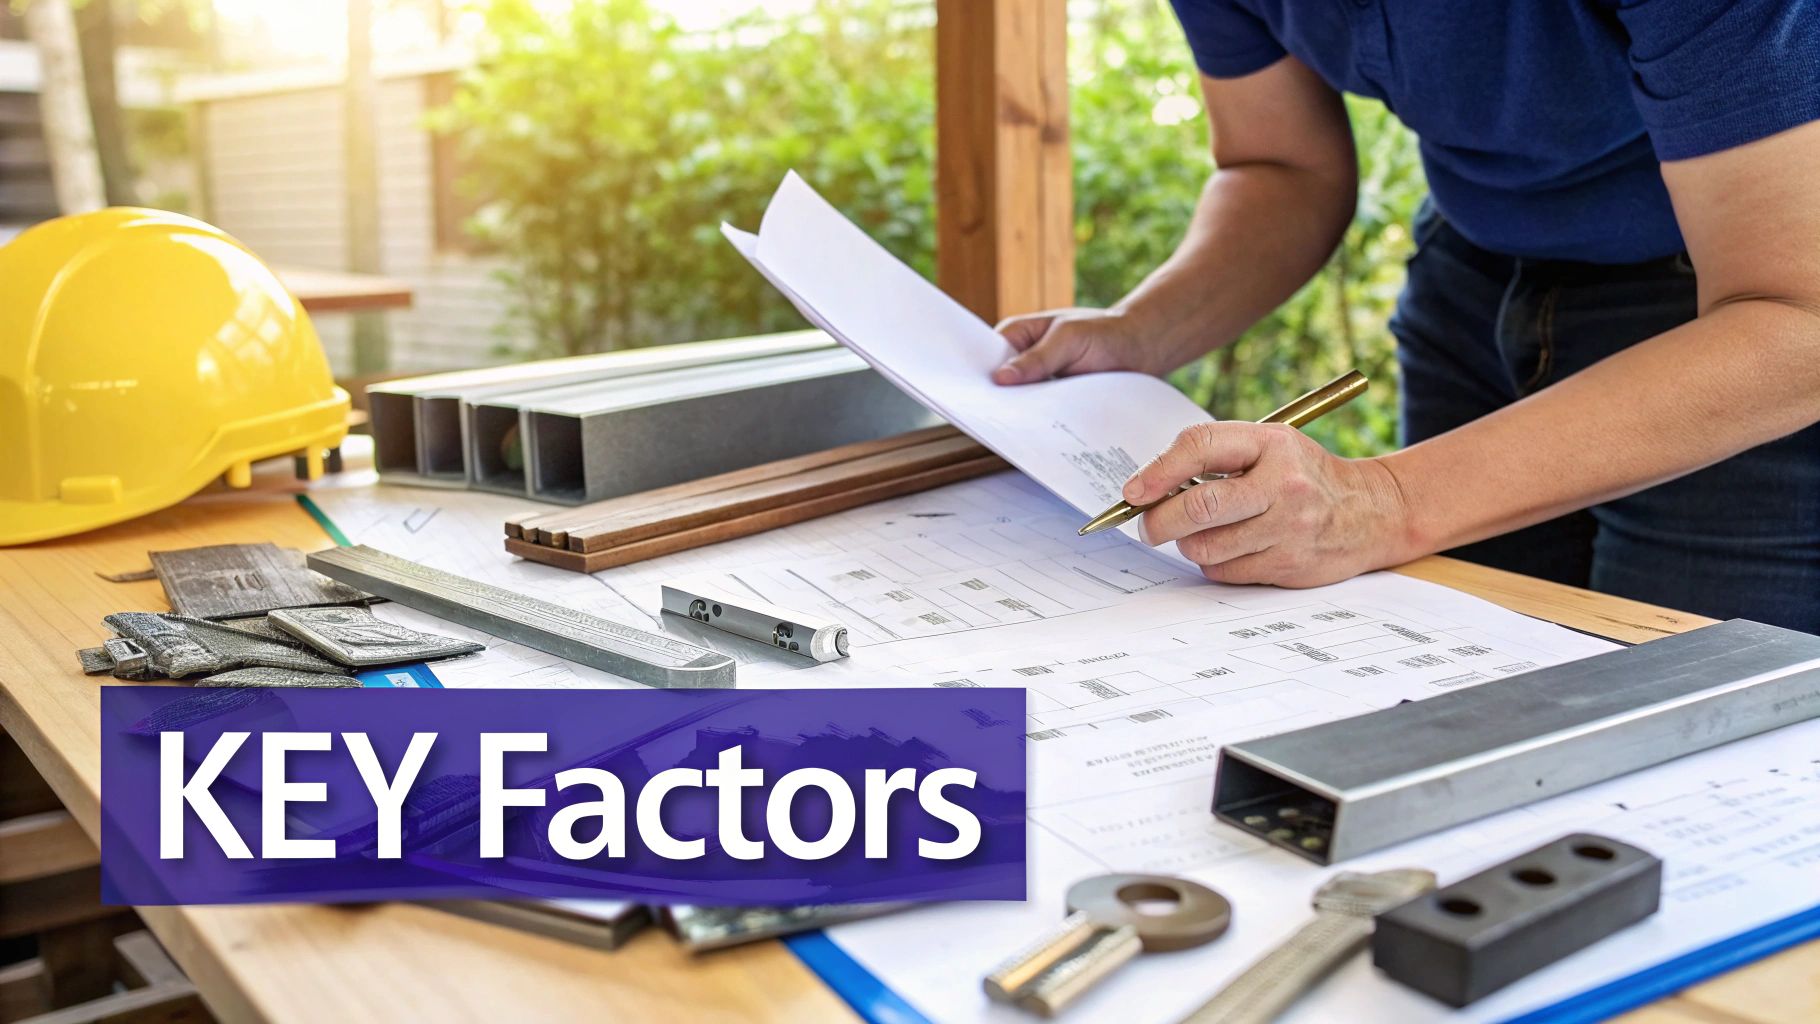
Key Factors for Vetting Suppliers
When you start comparing companies, you have to look past the price tag. The real value is in the details that determine whether your building will be standing strong decades from now.
First, ask about the steel itself. A suspiciously low price often points to a higher steel gauge (which means thinner, weaker metal), and that's a serious compromise on strength. You want to find suppliers who are proud of where they source their materials. For instance, many of the best builders exclusively use American-made steel because it meets strict quality control standards. You can read more about why this matters in our guide on why we only use US-made national steel.
Next up, dig into the warranty. A solid warranty—like a 40-year guarantee on the framing and panels—is a massive vote of confidence. It tells you the company isn't afraid to stand behind its product. If you see vague terms or a warranty that sidesteps structural integrity, walk away.
Crucial Takeaway: A supplier's readiness to share detailed engineering plans, transparent material specs, and a rock-solid warranty is the clearest sign of their quality and reliability. Don't settle for anything less.
It’s also a smart move to ask about their supply chain disruption management strategies. This will give you an idea of how likely your project is to stay on schedule, even if issues pop up.
Reading Reviews and Asking the Right Questions
Customer reviews can be a goldmine of information, but you have to read between the lines. Look for recurring themes. Are multiple people complaining about delivery delays, missing parts, or customer service that ghosts them after the sale? These are giant red flags you can't ignore.
When you get a salesperson on the phone, be ready with a list of pointed questions. This is your chance to see if you're talking to a real expert or just a reseller.
- "Can you provide engineer-stamped blueprints certified for my county's specific wind and snow load codes?"
- "What gauge steel do you use for the primary framing, secondary framing, and the wall panels?"
- "What kind of fasteners and sealants are included to make sure the building is completely watertight?"
How they answer will tell you everything you need to know. A knowledgeable manufacturer will have these answers ready, while a middleman will likely stumble. By doing your homework, you can confidently pick a supplier who will deliver a safe, durable building that’s built to last.
Managing Permits and Preparing Your Build Site
A smooth metal building installation starts long before the delivery truck rolls up. Honestly, tackling the permits and site prep early is one of the most critical parts of the whole process, and it's where I see people get tripped up the most.
It can feel a little intimidating, but it doesn't have to be. Your first move, without question, is to get in touch with your local building department. This is non-negotiable. They'll give you a clear rundown of everything you need, which will almost certainly include certified engineering plans from us to prove the structure meets local codes for wind and snow loads.
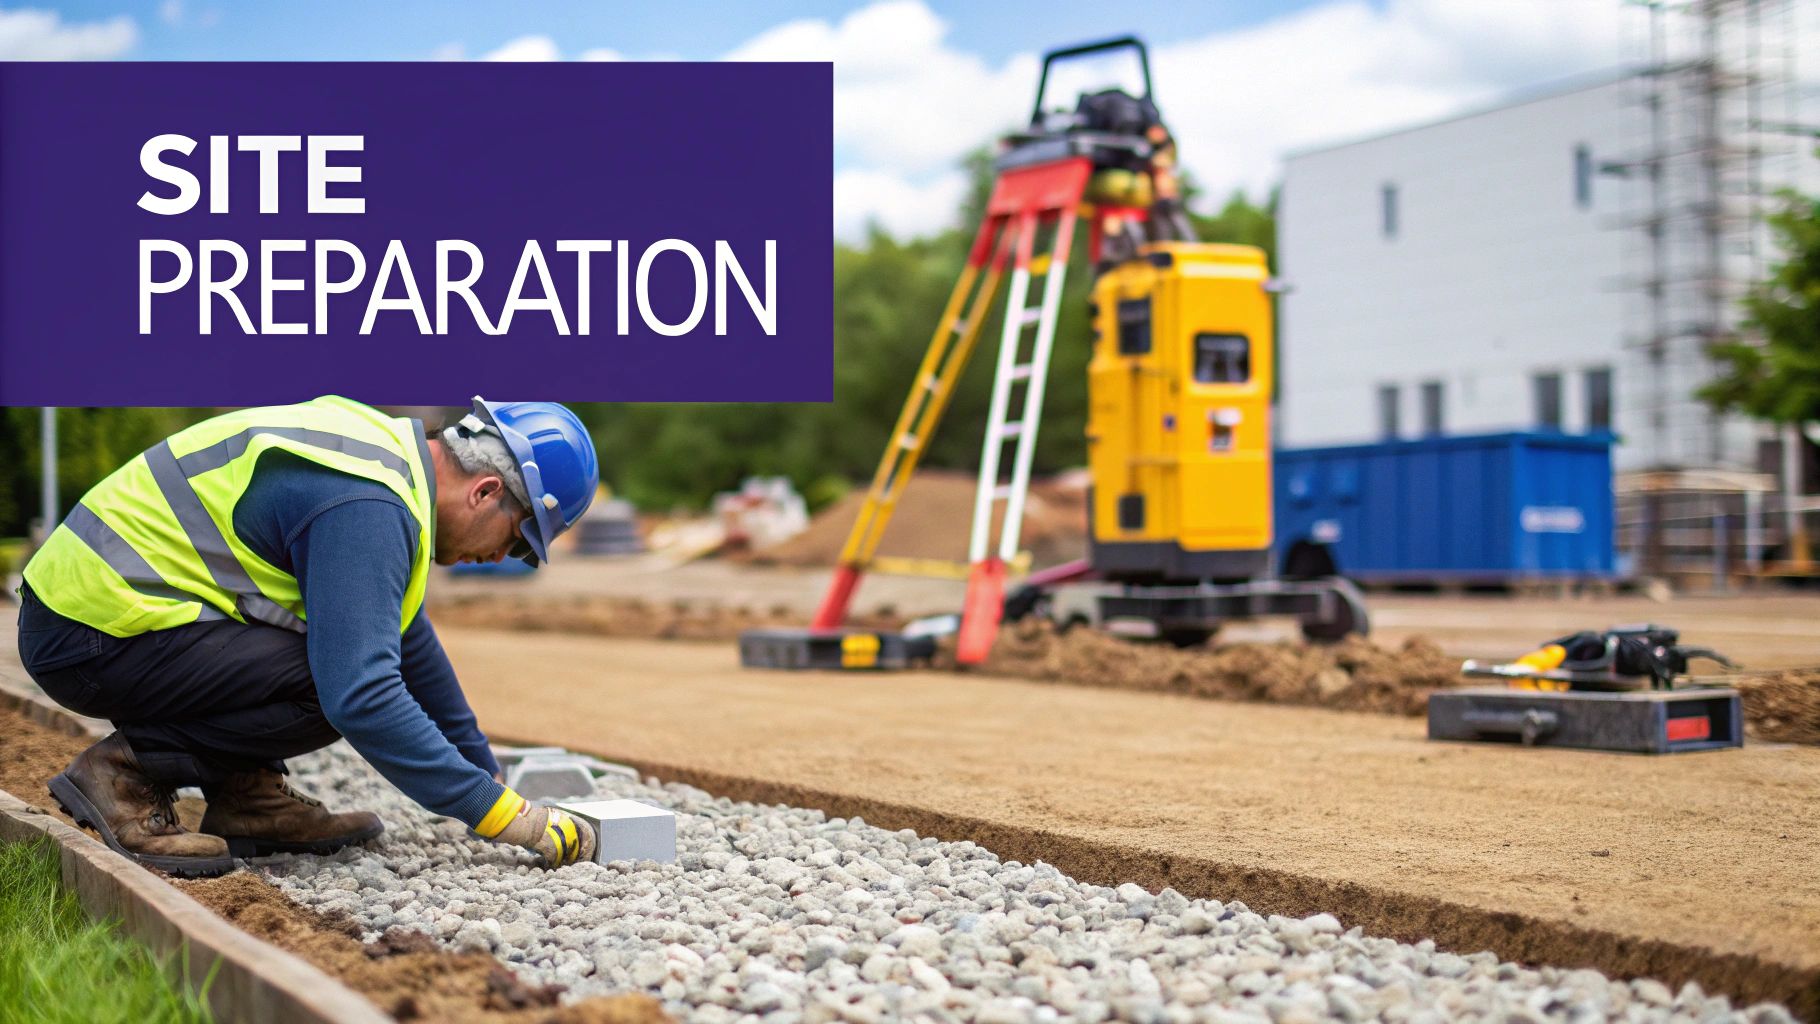
Getting Your Groundwork Right
With the paperwork in motion, your focus can shift to the physical build site. A perfectly level and stable base is the single most important factor for a successful installation. I've seen it firsthand—an uneven or poorly compacted site can cause serious headaches down the road, from doors that won’t close right to leaks and even warping in the frame.
Proper site prep breaks down into a few key jobs:
- Clearing and Grading: The entire area needs to be cleared of all trees, rocks, and any other debris. Then, the ground has to be graded to create a level pad that extends a few feet beyond the building's footprint on all sides.
- Compaction: Just pushing dirt around isn't enough. The soil must be professionally compacted to stop it from settling after your foundation is poured.
- Utilities: Now's the perfect time to run any underground plumbing or electrical lines that will service your new building.
During this phase, you'll likely generate some waste. It’s important to look into local rules for understanding skip permit requirements to stay compliant and avoid any fines.
Choosing the Right Foundation
The foundation is what anchors your building to the ground, giving it the stability to last for decades. The right one depends on your building’s size, your specific soil type, and of course, your budget.
Expert Insight: Think of the foundation as an integral part of your building's structural system, not just a platform. Cutting corners here is a recipe for long-term problems. Always follow the engineering plans we provide.
The most common choice for metal buildings is a monolithic concrete slab. It gives you a durable, level floor and solid anchoring points all in one shot. For a deeper look at the options, it's a good idea to review the common steel building foundation requirements before making a final call.
The demand for these incredibly durable structures is undeniable. The global metal building materials market was valued at $177.55 billion in 2021 and is on track to hit $225.23 billion by 2025. It's a testament to how many people are choosing steel for its longevity and value.
Deciding Between DIY and Professional Installation
Once your building kit arrives, you’ve hit a major fork in the road. This is where you need to have a really honest conversation with yourself: are you going to install it yourself, or is it time to hire a professional crew?
The DIY route can be incredibly rewarding, not to mention a great way to save a good chunk of change on labor. But make no mistake, it’s a serious undertaking that demands more than just a free weekend and a basic toolbox.
The Realities of a DIY Installation
Before you fully commit to a do-it-yourself build, it’s absolutely critical to take stock of your resources. Self-assembly is an achievable goal for many people, but it requires meticulous planning and, most importantly, the right heavy-duty equipment.
Here are a few non-negotiables you'll need for a safe and successful DIY project:
- Essential Equipment: You’ll need more than hand tools. Think bigger. Access to a forklift or a boom lift is often essential for safely raising heavy steel frames and panels into place.
- The Right Skills: You must be comfortable reading complex blueprints, working at heights, and making sure every single component is perfectly square and level. There's very little room for error here.
- Time and a Team: Even a smaller garage-sized building can take several days to erect with a team of capable helpers. It's easy to underestimate the time commitment, so plan accordingly.
If you’re ready to tackle the challenge head-on, our guide on how to erect a metal building breaks down the process in detail.
Finding and Vetting Professional Installers
If a DIY build sounds like more than you bargained for, hiring a professional crew is a smart investment in your peace of mind. A seasoned team can often get the job done in a fraction of the time and deliver guaranteed, high-quality results.
When you're looking for installers, focus on local contractors who have specific experience with pre-engineered metal buildings. Always ask for references and look at photos of their completed projects. A quality contractor will give you a clear, detailed contract that spells out the scope of work, payment schedule, and project timeline.
Key Takeaway: The decision to hire professionals really boils down to balancing cost against time and risk. A pro crew eliminates the risk of expensive installation mistakes and saves you from a physically grueling job.
The preference for these structures in commercial development really speaks to their efficiency. The pre-engineered buildings market was valued at $18.79 billion in 2024 and is projected to keep growing, largely thanks to faster construction times. This professional appeal is why so many homeowners also opt for expert installation to ensure a flawless finish.
Common Questions About Buying a Metal Building
Even the most thorough planner has questions when it comes to a major purchase like a steel building. That’s perfectly normal. Getting straight answers is the best way to feel confident about your investment and make sure there are no surprises down the road.
We've put together a few of the most common questions that come up during the buying process. Think of it as your quick-reference guide for navigating those final decisions.
How Long Does It Take to Get a Metal Building
This is always one of the first questions people ask, and the honest answer is: it depends. The total time from the day you place your order to the day your building is standing depends on how much customization you need, the manufacturer’s backlog, and even your location.
As a general rule, a realistic timeline from start to finish is usually between two and four months.
Here’s how that timeline typically breaks down:
- Design and Ordering: This phase is mostly in your hands. It can take just a few days if your design is simple, or a couple of weeks if you’re fine-tuning details and getting updated quotes.
- Manufacturing: Once your order is finalized, the factory starts fabricating your components. This production stage usually takes anywhere from four to eight weeks.
- Delivery: After your building is made, it needs to get to you. Shipping can add another one to two weeks to the clock.
- Installation: For a pro crew, a standard garage might be up in a few days. But a larger, more complex structure could easily take several weeks to assemble correctly.
Crucial Tip: Before you sign anything, always ask your supplier for their current lead times. Seasonal demand and supply chain hiccups can throw estimates off, so getting an up-to-the-minute timeline is key for planning your project.
What Are the Most Common Mistakes to Avoid When Buying
It’s painful to watch people make preventable mistakes that lead to serious buyer's remorse. Knowing the common pitfalls ahead of time is the easiest way to sidestep them completely.
The single biggest mistake is choosing a supplier based only on the lowest price. It's a classic trap. An unusually cheap quote is often a red flag that the company is using thinner-gauge steel or isn't engineering the building to meet your local wind and snow load codes. You end up with a flimsy building that’s less safe and won’t last.
Another frequent error is underestimating the total project cost. Many first-time buyers get a quote for the building kit itself and completely forget to budget for all the other essentials.
A Complete Budget Must Include:
- The concrete foundation (this is a major expense)
- Fees for pulling permits
- The cost of a professional installation crew
- Interior finishing like electrical, plumbing, and drywall
Finally, failing to properly prepare and level the build site is a recipe for disaster. An unstable or uneven base creates massive installation headaches, keeps doors from aligning properly, and can compromise the building's structural integrity over the long term.
Do I Need a Concrete Foundation for My Building
For nearly every situation, the answer is a firm yes. While a very small carport might get by on a level gravel pad with auger anchors (and only if your local codes even allow it), that's the rare exception, not the rule.
Any structure you plan to use as a garage, workshop, commercial space, or barn absolutely needs a proper concrete foundation.
There are a few critical reasons for this:
- Stability: A concrete slab provides the solid, stable, and perfectly level base needed to anchor the frame. This is non-negotiable for ensuring the building can handle the wind, snow, and seismic forces it was designed for.
- Durability: The foundation acts as a barrier, preventing moisture from seeping up from the ground. This protects your steel frame’s base from corrosion and keeps your belongings from getting damp.
- Code Compliance: In almost every jurisdiction, a proper foundation is mandatory to pass a building inspection. Your local building authority will require an engineered foundation plan to certify that the structure is safe and permanently secured.
Before you make any final moves, your very first step should be to talk to your local building department. They’ll tell you the specific foundation requirements for your area, ensuring your project is built on solid, compliant ground right from the start.
Ready to design a building that meets your exact needs? The team at Icon Steel Buildings is here to help you navigate every step of the process, from initial design to final installation. Get a free, no-obligation quote today and start building with confidence. Explore your options at https://iconsteelbuildings.com.