
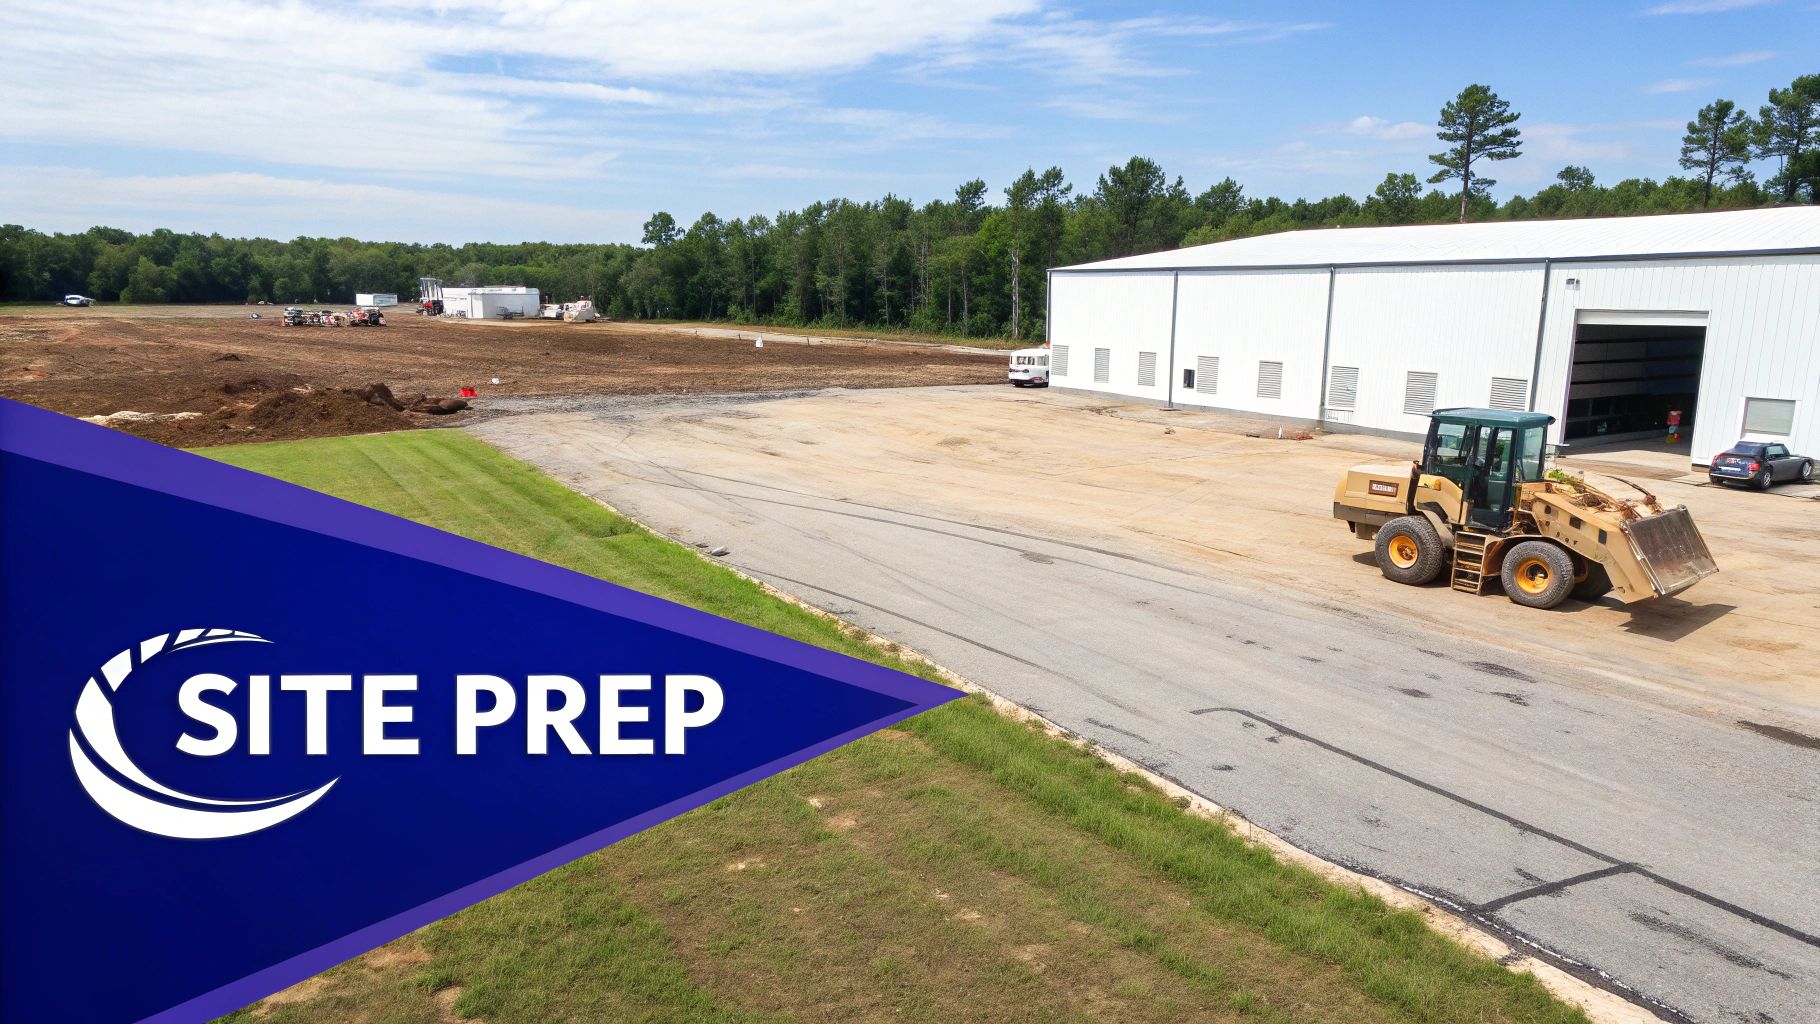
Your 60′ x 40′ shop might be made of steel, but it starts with dirt and concrete. Getting the site prep and foundation right is the unsung hero of a great build. It’s the work you do now that prevents the kind of expensive headaches down the road that make you wish you’d planned better. This is where you set the stage for a smooth, efficient construction process.
Planning Your Foundation and Site Prep
Before you even think about ordering steel, take a hard look at your land. The success of your 2,400-square-foot shop depends entirely on the ground it sits on. I’ve seen too many people rush this part, and it’s always an expensive mistake that leads to drainage problems, structural issues, or frustrating project delays.
A solid site evaluation is your first real step. Walk the property. Where are the low spots that will turn into ponds after a hard rain? What’s the overall slope like? And, critically, how are you going to get heavy equipment in and out? A concrete truck and an excavator need a lot more room to maneuver than your pickup.
Assessing Your Land and Access
Start by asking the right questions about your build site. A little foresight here will save you a world of hurt.
- Drainage: Figure out where water naturally wants to go. Your building pad needs to be elevated so water flows away from your foundation, not into your shop.
- Soil Quality: What are you working with? Sandy soil, heavy clay, or a field of rocks? Bad soil might mean you need to bring in engineered fill to create a stable base, which is an added cost you need to budget for. A simple soil test can tell you exactly what you’re dealing with.
- Accessibility: Is there a clear, wide path for delivery trucks and concrete mixers? Things like low-hanging power lines, fences, or even a few stubborn trees can shut down a job site fast.
Thinking through these logistics is what separates a smooth project from one where a delivery truck gets buried in mud or you discover your build site is a seasonal swamp.
Choosing the Right Foundation Type
For a 60′ x 40′ metal shop, the foundation isn’t just a platform—it’s a core part of the building’s structure. Your choice will come down to your local climate, soil conditions, and what you plan on doing inside the shop.
A monolithic slab is a really popular, cost-effective option for good reason. It’s a single pour that combines the footing and the floor slab, which simplifies the whole process and cuts down on labor costs. It’s a great fit for areas with stable soil and climates that don’t have extreme frost heave.
The other common choice is a stem wall foundation. Here, you pour concrete footers below the frost line first, then build short “stem walls” up to the slab height before pouring the slab inside. This is a much better approach in colder climates or on sloped lots because it gives you superior stability against ground movement.
If you remember one thing, make it this: Your foundation choice must align with your local building codes and the engineering specs that come with your steel building. A mismatch here is a recipe for failed inspections and a compromised structure.
The Site Preparation Checklist
Once you’ve got a plan for the land and foundation, it’s time to move some dirt. Proper site prep is all about making sure that concrete gets poured on solid, level ground. The process usually follows a predictable sequence.
- Clearing and Grubbing: First, you have to get rid of all the trees, stumps, big rocks, and any other organic stuff in the build area. If you leave roots or vegetation behind, they’ll eventually rot and cause the ground to settle under your slab.
- Rough Grading: Next, an excavator or dozer comes in to shape the land. This step establishes the initial level and creates the proper slope to ensure water drains away from your building pad.
- Building Pad Construction: Now you bring in a layer of compacted fill—usually gravel or crushed rock—to create a stable, level pad that’s a bit larger than your 60′ x 40′ footprint. This pad must be compacted to at least 95% to keep it from settling later.
- Utility Trenching: Before any concrete shows up, you need to dig trenches for your water lines, sewer, and any electrical conduits that will run under the slab.
Knowing these steps helps you have smarter conversations with your contractors. For a deeper dive into the technical specs, you can explore the essential steel building foundation requirements that guarantee a shop built to last. Believe me, careful groundwork is the best investment you can make.
Designing a Functional 2,400 sq ft Shop Layout
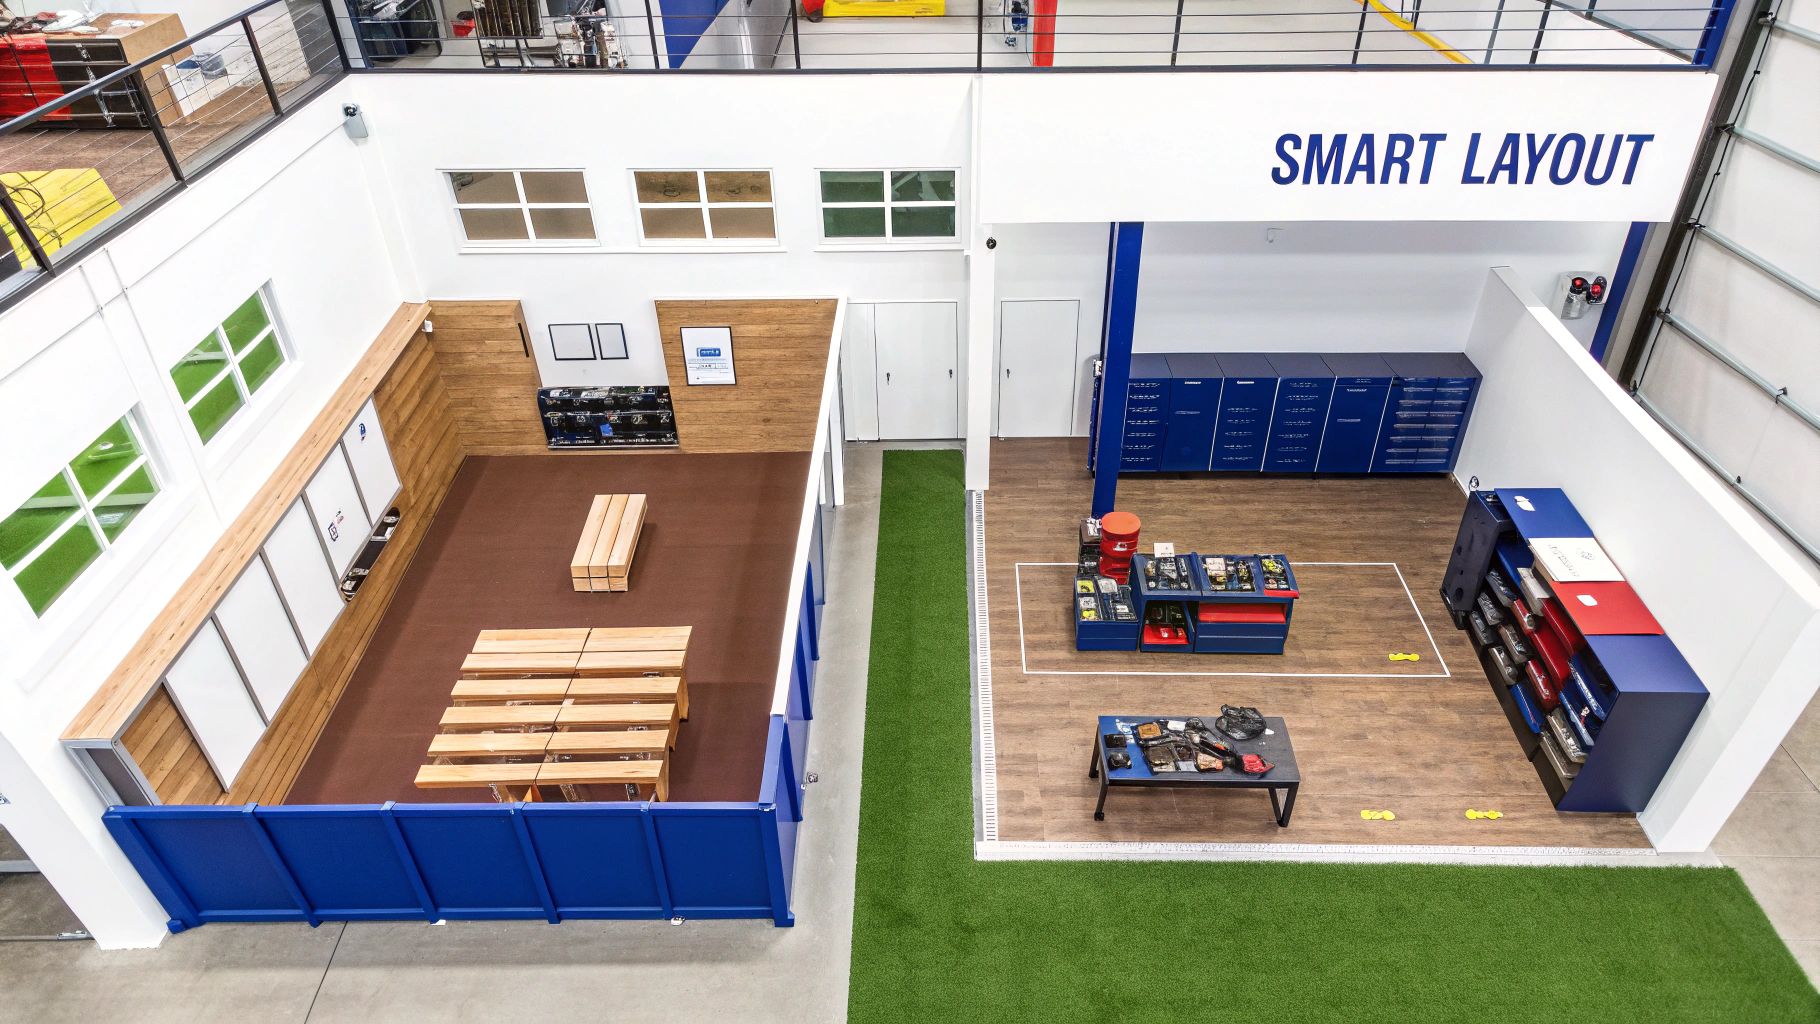
A 60×40 shop gives you a generous 2,400 square feet of raw potential. But a truly great workspace is born from smart planning, not just open space. The goal is to turn this blank canvas into a purpose-built environment where every inch works with you, not against you, boosting efficiency for your business or passion project.
It all starts by getting honest about your primary and secondary activities. Are you running a two-bay auto shop that needs clear spans for vehicle lifts? Maybe you’re a woodworker who needs distinct zones for cutting, assembly, and finishing to keep dust under control. Thinking through these day-to-day workflows is the bedrock of a functional design.
The versatility of this footprint is exactly why 60×40 shop plans are so popular in commercial and industrial circles. Market data shows these dimensions serve countless needs, from light manufacturing to equipment repair. In 2024, commercial metal buildings were valued at around $5.0 billion, with industrial applications adding another $4.1 billion—a clear sign of sustained demand for practical, adaptable structures like these.
Core Layout Configurations
Before you start sketching on a napkin, it helps to consider a few proven configurations. Think of these as solid starting points that you can tweak to fit your exact needs. Each one prioritizes space differently to match a distinct purpose.
One of the most popular choices is the classic two-bay workshop. This layout typically dedicates about two-thirds of the space (roughly 1,600 sq ft) to open work bays with high ceilings, perfect for automotive lifts or oversized projects. The remaining third can be partitioned off for tool storage, a workbench area, and a small office.
Another solid approach is the zoned craftsman layout. This is ideal for work like woodworking or metal fabrication where processes need to be kept separate. You might dedicate one side of the shop for “dirty” work like cutting and grinding and the other for “clean” work like assembly and finishing, with a wide central aisle to move materials.
Don’t just plan for the tools and equipment you have now. Always leave a designated “flex zone”—an open area that can accommodate a future purchase, a new process, or just a large, temporary project. Future-proofing your layout will save you major headaches down the road.
Optimizing Workflow and Space
Efficiency is all about minimizing wasted steps. Seriously, think about the path a project takes from raw material to finished product and arrange your equipment to match that flow. A logical layout prevents you from constantly trekking back and forth across the shop.
A woodworker’s setup, for instance, might flow like this:
- Material Storage: Positioned near a large roll-up door for easy unloading.
- Cutting Station: Saws and primary shaping tools are next, containing the bulk of the sawdust in one area.
- Assembly Area: A large, clear central space with plenty of workbench surface.
- Finishing Room: A partitioned, well-ventilated room to keep dust off curing finishes.
This kind of logical progression just makes your work smoother and safer. It’s also a good idea to get a complete picture of your layout before a single piece of steel is erected. To make sure your design is solid and catch any potential issues, you can explore how advanced tools like BIM modeling to preempt risks can help you visualize the final space and solve problems on screen instead of on-site.
The table below breaks down a few common ways to divide up 2,400 sq ft to suit different needs.
Sample 60×40 Shop Layout Configurations
| Layout Type | Primary Use | Workshop Area (sq ft) | Vehicle/Storage Bays | Office/Flex Space |
|---|---|---|---|---|
| Mechanic’s Special | Auto Repair, Equipment Maintenance | 1,800 | 2 Bays with Lifts | 600 sq ft (Office/Parts) |
| Craftsman’s Workshop | Woodworking, Metal Fabrication | 1,600 | 1 Bay (Materials) | 800 sq ft (Assembly/Finishing) |
| Hybrid Business | Light Manufacturing, Online Retail | 1,400 | 1 Bay (Shipping) | 1,000 sq ft (Office/Inventory) |
As you can see, the same footprint can be configured in dramatically different ways depending on what you need to accomplish.
Integrating Offices and Mezzanines
Many people need more than just a workshop. Adding an office, breakroom, or bathroom is a common requirement that transforms a simple shop into a full-fledged business headquarters or a much more comfortable hobby space.
A corner build-out is an efficient way to tuck in a small office without eating up too much of your main floor. Placing it near the man door provides easy access for visitors or customers, keeping them out of the main work area.
But if you really need to maximize your space without expanding the building’s footprint, a mezzanine is the perfect solution. A partial second story can be used for all sorts of things:
- Light-duty storage for parts or inventory
- An office with a bird’s-eye view of the shop floor
- A clean room for sensitive electronics or assembly
Just remember to plan for a mezzanine from the start. It directly impacts your building’s required eave height and the engineering for your foundation. By carefully considering these different layout strategies, you can explore other metal building floor plans and get more ideas to truly customize your 2,400 sq ft space.
Choosing Your Doors, Windows, and Roof Style
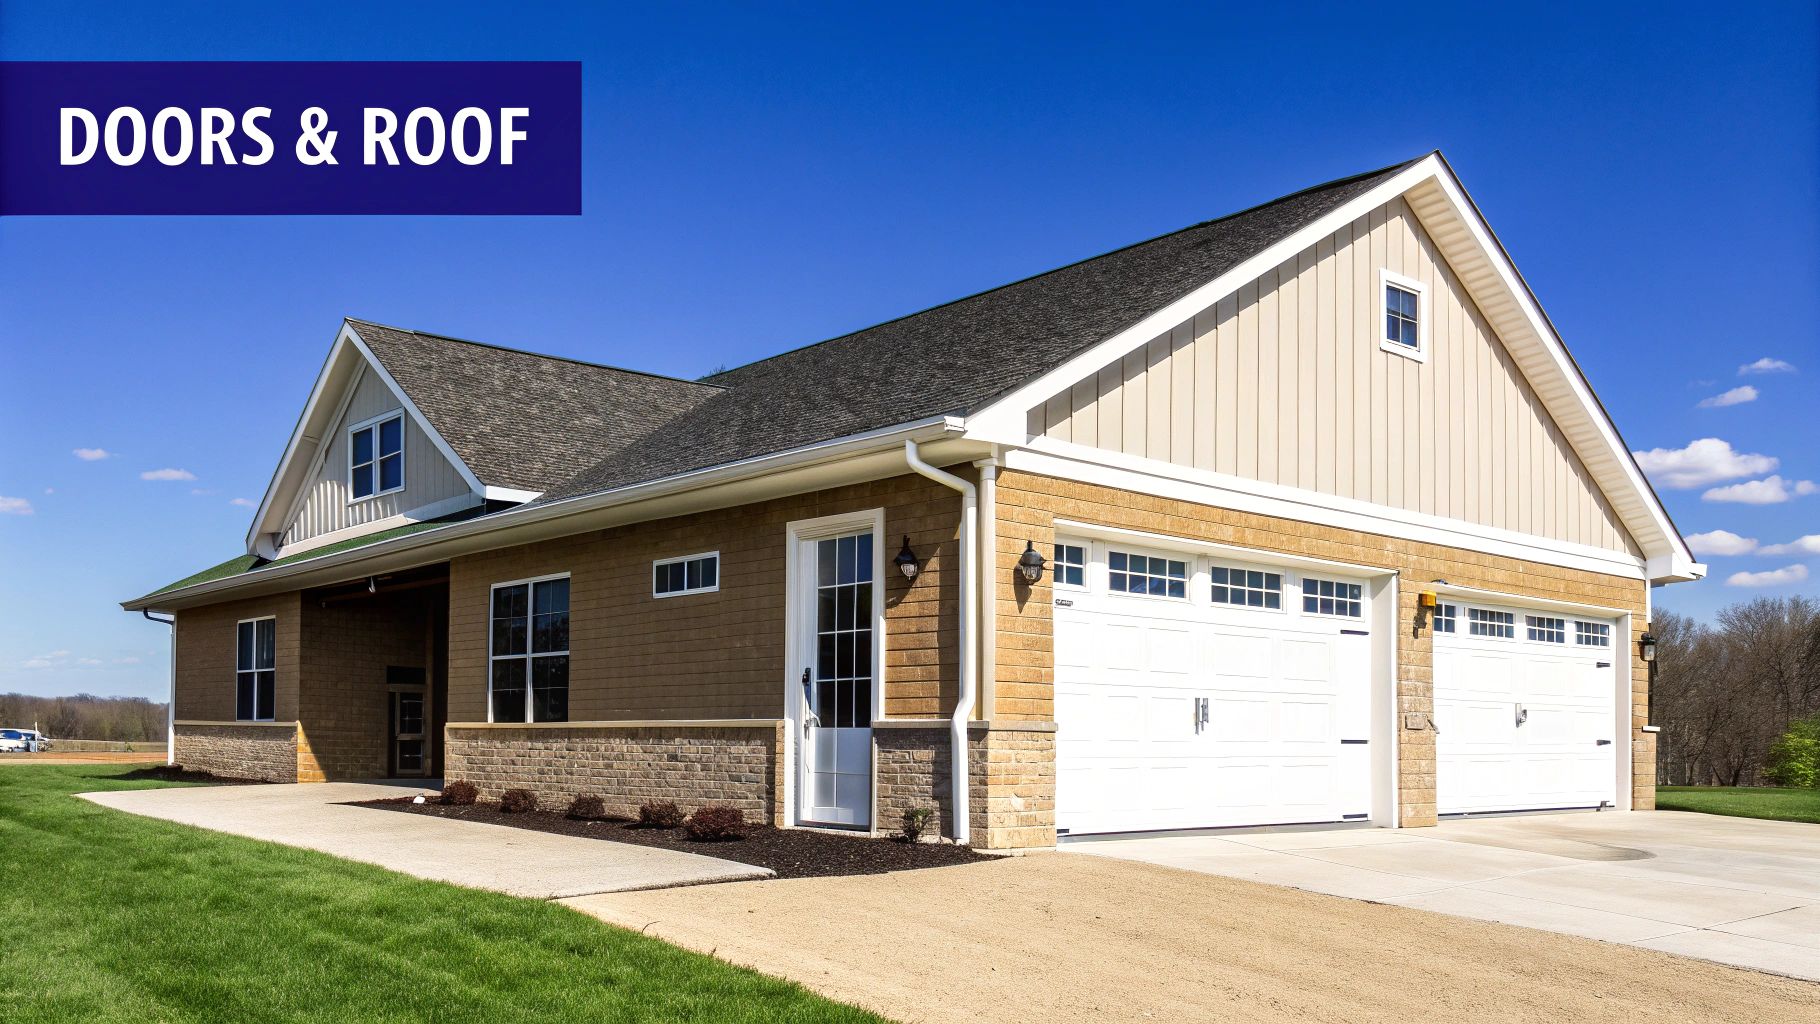
This is where your 60 x 40 shop starts to feel real—when you’re framing out the shell. The doors, windows, and roof you choose are about way more than looks. They’re the core of your building’s everyday function, its ability to stand up to the weather, and its overall personality.
Think about it: these components are how you’ll interact with your shop every single day. A smartly placed door saves you countless steps. The right window can slash your electricity bill. And the proper roof pitch? That can be the difference between a dry, usable space and a winter-long headache.
Selecting the Right Roof Pitch and Style
A roof does more than keep you dry. Its style and pitch directly impact your interior volume, weather resistance, and even your budget. For a 60×40 shop, the hands-down most common choice is a classic gable roof. Its simple A-frame design is fantastic at shedding rain and snow, and it happens to be one of the most cost-effective styles to build.
The pitch, or steepness, is where you really start to customize. A lower pitch, like a 2:12 or 3:12, uses fewer materials and is generally easier on the wallet. But a steeper pitch, like a 6:12, opens up a huge amount of vertical space inside. It’s perfect if you’re thinking about adding a storage loft or need to accommodate taller equipment. If you’re in a snowy region, a steeper pitch is practically non-negotiable to keep heavy snow loads from piling up.
The single most important factor for your roof pitch is your local climate. A shop in Florida has totally different requirements than one in Colorado. Your plans have to account for regional wind and snow load codes.
Another great option to consider is a monitor-style roof. This design has a raised center section with clerestory windows—an awesome way to pull natural light deep into the middle of your 2,400 sq ft space. It’s a bit more complex to frame, but it adds some serious architectural character and makes the interior feel bright and open. You can check out a bunch of traditional and modern roof styles for barns to see what fits your vision.
Strategic Placement of Overhead and Man Doors
How you access your shop is everything. For a 60×40 footprint, map out how vehicles, equipment, and materials will flow. Parking a big RV or a dump truck inside? You’ll need at least one 14′ tall roll-up door. For regular cars, trucks, or tractors, 10′ or 12′ doors usually do the trick.
Here are a few placement tips I’ve seen work wonders:
- Corner Placement: Putting a large roll-up door near the corner of a 60′ wall leaves you with long, uninterrupted stretches of wall space for workbenches, tool chests, and shelving.
- Drive-Through Design: This is a game-changer. Installing large doors on opposite 40′ walls creates a drive-through bay. It’s incredibly useful for working on trailers or long equipment without having to do a 10-point turn to get out.
- Man Door Access: Always, always put a walk-in man door near your main work area. Add another by the office or breakroom. This simple step keeps you from having to raise a giant overhead door every time you need to step in or out.
Leveraging Windows for Light and Ventilation
Don’t treat windows as an afterthought. They are absolutely critical for making your shop a safe, comfortable, and efficient place to work. Good natural light cuts down on your energy bills and just makes the space feel bigger and more inviting.
When planning where to put them, think about the sun. Windows on the south-facing wall can provide passive solar heat in the winter, which is a nice bonus. North-facing windows offer consistent, indirect light that’s perfect for detailed work since there’s no harsh glare.
For ventilation, it’s all about creating a cross-breeze. Place windows or operable louvers on opposing walls to pull fresh air through, helping vent fumes and keep things from getting stuffy in the summer. A few well-placed windows can completely transform your shop’s interior from a dark cave into a space you actually want to spend time in.
Creating a Realistic Project Budget
Let’s talk about the most critical step for a stress-free project: understanding the true, all-in cost of your 60 x 40 shop. It’s easy to get excited by the sticker price of a steel building kit, but that number is just one piece of a much larger financial puzzle. A successful build absolutely hinges on a transparent budget that accounts for every single expense.
This is where many people get tripped up. The trick is to think in terms of “soft costs” and “hard costs.” Soft costs are the less tangible expenses like permits, architectural plans, and engineering fees. Hard costs are the physical stuff—the concrete, the steel, and the labor needed to put it all together.
The True Cost of the Building Kit
The initial quote for a pre-engineered metal building (PEMB) kit is your starting line, not the finish line. A common 60 x 40 shop plan (2,400 sq ft) is a great example of why this construction method has gotten so popular.
Kit prices for a building this size often land in the $18–$21 per square foot range. That puts the material cost for the basic shell somewhere between $43,200 and $50,400. This pricing reflects broader industry trends, but remember, that price tag doesn’t include the foundation, doors, windows, insulation, or any interior work. It’s the baseline you’ll build the rest of your budget on.
Hard Costs Beyond the Steel
These tangible expenses will make up the lion’s share of your budget. They’re the elements that transform a pile of steel beams and panels into a functional, working shop.
- Foundation: This is your first major hard cost after buying the kit. Depending on your soil, local climate, and the foundation type you choose (like a monolithic slab vs. a stem wall), the concrete work for a 2,400 sq ft building will be a significant line item.
- Construction Labor: Unless you’re planning a complete DIY build, you’ll need to hire a crew to erect the building. Labor rates vary wildly by location, but they are always a substantial part of the final cost.
- Heavy Equipment Rental: The erection process isn’t happening without equipment like lifts and cranes, and those come with daily or weekly rental fees.
Don’t ever underestimate the “delivery and freight” line item on your kit quote. Getting 2,400 square feet worth of steel delivered to a rural job site can be a complex and costly part of the process. Always confirm these charges upfront.
When you start hiring contractors, financial clarity is everything. It pays to do some homework on understanding different building contract types, like cost-plus agreements. Knowing the basics can help you negotiate better terms and keep control over your budget.
Factoring in Finishes and Utilities
This is the category people most often forget to budget for properly. The costs to actually make your shop usable can easily match or even exceed the cost of the steel kit itself.
Your detailed budget absolutely must account for:
- Electrical Work: This includes running power to the building, installing a breaker panel, and wiring for all your lights, outlets, and heavy equipment. A 200-amp service is a common choice for a shop this size.
- Plumbing: If you’re adding a bathroom or even just a utility sink, you’ll have costs for trenching, pipes, fixtures, and possibly a septic system if you aren’t on city sewer.
- HVAC Systems: Heating, ventilation, and air conditioning are what make a workspace comfortable and productive. Your options can range from simple propane heaters to full central air systems.
- Insulation: Properly insulating your shop is an upfront cost that pays you back in energy savings for years to come. Spray foam and fiberglass batts are both popular and effective choices.
- Interior Finishes: This covers everything from framing out an office and hanging drywall to painting and installing flooring.
Creating a thorough budget means looking at all these moving parts. For a more detailed breakdown, check out our guide on estimating your total commercial metal building cost to see how all these factors come together. By planning for every expense from day one, you can avoid surprise costs and ensure your project stays on track and on budget.
Navigating Building Codes and Permits
Let’s be honest, the permit process can feel like the most frustrating part of any building project. It’s a maze of paperwork, inspections, and local rules that seems designed to slow you down. But it’s actually a critical safety net ensuring your 60 x 40 shop is built right, protecting your investment and everyone who uses it.
Getting through this phase smoothly boils down to one thing: preparation. Before a single shovel hits the dirt, your local building authority needs to see a comprehensive plan. This isn’t just a napkin sketch; it’s a formal package of documents that proves your project meets all the local and state regulations.
Assembling Your Permit Application Package
Think of your permit application as the complete story of your project. The goal is to give the planning department everything they need for a one-shot approval, avoiding endless back-and-forth revisions. Being thorough right from the start can save you weeks, or even months, of delays.
Your application package will almost certainly need these key items:
- Engineered Building Plans: These are the official blueprints for your 60 x 40 shop plans. They must be stamped by a licensed engineer and detail everything from the foundation design to the roof truss specs.
- A Detailed Site Map: This is a bird’s-eye view of your property, clearly marking where the shop will sit. It needs to show property lines, any existing structures, and the exact distances from roads and boundaries—what are known as setbacks.
- Foundation Design: You’ll need a specific, engineered plan for your concrete foundation that’s designed to support the building’s weight and handle your local soil conditions.
Understanding Key Code Requirements
Building codes aren’t suggestions—they are the law for your new shop. While the specifics can change quite a bit from one county to the next, a few key requirements are universal for steel buildings.
One of the biggest factors is the wind and snow load rating. Your building has to be engineered to withstand the maximum wind speeds and heaviest potential snowfall for your specific address. This isn’t a generic number; it’s a calculation that directly impacts the structural design of your entire shop.
Your very first stop should be your local building department’s website or a quick call to their office. Ask for their checklist of all required documents for a new accessory structure. This simple step clears up the confusion and gives you a clear roadmap.
Another deal-breaker is setbacks. These rules dictate the minimum distance your shop must be from property lines, roads, and even other buildings on your land. Getting this wrong is an incredibly costly mistake that could force you to tear out and move your entire foundation. Before you finalize anything, confirm all the local setback requirements.
If you need help finding a qualified local builder who already knows the ins and outs of these nuances, getting information on a metal shop building near me can connect you with experienced pros. A little proactive planning and asking the right questions will get you through the red tape and keep your project moving forward.
Your Top Questions About 60×40 Shop Plans Answered
When you start getting serious about your shop build, the big-picture ideas give way to very practical questions. These are the details that trip people up, but getting them sorted out now will save you a ton of headaches and money. We hear the same questions time and again, so let’s dig into the most common ones we get about 60 x 40 shop plans.
How Tall Should My 60×40 Shop Be?
This is one of the first and most important decisions you’ll make, and it has a huge impact on what you can do with your building. We’re not talking about the roof peak here; the critical number is the eave height—the distance from your finished floor to where the walls meet the roofline. Get this wrong, and you’ve limited your shop’s potential before you even pour the concrete.
A good starting point for a general-purpose garage or workshop is an eave height of 12 to 14 feet. That’s plenty of room for most trucks, trailers, and standard shop equipment.
But if you have bigger plans, you need to think taller.
- Vehicle Lifts: Planning on working under your cars? For a two-post or four-post automotive lift, you’ll want a minimum eave height of 16 feet to comfortably lift most vehicles without worrying about hitting the ceiling.
- RVs and Heavy Equipment: If you need to park a Class A motorhome, a combine, or a dump truck inside, you’re looking at an eave height of 18 feet or more. This is non-negotiable to clear the massive overhead door required for that kind of machinery.
- Future Mezzanine: Even if it’s just a “maybe someday” idea, planning for a future loft for storage or an office means you need more vertical space now. An eave height of at least 20 feet will give you usable headroom on both levels.
Think of it this way: you can never have too much height, but adding it later is practically impossible. The cost of a few extra feet of steel during the initial build is a tiny fraction of what it would cost to try and raise a roof down the road.
Can I Build a 60×40 Steel Shop Myself?
The DIY approach is a powerful way to save on labor costs, and for a 2,400 sq ft steel building, that savings can be substantial. But this isn’t a weekend project. It’s a serious undertaking that demands the right skills, equipment, and a healthy dose of patience.
Before you commit, be honest with yourself. While a pre-engineered steel building kit is designed for straightforward assembly, you still need to be able to read blueprints, run heavy equipment like a forklift or a scissor lift, and be comfortable working at height. The process is less about intricate carpentry and more about systematic, bolt-together assembly.
This is absolutely not a one-man job. You’ll need a reliable crew of at least two or three people to help you safely lift and position heavy steel beams and wall panels. If you’re on a tight schedule or don’t have a background in construction, hiring a professional erection crew is often the smartest move. They can get the structure up faster and more safely than most DIY teams.
What Is a Realistic Timeline for a 60×40 Shop Build?
Knowing the full timeline helps you coordinate everything from contractors to material deliveries. The clock doesn’t start when the first shovel hits the dirt; it starts with planning and paperwork. Timelines can stretch based on how fast your local permit office moves, contractor backlogs, and even the weather.
The first major hurdle is always administrative, and it often takes longer than people expect.
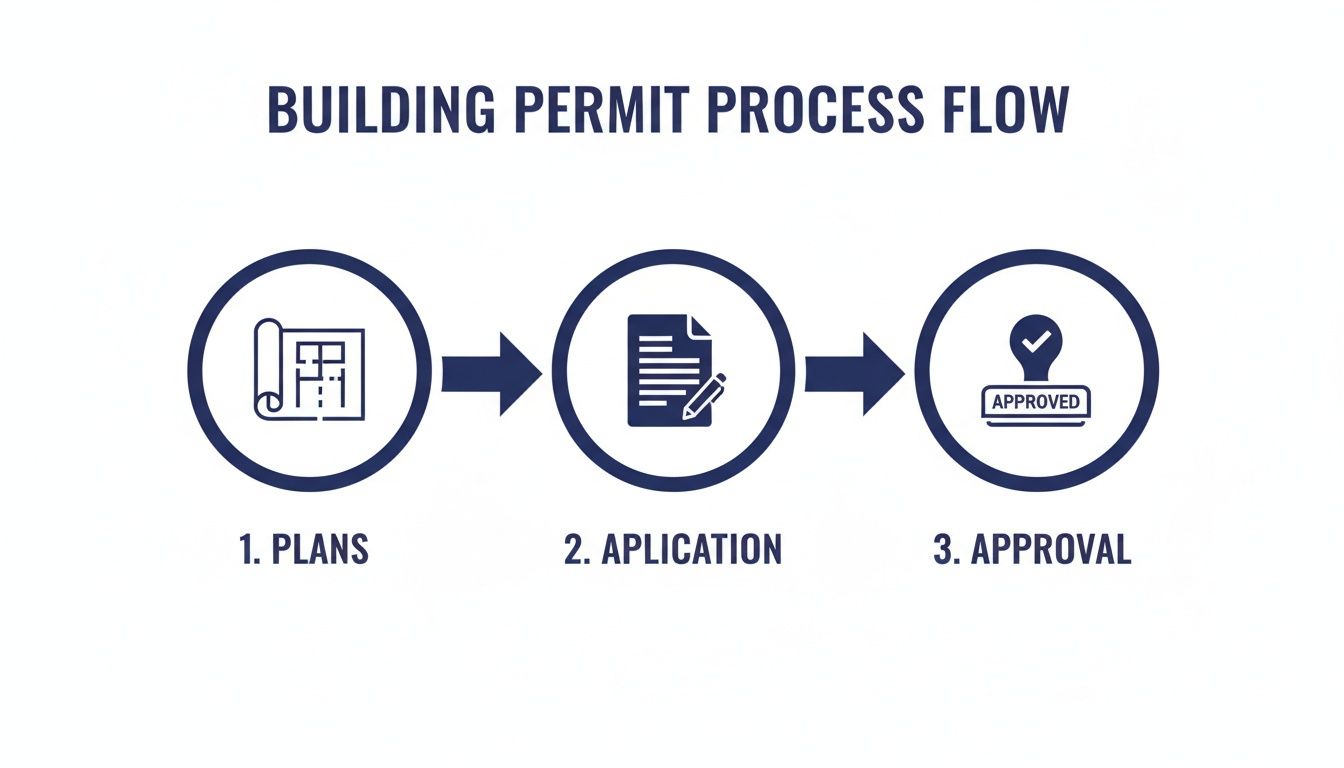
As you can see, getting that permit in hand is a multi-step process that happens long before you break ground.
Here’s a rough breakdown of how a typical project unfolds:
- Planning & Permitting (4-8 weeks): This is where you finalize your 60 x 40 shop plans, gather all your documents, and submit everything to the local building authority for review and approval.
- Kit Manufacturing & Delivery (6-10 weeks): After you place your order, your building is custom-fabricated and then shipped to your job site.
- Site Prep & Foundation (1-2 weeks): This work can happen while your building is being made. Your concrete contractor will get the site graded and pour the slab.
- Building Erection (1-2 weeks): With a professional crew, the primary steel frame, sheeting, and trim for a 60×40 shop can go up surprisingly fast.
- Finishing (4-12+ weeks): This is the most variable part of the timeline. It includes all the interior work—running electrical and plumbing, installing insulation, and building out any custom spaces.
All in all, a realistic timeline to budget for, from the very beginning to a fully finished shop, is around 4 to 6 months.