
If you're looking for a dedicated space for your hobbies, business, or just tinkering with your truck, a metal building home shop is an incredible solution. Forget cramped garages or damp basements. These pre-engineered buildings are a world away from traditional wood structures, delivering unmatched durability, wide-open interiors, and a surprising level of cost-effectiveness.
This guide will walk you through everything you need to know to plan the perfect workshop from the ground up.
Why Your Next Workshop Should Be a Metal Building
When you picture your dream workshop, you probably imagine a space with no limitations. That’s exactly what a modern metal building shop delivers, moving far beyond the old stereotypes of simple tin sheds and offering a far superior alternative to traditional construction.
The secret is the pre-engineered steel frame. This design creates massive, open interiors without a single interior support column getting in your way. Imagine working on a car lift or sliding a full sheet of plywood across the floor without dodging posts—that’s the kind of freedom a clear-span design gives you.
Durability That Outlasts Traditional Builds
You’re not just building a shop for today; you're making an investment for the future. Steel framing is naturally resistant to almost all the common headaches that come with wood structures.
- Pest and Rot Proof: Termites, carpenter ants, and moisture-related decay are simply non-issues.
- Fire Resistance: Steel is non-combustible, which is a massive safety benefit if you're welding, grinding, or woodworking. This often translates to lower insurance premiums, too.
- Weather Hardy: These buildings are engineered to meet your specific local codes for wind and snow loads, meaning they are literally built to handle the worst weather your area can throw at them.
The real value of a metal building isn't just in its initial cost, but in its low-maintenance longevity. You're investing in a structure that won't require constant repairs, painting, or pest control, saving you significant time and money over the decades.
This isn't just a niche trend; it's a major shift in construction. The global demand for metal building materials is booming, with a projected market value of $225.23 billion by 2025. It’s a clear sign that homeowners and businesses alike are choosing durable, customizable buildings.
The conversation often boils down to metal versus wood. While a traditional pole barn has its uses, a steel building pulls ahead with serious advantages in raw strength and long-term value. For a much deeper comparison, check out our complete guide on steel building vs. wood building. Making the switch to steel ensures your workshop is an asset that will stand strong for years.
Laying the Groundwork for Your Shop
A truly great workshop isn’t just about the steel that goes up; it’s about the earth it stands on. The success of your metal building home shop begins long before the first piece of framing arrives, starting with careful site prep and a solid foundation plan. Getting this stage right prevents countless future headaches, from water issues to structural problems down the road.
Choosing the right location on your property is the first critical decision you'll make. It’s tempting to just pick the flattest, most open area, but there’s more to it than that. Think about future access—will you be able to easily drive a truck or trailer right up to the main doors? You also have to consider things like sunlight and prevailing winds, as these can impact your workshop's natural lighting and temperature all year long.
But most importantly, you need to analyze the drainage. Never, ever build at the lowest point of your property. Water will inevitably find its way to your foundation, creating a constant battle against moisture. A slightly elevated spot is always the better choice.
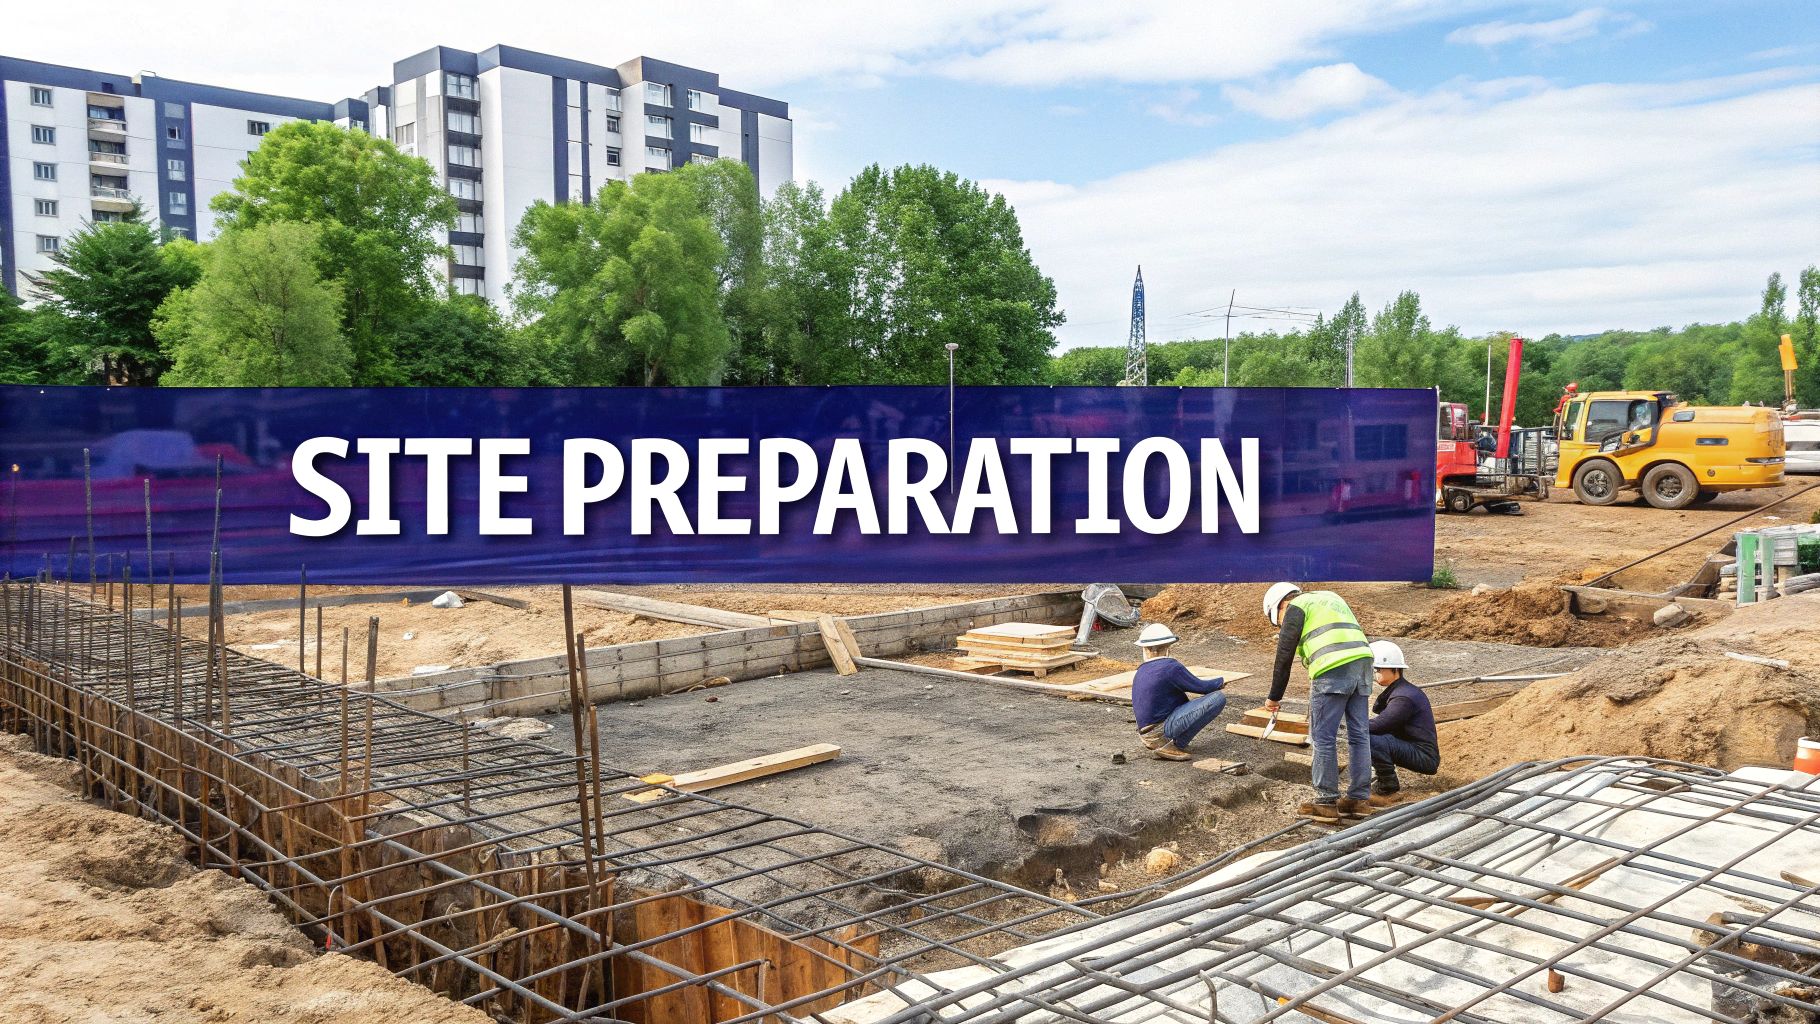
Preparing Your Building Site
Once you’ve pinpointed the perfect spot, the real work begins. Proper site preparation involves more than just clearing away some brush. The goal is to create a stable, level, and well-drained base that will support your building for decades to come.
This process breaks down into a few key actions:
- Clearing and Grubbing: All vegetation, trees, stumps, and big rocks have to go. Make sure to clear the building footprint plus a buffer of at least 5-10 feet on all sides.
- Grading: The land must be graded to create a level building pad. Crucially, the surrounding area should be sloped away from the pad to direct water runoff away from your future foundation. A slope of at least 1/4 inch per foot is a good rule of thumb.
- Compaction: This step is non-negotiable for a stable foundation. The soil and any added base material (like gravel) must be thoroughly compacted to prevent it from settling later on. Settling can cause your concrete foundation to crack, compromising the entire structure.
Proper site prep is everything, especially when it comes to compacting the base for your shop's foundation. Using the right vibration plate compactors is key to ensuring you get that solid, reliable base your project needs.
Choosing the Right Foundation
The foundation is the literal bedrock of your metal building home shop. It transfers the entire weight of the structure to the ground, so getting this right is paramount. Your choice will depend on your local soil conditions, frost line depth, and how you plan to use the shop.
For most workshops, a slab-on-grade concrete foundation is the most popular and practical option out there. This single pour of concrete acts as both the foundation and the floor of your shop. It’s durable, easy to clean, and gives you a perfectly flat surface for rolling tool chests and heavy equipment.
Of course, other options might be more suitable in certain scenarios.
- Pier Foundations: These are best for uneven terrain or areas with poor soil stability. Concrete piers are sunk deep into the ground, and the building's frame is anchored to them. You'll just need to add a separate floor system, typically wood or steel.
- Basement or Crawl Space Foundations: While less common for simple shops because of the higher cost, these can be engineered for metal buildings if you need underground storage or easy access to utilities.
Don’t guess on your foundation. Soil tests and a professional assessment are wise investments. Building on expansive clay soil, for example, requires a very different foundation design than building on sandy loam to prevent cracking and shifting.
Before you even think about pouring concrete, you have to plan for utilities. It's far easier and cheaper to run plumbing drains and electrical conduits under the slab before it’s poured than to try and cut into it later. Think about where you might want a sink, a bathroom, or floor outlets for heavy machinery. For a comprehensive look at what goes into a solid base, our guide on steel building foundation requirements covers these details thoroughly. A well-planned foundation truly sets the stage for a smooth and successful build.
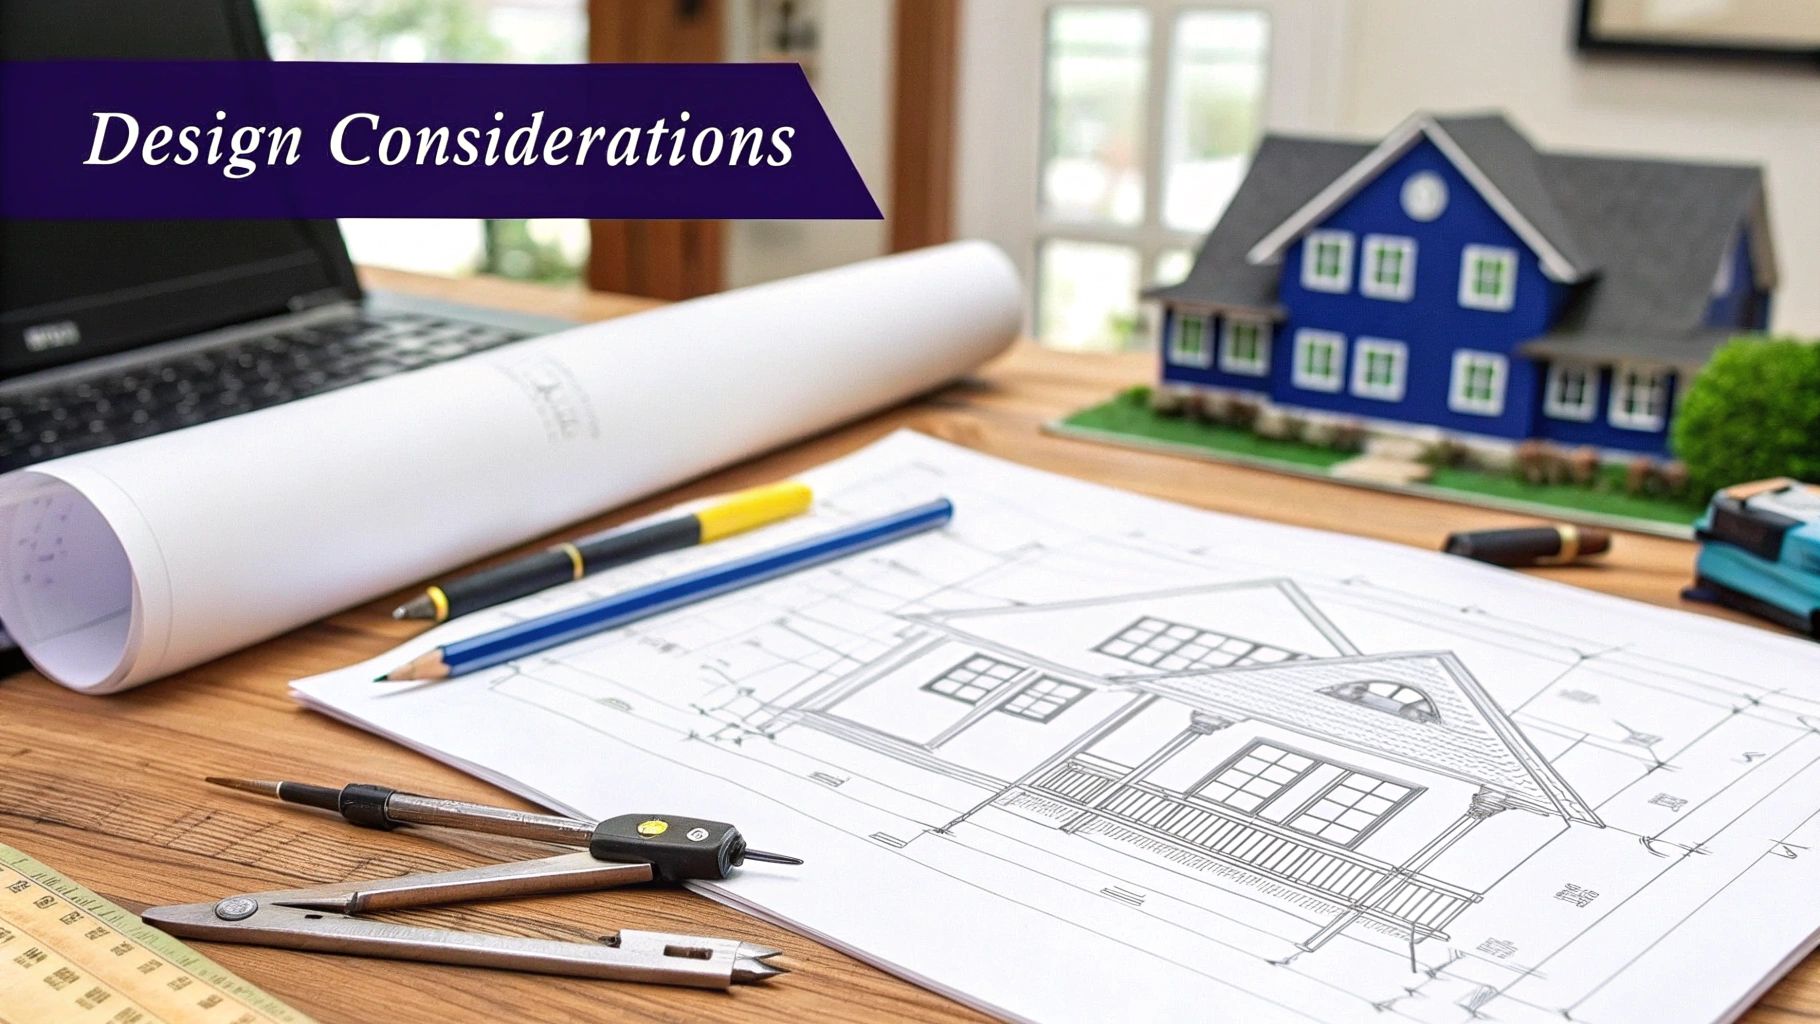
Designing a Workshop That Actually Works
This is where the vision for your perfect metal building home shop starts to become a reality. We're moving beyond simple dimensions now. A truly great design is all about creating a space that is functional, efficient, and frankly, a place you want to spend time in. I've seen it time and again—a well-thought-out layout is the difference between a cluttered, frustrating workshop and one that inspires you to get things done.
The first thing to do is think in zones. Not every task is the same, so your layout shouldn't treat them that way. For instance, you definitely don't want grinding sparks flying onto a woodworking project you just finished lacquering.
Creating distinct zones for different types of work is key. You might dedicate one corner to "dirty work" like metal fabrication and grinding, set up another area for clean assembly and electronics, and then have a completely separate space for storage. This simple separation minimizes cross-contamination and makes cleanup a whole lot easier.
Planning Your Workflow and Access
A great workshop is built on understanding space planning principles, making sure every square foot is put to good use for tools, benches, and just moving around. Think about your process. How will you move through the space during a typical project? Are your most-used tools right next to your main workbench? Is there a clear path to bring in large sheets of plywood or roll a car inside?
This is where door placement becomes absolutely critical. Don't just slap a big roll-up door in the middle of a wall and call it a day. Consider positioning it off-center. This little trick creates a much larger, uninterrupted wall space perfect for long workbenches and storage racks.
If you plan on working on vehicles, make sure you have at least a 12-foot-wide by 10-foot-high door. I’d also strongly recommend a second, smaller man door for quick ins and outs without having to open the entire bay.
Window placement also plays a huge role in the feel of your shop. Placing windows high up on the walls brings in fantastic natural light without eating up that valuable wall space you need for tool storage. If you have a southern-facing wall, a well-designed overhang can block the harsh summer sun while letting in that warm, low winter light.
Powering Your Ambitions
One of the most common mistakes I see is underestimating electrical needs. Your shop's electrical plan has to be robust enough for everything from small power tools to heavy-hitters like welders and compressors. Believe me, it is far cheaper to over-plan your electrical layout now than to try and add more circuits later.
Here are a few power planning must-haves:
- Dedicated Circuits: Any high-draw equipment, like a 240V welder, a big air compressor, or a car lift motor, needs its own dedicated circuit. This is non-negotiable if you want to avoid constantly tripping breakers.
- Outlet Placement: You can never have too many. Plan for outlets every 6-8 feet along your workbench walls. And here's a pro tip: consider adding a few outlets in the ceiling for retractable cord reels.
- Lighting Layout: A single bulb hanging in the middle just won't cut it. You need bright, even lighting across the entire shop to get rid of shadows. High-output LED fixtures are the way to go—they're energy-efficient and provide incredible illumination.
Think beyond the walls. If you ever plan to work just outside the main doors, install an exterior GFI-protected outlet. It’s a small addition that adds massive convenience for jobs like power washing a car or using a miter saw outdoors on a nice day.
Climate Control and Comfort
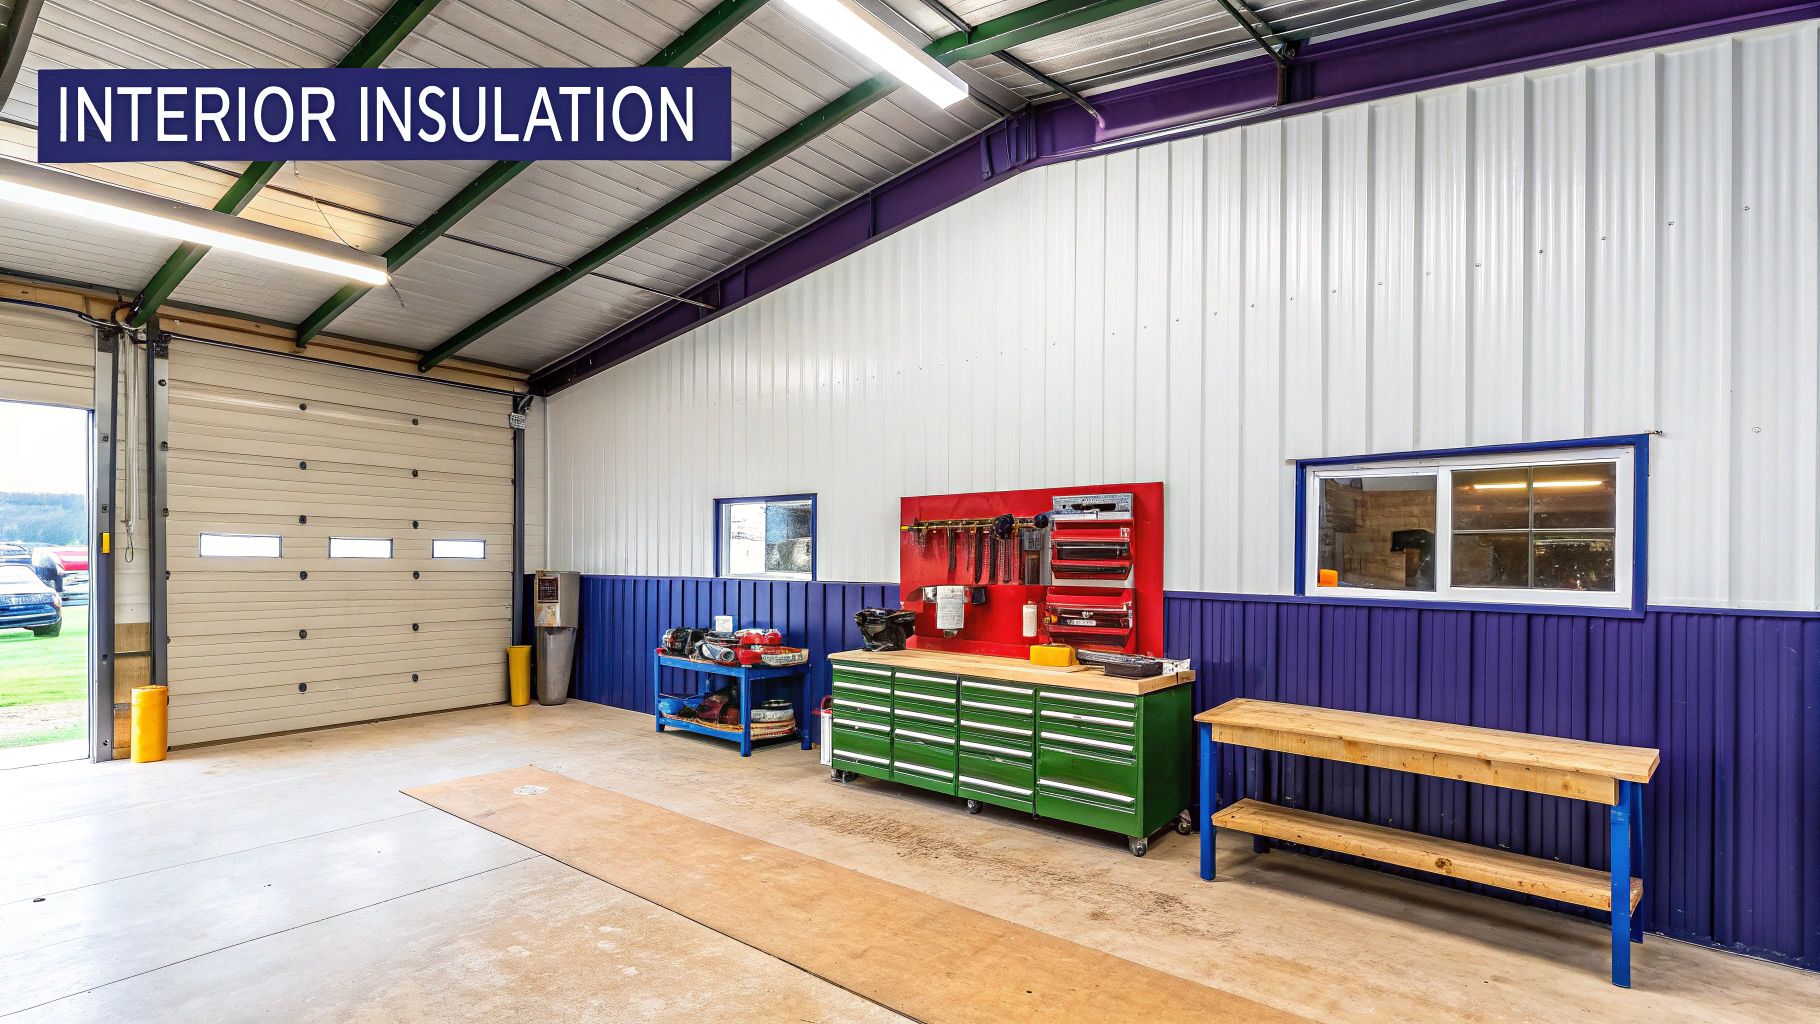
An uninsulated metal building can feel like an oven in the summer and an icebox in the winter, which doesn't make for a pleasant workspace. Proper insulation isn't a luxury; it's a necessity for creating a comfortable and energy-efficient shop. It also plays a huge part in controlling condensation, which can lead to rust on your expensive tools and equipment.
When you're looking at insulation, pay attention to the R-value, which measures its ability to resist heat flow. The higher the R-value, the better it insulates. For a deeper look into the materials that work best for these structures, you can review our guide to the most effective https://iconsteelbuildings.com/custom-steel-buildings/ and their insulation options.
Here’s a quick comparison of the most common insulation choices to get you started.
Metal Building Insulation Comparison
| Insulation Type | Average R-Value per Inch | Estimated Cost (per sq ft) | Pros | Cons |
|---|---|---|---|---|
| Fiberglass Batts | R-3.1 to R-4.3 | $1.00 – $2.50 | Very cost-effective and easy for a DIY install. | Can lose R-value if it gets compressed; susceptible to moisture. |
| Spray Foam | R-6.0 to R-7.0 | $2.00 – $5.00 | Creates an excellent air seal and adds structural rigidity. | More expensive; requires professional installation. |
| Rigid Foam Board | R-4.0 to R-6.5 | $1.50 – $4.00 | High R-value for its thickness and is moisture resistant. | All the joints must be carefully taped to create an air barrier. |
Each type has its place, and the right choice often depends on your climate and budget.
Finally, a word on future-proofing. Even if a utility sink or a small bathroom isn't in the budget right now, roughing in the plumbing during the foundation phase is a brilliant move. Capping off a drainpipe and a water line under the slab costs very little today but will save you thousands in concrete-cutting and plumbing headaches down the road.
Understanding Kits Costs and Construction
Once you've got your design plans locked in, it's time to shift gears to the practical side of things: actually bringing your home shop to life. This is where we talk about budgets, timelines, and the big decision between a pre-engineered kit and a totally custom build. Getting these details right from the start is the key to keeping your project on track, both financially and logistically.
For most home shops, a pre-engineered metal building kit is the way to go, and for good reason. These kits are designed in a factory to your exact specs. Every single beam, panel, and bolt is manufactured to fit together perfectly. That precision means less on-site cutting and welding, which dramatically speeds up the construction process.
Decoding the True Cost of Your Shop
The sticker price on a metal building kit is just the starting point. To create a budget that won't give you any nasty surprises, you have to account for all the other costs that turn a pile of steel into a functioning workshop. It's these "hidden" expenses that often catch first-time builders off guard.
Here’s a more realistic breakdown of what you need to factor into your total project cost:
- The Kit Itself: This is your biggest line item, covering all the steel framing, wall and roof panels, and the fasteners to put it all together.
- Delivery Fees: Steel is heavy, and freight charges can be a serious expense. Depending on how far you are from the manufacturer, delivery can easily add several thousand dollars to your bill.
- Foundation Work: Like we've already covered, the concrete slab is non-negotiable and a major cost. You can expect this to run anywhere from $5 to $10 per square foot.
- Construction Labor: Unless you're tackling this entirely on your own, you'll need to hire a crew. Professional erection can add 30-50% of the kit cost right back into your budget.
- Equipment Rental: If you're going the DIY route, you'll almost certainly need to rent equipment like a forklift or a scissor lift to safely raise those heavy steel frames.
The good news? Recent market shifts have brought some relief. By 2025, metal building costs have dropped by 10-20% from their pandemic-era highs. To give you a ballpark, a 1,000-square-foot metal building kit might cost between $10,000 and $20,000. Of course, larger or more complex structures can range from $100,000 to $300,000, depending heavily on steel thickness, coatings, and how much you customize.
The Construction Sequence Unpacked
Once that truck pulls up and your kit is on-site, the process of turning it into a building is surprisingly efficient and logical. Whether you’re leading the charge yourself or you've hired a crew, the sequence is pretty much the same: you go from a flat slab of concrete to a fully enclosed structure.
This image really helps visualize how the initial decisions you make when ordering your kit directly impact the materials that show up on the truck.
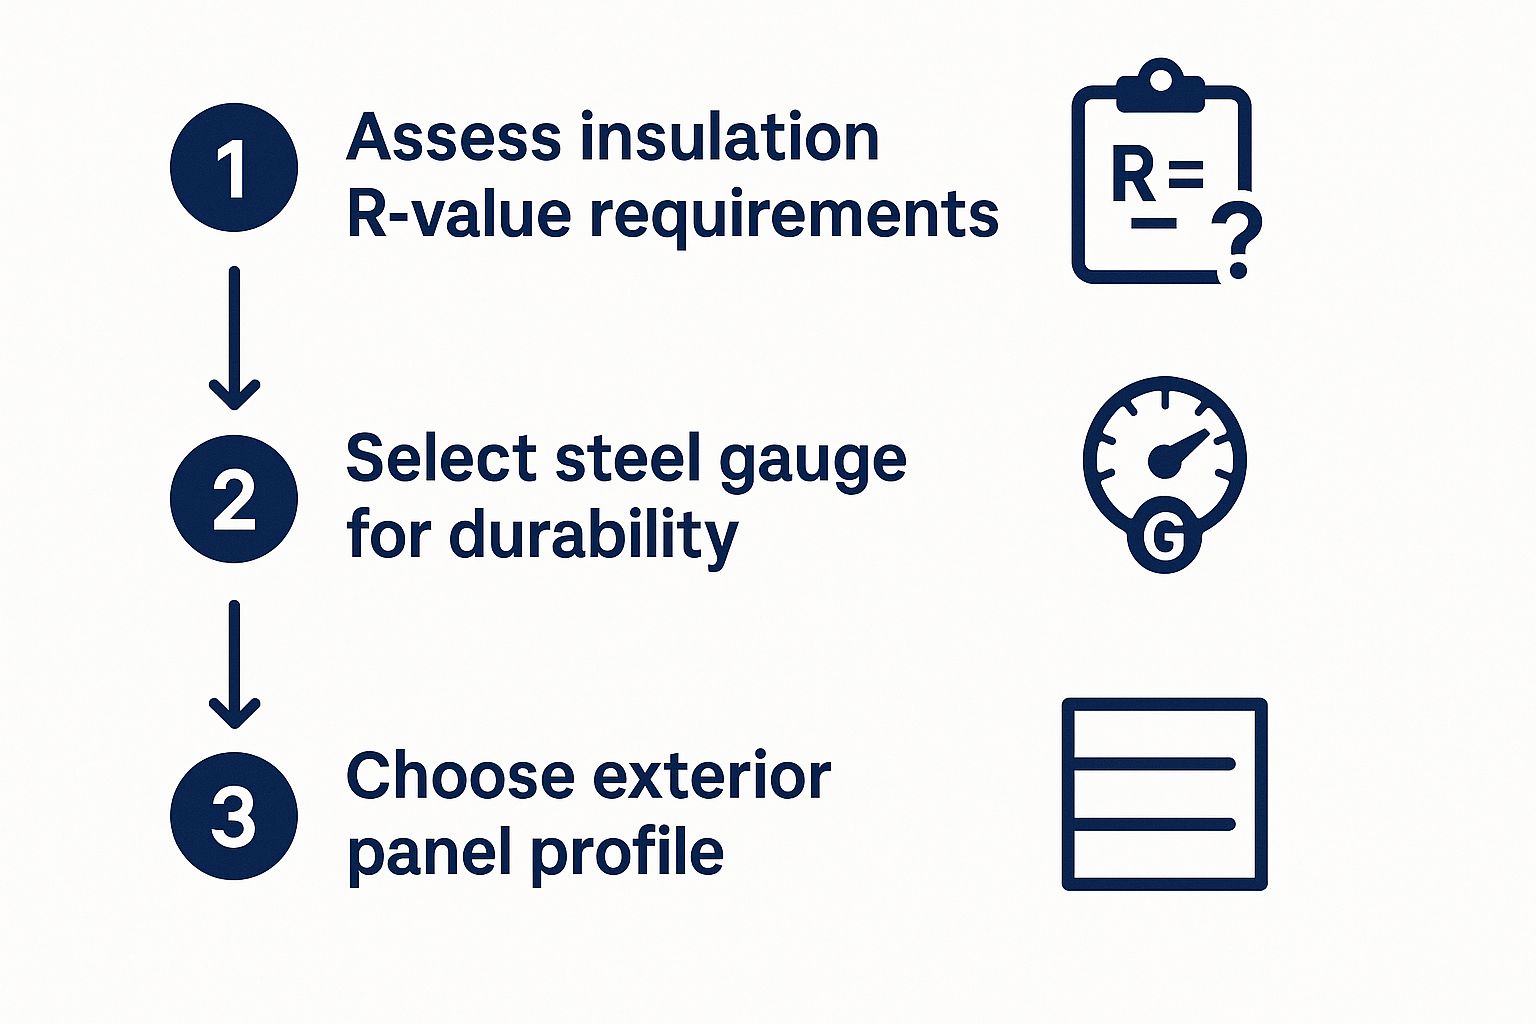
As you can see, your choices for things like insulation, steel gauge, and panel style are all interconnected. They define the core components of your building kit before a single piece of steel is even cut.
The actual erection process usually looks something like this:
- Staging Materials: First things first, you unload the truck and get everything organized. It's smart to lay out the main framing members near where they'll be installed to save yourself a headache later.
- Erecting the Main Frames: The big I-beam columns and rafters are bolted together on the ground. Then, they’re lifted into place and anchored securely to the foundation.
- Installing Girts and Purlins: These are the secondary framing pieces. Girts run horizontally between the main columns, and purlins do the same between the rafters. They provide the structure for attaching the wall and roof panels.
- Framing Openings: Now you install the additional steel framing that creates the precise openings for your roll-up doors, walk-in doors, and windows.
- Sheeting the Walls and Roof: This is the fun part where your structure really starts to look like a building. The metal panels are attached to the girts and purlins, usually starting from the bottom and working your way up.
- Installing Trim and Accessories: The final step is all about the details. You'll add corner trim, gutters, and downspouts, and seal everything up to make sure it's completely weatherproof.
DIY Build Versus Hiring a Professional Crew
Deciding whether to build the shop yourself or hire a professional crew is a huge decision. It has massive implications for your budget, your timeline, and honestly, your stress level. Going the DIY route can save you thousands in labor, but don't underestimate the commitment.
A successful DIY build requires more than just a good set of tools. It demands careful planning, patience, and a healthy respect for safety, especially when you're working with heavy materials at height.
If you opt for a DIY build, be real with yourself. A small, simple shop might be a totally manageable project for a few handy friends over a couple of weekends. A larger, more complex building, on the other hand, can get overwhelming fast. And don't forget to factor in the rental cost for essential equipment like a forklift—it's an absolute must for safely lifting those heavy I-beam frames.
Hiring a professional erection crew buys you peace of mind and speed. An experienced team can often get a standard-sized shop standing in just a few days, which is a fraction of the time it would take a novice. They already have the right tools, the safety gear, and the know-how to handle any curveballs. When you're vetting contractors, always ask for proof of insurance and check their references from previous metal building projects.
No matter which path you take, getting familiar with the different types of pre-engineered kits is time well spent. For a much broader perspective, you might want to check out the ultimate guide to steel building kits, which covers everything from residential to commercial applications. The more you know, the more confident you'll be in your final decision.
Outfitting Your Space for Maximum Functionality
With the steel structure of your home shop standing tall, the real fun begins. Now it’s time to transform that bare-bones shell into a high-performance workspace. The choices you make here—from the floor under your feet to the lights over your head—will define how your shop feels and functions every single day.
The first and arguably most impactful decision is your flooring. That bare concrete slab is a decent starting point, but protecting it is non-negotiable if you want it to last. Two options consistently rise to the top for their sheer durability in a demanding shop environment.
Durable Flooring for a Hardworking Shop
The right floor coating does more than just look good; it resists chemical spills, shrugs off impacts from dropped tools, and makes cleanup almost effortless.
- Epoxy Coatings: There's a reason this is such a popular choice. A quality, multi-layer epoxy creates a seamless, non-porous surface that’s incredibly resistant to oil, gasoline, and other nasty chemicals. It’s tough enough to handle heavy equipment and constant foot traffic without chipping or peeling.
- Polished Concrete: If you lean toward a more industrial aesthetic, polished concrete is a fantastic route. The process involves grinding the concrete surface to a smooth, high-gloss finish that is then sealed. This creates an incredibly dense and durable floor that won't stain easily and is ridiculously easy to keep clean.
Both are excellent, but epoxy often gives you slightly better impact resistance. That’s a key factor to consider if you'll be working with heavy tools and parts.
Smart Storage and Organization Systems
A cluttered shop isn't just inefficient—it's unsafe. The clear-span interior of a metal building is a blank canvas, giving you the perfect opportunity to create a truly organized space where everything has a home. Don't just push everything against the walls; you have to think vertically and strategically.
Heavy-duty industrial shelving is a must-have for storing bulky items like parts bins, fluid containers, and larger tools. For the hand tools you use constantly, a wall-mounted organizer system is a game-changer. Think pegboards or slat walls with customizable hooks and holders. They keep your wrenches, screwdrivers, and pliers visible and always within arm's reach.
A great organization tip is to create "kits" in mobile tool chests. Have one chest dedicated to electrical work, another for welding supplies, and a third for general mechanics. You can roll the exact tools you need right next to your project, saving countless trips back and forth across the shop.
Essential Systems for Comfort and Safety
Ultimately, your shop’s functionality boils down to three critical systems: lighting, climate control, and ventilation. Getting these right from the start will make your workspace comfortable, safe, and far more productive.
High-efficiency LED lighting is the undisputed champion for any workshop. Modern LED fixtures pump out bright, shadow-free light that mimics natural daylight, which seriously reduces eye strain and helps you work more accurately. Plan for overlapping fields of light to ensure every corner is well-lit, paying special attention to the areas over workbenches and machinery.
Climate control is just as important. Proper insulation is your first line of defense, but you’ll also need an active heating and cooling system. Mini-split systems are an excellent choice for a metal building home shop because they're energy-efficient and don't require any ductwork. You can dive deeper into our complete guide on steel building insulation options to see how the right insulation works hand-in-hand with your HVAC system.
Finally, never, ever neglect ventilation. If you're doing any welding, painting, or running engines, a robust ventilation system is non-negotiable for clearing out harmful fumes. Installing one or two powerful exhaust fans on opposite walls is a simple way to create effective cross-ventilation, ensuring a safer and healthier place to work.
Common Questions About Building a Metal Shop
Once you start nailing down the final details of your metal shop, a few key questions always seem to pop up. Getting straight answers to these is crucial for keeping your project moving forward without any costly surprises.
Let's dive into some of the most common things we get asked.
Probably the biggest question on everyone's mind is the timeline. While every project has its own quirks, there's a general rhythm to it. The initial steps—getting permits approved and the site prepped—often feel like they take the longest.
But here's the good part: once your concrete foundation has cured, the building itself shoots up incredibly fast. A professional crew can often get the steel frame and panels up for a standard 30×40 foot shop in just 3-5 days. If you're tackling it as a DIY project, you should probably set aside several solid weekends to get it done right.
Permits and Property Lines
This brings us to the next big one: "Do I really need a building permit?" The answer is almost always a hard yes. Most local governments require permits for any new structure, sometimes for buildings as small as 120 square feet.
Before you lift a single shovel, your first call should be to your local building department. They'll tell you exactly what you need, but you can generally expect to provide:
- Engineered Drawings: Your kit manufacturer will usually supply these, already certified for your local codes.
- A Site Plan: This is a map of your property showing exactly where the new shop will sit, including how far it is from your property lines (these are called setbacks).
- Foundation Plans: Detailed specs for your concrete slab or pier foundation.
Don't even think about skipping the permit process. It's a recipe for disaster that can lead to massive fines, stop-work orders, or even being forced to tear down the entire structure you just paid for. Always get that official approval before you break ground.
Attaching to an Existing Structure
Finally, we often hear from homeowners who want to know if they can attach their new metal shop directly to their house or an existing garage. The short answer is yes, it's possible. The long answer is that it's a whole lot more complicated than a standalone build.
Connecting two different structures requires careful engineering to make sure the join is secure and safe. You have to figure out how the new foundation will interact with the old one without causing shifting or stress cracks. Plus, creating a permanent, watertight seal between completely different building materials is a major challenge in itself.
This isn't a DIY job. This kind of project almost always demands the expertise of a structural engineer and a contractor with experience in this specific type of work to ensure it’s done safely and up to code.
Planning your perfect workshop should be exciting, not overwhelming. At Icon Steel Buildings, we provide top-quality, American-made kits and the expertise to help you build with confidence. Explore our customizable options and start designing your dream shop today at https://iconsteelbuildings.com.