
Putting gutters on your metal building is about more than just keeping the rain off your head. It’s a crucial step in protecting the entire structure—from the foundation right up to the roof panels. This isn’t just a slap-it-on-and-go job; it takes the right materials and specific mounting methods designed for metal siding and trim to get it right. If you want your building to last, you have to manage that water runoff effectively.
Why Your Metal Building Needs the Right Gutters
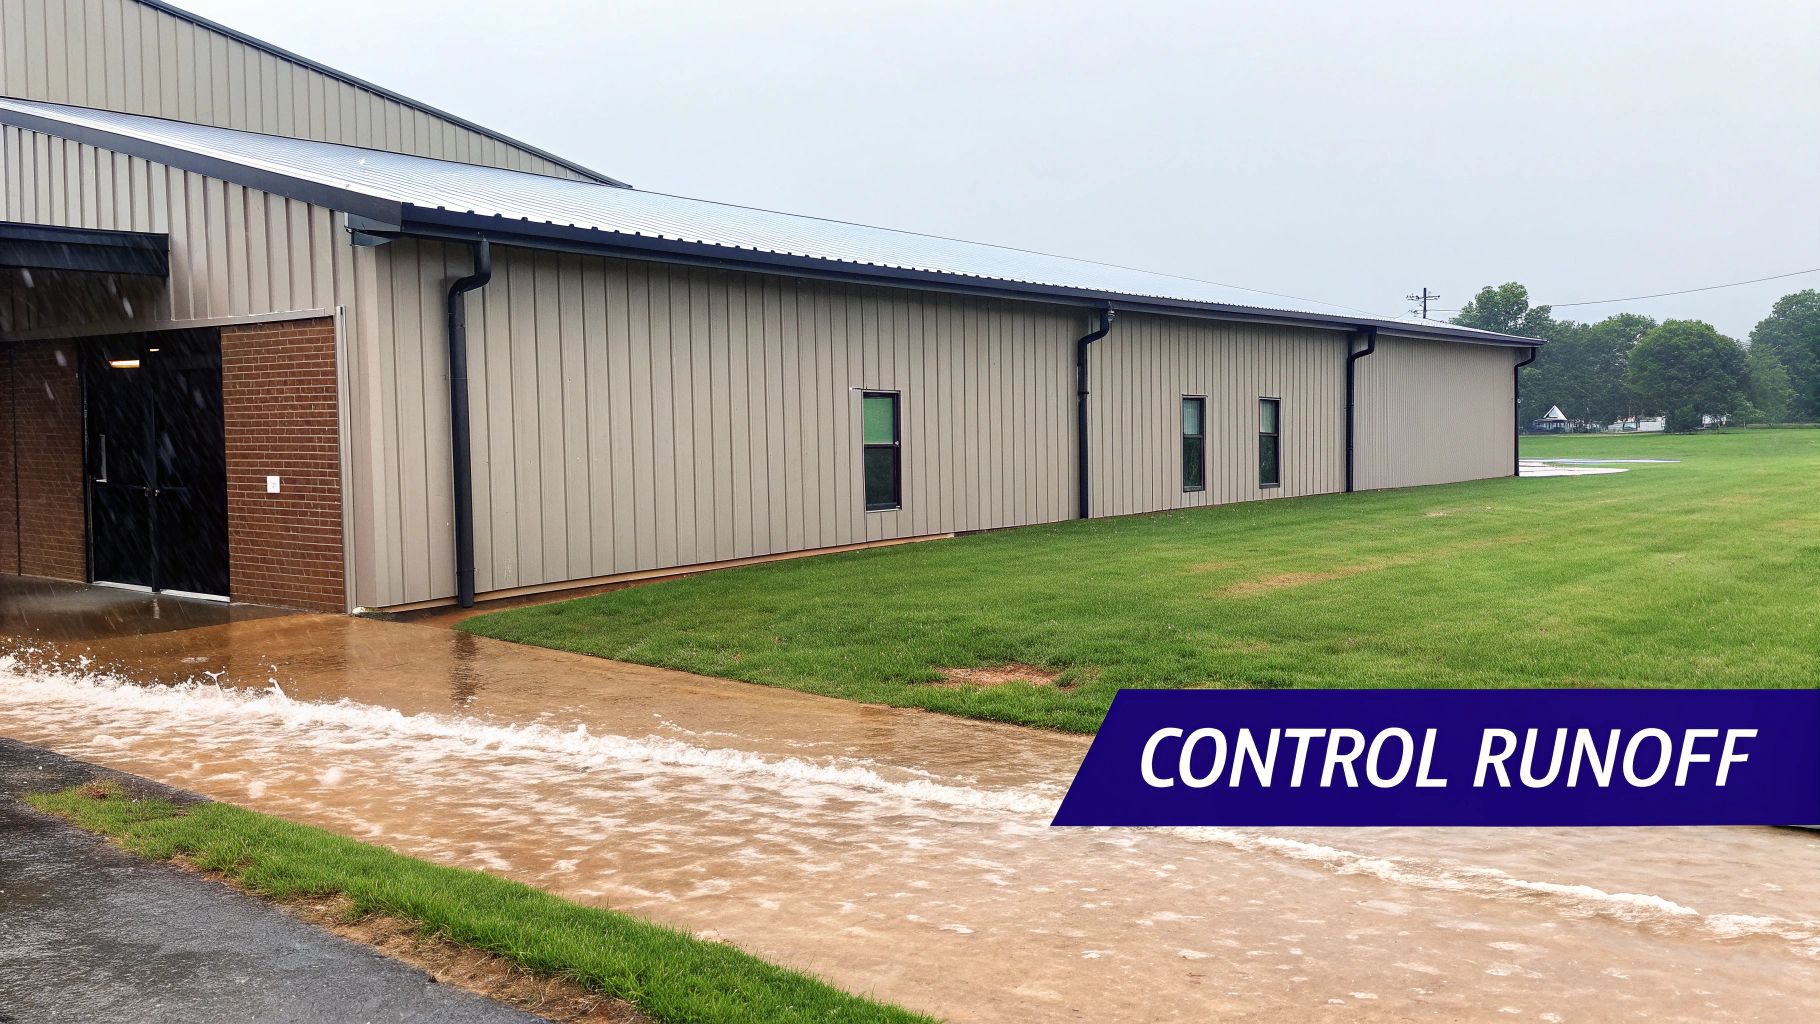
Think of gutters as a non-negotiable defense system for your steel building. A typical asphalt shingle roof will soak up a bit of rain and slow things down. A metal roof does the exact opposite. Its slick surface sends water shooting off at high speed, and without a solid gutter system to catch it, that powerful cascade is going to cause problems.
Protecting Your Foundation and Structure
All that uncontrolled water has to go somewhere, and that’s usually straight down to the base of your building. When water pools there, it soaks the soil and starts to compromise your foundation. Over time, this can lead to serious issues like shifting, cracking, or even sinking.
Water can also find its way underneath the structure, setting you up for some expensive repairs down the road. And that constant splashing against the base of your steel panels? That’s a recipe for rust and corrosion, which will dramatically shorten the lifespan of your investment.
Understanding why steel buildings are ideal for harsh weather helps put this into perspective. These buildings are tough, but they need proper water management to maintain that resilience. By channeling water away, you’re not just protecting the structure; you’re also keeping the siding clean from mud stains.
The Financial and Practical Impact
There’s a reason the global gutter installation market hit USD 8.5 billion in 2023—a huge chunk of that is for commercial and agricultural metal buildings. Pros in the field know that a minimum slope of 1/4-inch per 10 feet of gutter can cut the risk of foundation erosion by up to 70%. That’s a massive return on a simple installation detail.
The real value of a gutter system is preventative maintenance. A few hundred dollars spent on proper installation can save you thousands in potential foundation repairs, landscaping replacement, and structural damage down the line.
At the end of the day, installing gutters is one of the smartest things you can do to ensure your building lasts for decades. It’s a key part of the total protective system, especially when you consider how well steel holds up in bad weather. For more on that, check out our guide on the safety of steel buildings in storms.
Planning Your Project and Gathering Supplies
Everyone’s heard the old saying, “measure twice, cut once.” When it comes to installing gutters on a metal building, it’s more like “plan ten times, install once.” A successful gutter installation is 90% planning and 10% execution. Taking the time to map everything out before you even touch a ladder will save you from making frustrating, time-wasting trips back to the hardware store. This prep work is what separates a professional, leak-free job from a weekend project gone wrong.
Start with a simple walk-around. Grab a good tape measure and record the length of every single eave or fascia board where you’ll be hanging a gutter. Don’t just keep the numbers in your head—jot them down on a quick sketch of your building’s layout. This little map will be your best friend when you start cutting sections.
With your total length figured out, it’s time to think about downspout placement. You want to be strategic here. The whole point is to get water away from your building’s foundation, not create a pond next to your walkway or front door. A solid rule of thumb is to install one downspout for every 40 feet of gutter. This setup can usually handle a typical downpour without getting overwhelmed.
Calculating the Perfect Slope
For gutters to do their job, you need gravity on your side. If you hang them perfectly level, water will just sit there, creating a stagnant mess that attracts mosquitoes and eventually causes the gutter to sag and corrode. The secret is a consistent, gentle slope running toward each downspout.
The industry standard for proper drainage is a slope of at least 1/4 inch for every 10 feet of gutter. So, if you have a 40-foot run, the downspout end should be a full inch lower than the high point.
To get this right, go to the end of the run farthest from your planned downspout. Make a mark for your high point. Then, head over to the downspout end, calculate the total drop you need based on the length, measure down, and make your low-point mark. Snap a chalk line between those two points, and you’ll have a perfect, foolproof guide for your installation.
Your Essential Tools and Materials Checklist
There’s nothing worse than getting halfway through a job only to realize you’re missing a critical tool. Putting gutters on a metal building requires some specific gear that can handle steel siding and trim. And if you want to get a broader sense of the entire construction process, our guide on metal building installation offers some great background info.
Before you start, run through this checklist to make sure you have everything you need right at your fingertips.
Essential Tools and Materials Checklist
Gathering all your supplies before you begin is non-negotiable. This list breaks down exactly what you’ll need to pull off a clean, professional-grade gutter installation on your metal building.
| Category | Item | Key Consideration |
|---|---|---|
| Gutters & Fittings | Gutter Sections (5″ or 6″) | Choose aluminum or steel. 6″ K-style is best for large metal roofs with heavy runoff. |
| Downspouts | Ensure the size (e.g., 3×4 inch) matches the gutter’s capacity. | |
| Elbows & End Caps | You’ll need A-style and B-style elbows to navigate corners and direct flow. | |
| Fasteners & Sealant | Self-Tapping Metal Screws | Must have a neoprene or EPDM washer to create a watertight seal against metal. |
| Gutter Hangers/Brackets | Spacing should be no more than 24 inches apart to prevent sagging under heavy rain or snow. | |
| Metal-Compatible Sealant | Look for a high-grade, flexible sealant designed for outdoor use on metal. | |
| Tools | Cordless Drill | A must-have for driving self-tapping screws into metal framing and trim. |
| Hacksaw or Tin Snips | Needed for cutting gutter sections to the precise length required. | |
| Chalk Line & Level | Essential for accurately marking your slope before installation. |
With these items ready to go, you’re setting yourself up for a smooth and successful project.
Mastering Gutter Mounting on Metal Surfaces
This is where the real work begins. Attaching gutters to a metal building isn’t like tacking them onto a wood-framed house—it demands precision. Metal structures have unique surfaces and connection points, and the last thing you want to do is compromise your building’s siding or roof. The goal is a secure, leak-proof system that lasts.
Most of the time, you’ll be working with a building that has a standard metal fascia or eave trim. This is that flat, vertical surface just below the roofline, and it’s your primary mounting surface. But here’s the catch: you can’t just drive screws into that thin sheet metal and call it a day. It won’t hold. You have to anchor your gutter hangers into the structural frame behind the trim.
First, map out your hanger locations, keeping them no more than 24 inches apart. A stud finder can help locate the frame members, but you can also usually spot the existing screw lines on the trim. When you drive your self-tapping screws, you should feel them bite into the solid steel or wood purlin behind the fascia. That solid connection is what separates a gutter that sags after the first storm from one that stays put for decades. If you want a better picture of the building’s skeleton you’re anchoring into, understanding the basics of a metal building frame can be a huge help.
This simple flowchart breaks down the essential planning you need to do before a single screw goes in.
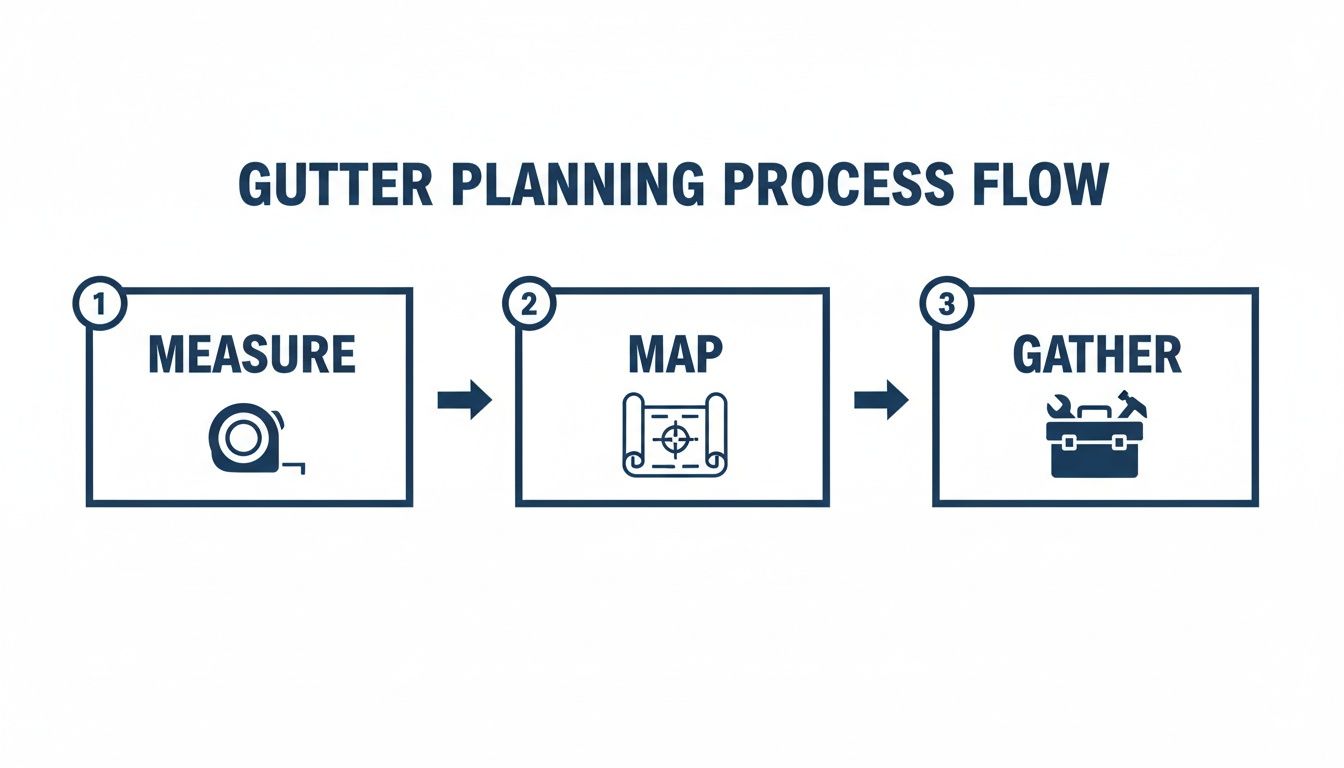
Visualizing your steps—from measuring twice to gathering every tool—reinforces just how critical good preparation is for a smooth installation.
Handling Buildings Without Fascia
So what do you do if your metal building doesn’t have a fascia board? This is pretty common on simpler structures like carports or barns where the rafters or purlins are exposed. In these situations, you can’t mount the gutters vertically. You’ll need to switch gears and use roof strap hangers.
These are specialized hangers with a long metal strap that secures directly to the roof deck itself. The strap slides up under the edge of the roof panels and is screwed into the purlins. The gutter bracket then hangs right off the end of the strap.
Critical Tip: When installing roof strap hangers, you absolutely must use screws with high-quality EPDM or neoprene washers. This creates a watertight seal where the screw penetrates the roof, preventing leaks that can cause rust and serious damage down the road.
This method is a great workaround, allowing you to hang gutters securely even without a traditional surface. Just make sure you follow the manufacturer’s instructions to the letter to keep your roof weathertight.
Mounting on Corrugated or R-Panel Walls
Dealing with ribbed siding like corrugated or R-panel profiles is one of the trickiest parts of a metal building gutter install. The uneven surface makes it impossible to get a downspout strap or bracket to sit flush against the wall. If you try to attach it directly, you’ll just end up crushing the ribs and creating a weak, wobbly connection.
The professional solution here is to use mounting blocks or wedges. These are custom-cut pieces of treated wood, composite material, or dense foam designed to fit perfectly into the siding’s profile.
You can make them yourself by tracing the siding profile onto a block and cutting it out with a jigsaw. Once it fits snugly, you secure the block through the siding and into the building’s structural girts with long screws. This creates a perfectly flat, solid surface for mounting your downspout straps. It’s a clean, secure installation that won’t damage your siding—a small extra step that makes a world of difference in the final quality and durability of the job.
Putting It All Together: Assembling and Sealing for a Leak-Proof System
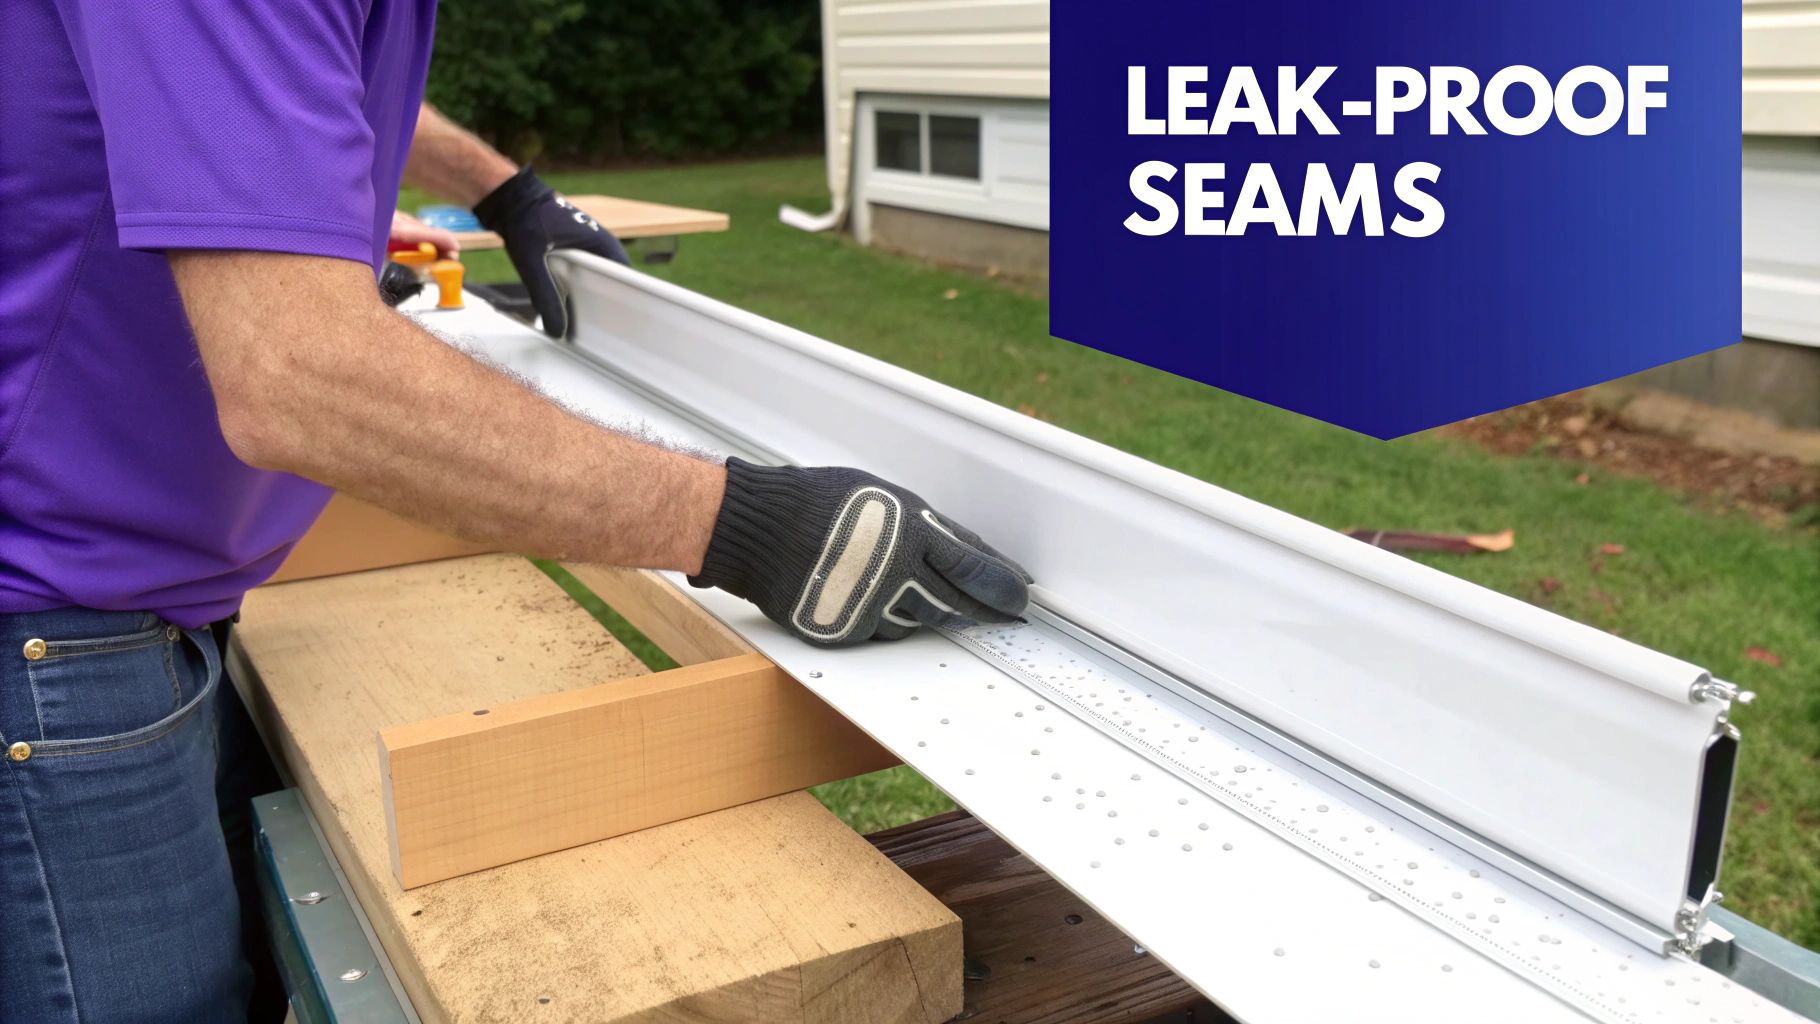
With your hangers firmly mounted, it’s time to turn those individual gutter pieces into a single, water-tight channel. This is the stage where your attention to detail really pays off. A little precision here separates a gutter system that lasts decades from one that’s leaking after the first big storm.
Start by connecting the gutter sections. You’ll want to overlap the pieces by at least 4 to 6 inches, making sure the downstream section is tucked inside the upstream one. This simple trick ensures water flows right over the seam instead of trying to push its way into it. Secure the overlapped pieces with short, self-tapping metal screws or rivets.
Now for the most important part of keeping things dry: sealing the seams. Don’t just grab any old caulk from the hardware store. You need a high-grade, metal-compatible sealant—something like a flexible butyl rubber or polyurethane-based product that’s made to handle temperature swings and metal expansion.
Creating Watertight Connections
Lay a generous bead of sealant along the inside of every seam, completely covering the edges and any screw heads. Use a putty knife or a gloved finger to smooth it out, pushing the sealant into every little gap. Trust me, it’s much better to use a little too much sealant now than to be back up on the ladder fixing a drip later.
The choice of sealant is critical, especially with metal buildings. A metal roof can expand up to 3 inches over a 100-foot span, which puts a ton of stress on any connection point. That’s why pros often use robust sealants like butyl rubber to guarantee a 99% watertight performance in sectional systems.
Next up is installing the downspout outlets. Figure out exactly where you want your downspout, mark the spot, and use a drill and tin snips or a hole saw to cut the opening in the bottom of the gutter. The drop outlet piece fits right in and gets sealed from the inside with that same high-quality sealant.
A rookie mistake is cutting the downspout hole too big. It makes getting a proper seal nearly impossible. Trace the outlet flange before you cut and stay just inside the lines. You want a snug, secure fit.
Assembling and Securing the Downspout
Once the main gutter channel is assembled and sealed, the last major piece is the downspout. This is the vertical pipe that gets the water from the roof safely down and away from your foundation. It’s just a series of straight sections and elbows that you piece together.
Attach an elbow to the drop outlet first. Then, measure and cut a straight piece of downspout to reach the next bend. Use elbows to work your way around overhangs or trim, keeping the downspout snug against the building wall. The final elbow at the bottom should direct water away from the foundation, preferably onto a splash block.
To hold everything in place, use downspout straps every 8 to 10 feet. Secure them to the wall with the same type of self-tapping screws you used for the hangers. This prevents the downspout from rattling around in the wind or getting yanked off during a downpour. The specific type of metal siding and roof you’re working with can affect this part of the job, so having some context on different roof styles for barns and other metal structures is always helpful.
Common Mistakes and Pro Tips for a Clean Finish
Knowing what not to do is just as important as knowing the right steps when you’re hanging gutters on a metal building. A few small, seemingly minor errors can snowball into big problems—think sagging sections, standing water, and leaks that completely defeat the purpose of the project.
Let’s walk through the common pitfalls I see all the time and how to sidestep them for a professional finish that actually lasts.
Getting the Pitch Perfect
One of the most frequent mistakes is setting the wrong pitch, or worse, no pitch at all. A perfectly level gutter is just a stagnant pond waiting to happen. It becomes a breeding ground for mosquitos and the constant moisture will kickstart corrosion. You need to create a subtle, consistent slope and let gravity do the heavy lifting for you.
Pro Tip: Don’t just eyeball it. Seriously. Snap a chalk line from your high point to your low point before you hang a single bracket. This is the only way to guarantee a uniform grade of at least 1/4 inch per 10 feet and ensure every drop of water flows right where it belongs: to the downspout.
Spacing and Sealing Done Right
Another classic rookie mistake is spacing the gutter hangers too far apart. Sure, it might save you a few minutes during the install, but hangers spaced wider than 24 inches are a recipe for sagging. The first time a heavy downpour or a bit of snow hits, that weight will create low spots where water and debris collect, putting a ton of stress on the whole system.
Using the right sealant is just as critical. Grabbing a generic tube of all-purpose caulk from the hardware store is a bad move. Metal expands and contracts a surprising amount with temperature swings, so you need a flexible, high-grade sealant specifically made for metal and outdoor use. Otherwise, those seams will crack and leak in no time.
Here are a few other pro tips that make a huge difference:
- Install Gutter Guards: These mesh or solid covers are a fantastic addition. They keep leaves and debris from clogging up the system and drastically cut down on your long-term maintenance headaches.
- Crimp Your End Caps: Don’t rely on sealant alone to hold things together. Take the time to securely crimp the end caps onto the gutter. This creates a tight, mechanical fit before you seal the inside seam.
- Follow a Checklist: When you’re juggling multiple steps, it’s easy to miss something. Using a structured approach prevents those oversights. A detailed construction quality control checklist can be a lifesaver for making sure every step is buttoned up correctly.
Thinking ahead is the real pro move. Beyond the installation itself, plan for routine maintenance. It might be helpful to look at a gutter cleaning price guide to get a sense of what professional service costs down the road. This kind of forward-thinking keeps your new system performing perfectly for years to come.
Got Questions About Your Gutter Install?
Even the best-laid plans run into snags. When you’re in the middle of a hands-on project like hanging gutters on a metal building, questions are bound to pop up. Getting the right answers is what separates a solid, leak-free gutter system from one that’ll give you grief for years to come.
We get these questions all the time from building owners and DIY pros, so let’s tackle the most common ones. This is the practical advice you need to handle the unique challenges of working with steel and get the job done right.
What Kind of Fasteners Should I Use?
Your choice of fastener is everything when you’re attaching something to a metal building. For gutters, you absolutely need to use self-tapping screws designed specifically for metal. These are a game-changer because they drill their own pilot hole, which makes the whole process faster and much cleaner.
Look for screws that come with a small, built-in neoprene or EPDM washer. As you tighten the screw, that little rubber washer compresses and creates a watertight seal. This isn’t just a nice-to-have; it’s essential for preventing moisture from getting into the connection point and starting rust or leaks. Make sure your screws are long enough to go through the fascia or trim and get a solid bite into the building’s frame.
Can I Screw Gutters Directly into a Standing Seam Roof?
Let me be crystal clear: never drill, puncture, or screw anything into standing seam metal roof panels. Not ever. The moment you create a hole, you’ve created a direct path for water to get in, which can lead to serious damage and will almost certainly void your roof’s warranty.
The only correct way to handle this is with non-penetrating clamps made for standing seam roofs. These clever devices are designed to clamp directly onto the raised vertical seams of the panels.
These clamps give you a rock-solid mounting point for your gutter brackets without putting a single hole in your roof. It’s the only method the pros use, and it’s non-negotiable if you want to protect the integrity of your roof.
How Do I Handle Thermal Expansion?
Metal moves. It expands in the heat and contracts in the cold, and this movement can destroy a long, continuous gutter run if you don’t plan for it. Both your building and your new gutters will be shifting with the temperature, and without a little slack, the system can buckle, warp, or even pull itself apart at the seams.
For any gutter run longer than 40 feet, you need to install an expansion joint. It’s a special fitting that looks like a little accordion and sits between two sections of gutter. This joint allows each section to move independently with temperature changes, absorbing all that stress so your gutter system stays intact.
At Icon Steel Buildings, we believe every part of your structure should be built to last. For a building designed with durability and quality in mind from the ground up, explore our custom options at https://iconsteelbuildings.com.