
Ever thought about building a professional-grade workshop like a life-sized LEGO set, where every single piece is engineered to snap together perfectly? That’s pretty much the big idea behind metal shop building kits. These are complete, all-in-one packages that give you the entire structural system for your new building—from the massive steel I-beams to the pre-drilled wall panels and every last nut and bolt—delivered right to your property.
What Are Metal Shop Building Kits
At its core, a metal shop building kit is a prefabricated construction solution. It’s designed from the ground up to take all the guesswork and nasty surprises out of a typical building project. Traditional wood-frame or block construction involves a ton of on-site measuring, cutting, and hoping everything fits. These kits, on the other hand, are engineered and manufactured with incredible precision in a controlled factory setting.
This factory-first approach means every component is made for a flawless fit. Think of it like this: it’s the difference between getting a custom-tailored suit and buying a bolt of fabric to try and sew one yourself. The kit shows up with everything you need for the main structure, turning a complicated construction job into a much more predictable and straightforward assembly process.
The Core Components of a Kit
So, what are you actually getting in one of these kits? While the exact contents can vary a bit, most of them include the essential building blocks to get a complete, weathered-in shell up and standing.
A typical package will have:
- Primary Framing: These are the heavy-duty steel I-beams that act as the building’s skeleton. This is where all the core strength and support comes from.
- Secondary Framing: This includes smaller steel parts like girts (for the walls) and purlins (for the roof). They run between the main frames and provide the structure to attach the exterior panels to.
- Wall and Roof Paneling: These are the pre-cut, and often pre-colored, metal sheets that form the skin of your building, keeping the weather out.
- Fasteners and Hardware: Every single nut, bolt, and screw needed for assembly is included. You won’t have to worry about whether you have the right hardware for the job.
Beyond the Basics
The real magic of metal shop building kits is their predictability. Because all the engineering is handled upfront and the materials are fabricated to exact specs, projects just move faster and are far more likely to stay on budget. You’ll deal with fewer surprises, less wasted material, and a massive reduction in the time you need to pay for on-site labor.
By shifting the most complex parts of construction from the chaos of a job site to the precision of a factory, metal building kits offer a smarter, more efficient way to build a durable, high-quality workshop, garage, or commercial space. That efficiency almost always saves you both time and money.
This system is a tough, reliable alternative for anyone needing a solid workspace, from a weekend mechanic to a full-blown commercial operation. To see how these components come together, you can explore the different designs of prefabricated metal building kits and find a structure that’s a perfect match for your needs. It’s an approach that completely changes the game, moving away from a custom, ground-up build to a highly efficient assembly project.
Comparing the Main Types of Metal Buildings
Picking the right structure for your workshop is the first big decision you'll make, and it sets the stage for everything else. Think of it like choosing the chassis for a custom car—the frame dictates what you can build on top of it. In the world of metal shop building kits, the choice really comes down to two dominant designs, each with its own distinct advantages.
The main players are Rigid Frame buildings, also known as I-beam structures, and Arch-Style buildings, which you probably know as Quonset huts. Getting a handle on their core differences is the key to making sure your new shop meets your needs today and can grow with you tomorrow. Let's break down how they stack up.
Rigid Frame I-Beam Structures
The Rigid Frame building is the undisputed heavyweight champion of the metal building world. It relies on massive, solid steel I-beams to create a powerful, self-supporting skeleton. This design gives you traditional straight walls and a classic gabled roof, opening up a cavernous, completely unobstructed interior.
Picture a commercial auto garage or a small manufacturing plant. The ability to have a huge, clear-span space with no pesky support columns getting in the way is the signature benefit of an I-beam building.
- Maximum Usable Space: The straight, vertical walls mean you get 100% usable floor-to-ceiling space. This is a non-negotiable for anyone looking to install car lifts, tall pallet racking, or run large equipment.
- Design Flexibility: Since the frame does all the heavy lifting, you can pop in conventional doors, windows, and other features pretty much anywhere you want without messing with the building's structural integrity.
- Expansion Ready: These structures are literally designed to grow. Adding more "bays" to make the building longer is a remarkably straightforward process.
As the diagram shows, when you need a permanent, engineered structure, a prefabricated kit is the most reliable and direct path forward.
Arch-Style Quonset Hut Buildings
The Arch-Style building, or Quonset hut, is a masterclass in structural efficiency. That iconic semi-circular shape isn't just for looks—the arch is the structure. Corrugated steel panels are simply bolted together to form a self-supporting shell, which means there's no need for any interior beams or trusses at all.
This design is incredibly tough, especially against punishing wind and heavy snow, because the curve naturally spreads the load across the entire building.
An arch building gets its strength from its shape, much like an eggshell. This built-in structural integrity means it uses less material, often making it the more budget-friendly choice for basic storage or a simple workshop.
The trade-off, however, is the curved walls. You inevitably lose some usable space near the sides of the building. While it's perfect for parking vehicles or storing bulk materials, trying to push tall shelving or equipment flush against the wall just isn't practical.
To get a deeper look at these designs and more, you can learn all about the different types of steel buildings we offer.
Rigid Frame vs Arch-Style Buildings at a Glance
To make the choice even clearer, here's a side-by-side comparison. This table helps you quickly see how the two primary types of metal shop building kits stack up against each other, making it easier to decide which one fits your project best.
| Feature | Rigid Frame (I-Beam) | Arch-Style (Quonset Hut) |
|---|---|---|
| Usable Space | 100% usable interior with straight walls | Reduced usable space near curved walls |
| Interior | Completely open, clear-span | Self-supporting arch, no interior frame |
| Customization | High; easy to add windows, doors, etc. | Limited; modifications can be complex |
| Foundation | Requires a more substantial concrete foundation | Can often be built on a simpler foundation |
| Ideal Use Cases | Commercial shops, manufacturing, warehouses | Garages, agricultural storage, personal workshops |
| Cost | Higher initial investment | Generally more cost-effective |
| Expansion | Designed for easy, modular expansion | Difficult and expensive to expand |
Ultimately, your decision should be guided by how you plan to use your building day-to-day.
Making the Right Choice for Your Shop
So, which one is right for you? It all boils down to your intended use.
If you need maximum interior volume for serious industrial work, commercial vehicle maintenance, or running a business, the Rigid Frame I-beam structure is the clear winner. Its straight walls and clear-span design offer versatility that's simply unmatched.
On the other hand, if you’re looking for a tough, cost-efficient building for general storage, a hobbyist workshop, or agricultural use, the Arch-Style Quonset hut offers exceptional strength and value. It’s simpler to put up and often requires a less intensive foundation, which can save you money on the overall project.
Essential Factors to Consider Before You Buy
Putting your money down on a metal shop building kit is a big decision and a serious investment. Before you sign anything, you need to think beyond the sticker price and basic dimensions. It’s the details that really make or break a project, and getting them right from the get-go is how you avoid expensive headaches later on.
Think of this part of the process as your pre-flight checklist. A pilot wouldn't dream of taking off without inspecting every critical system, and you shouldn't either. Overlooking something as simple as how you'll move around inside the shop or as complex as local permit laws can ground your project before a single bolt is turned.
Let's walk through the absolute non-negotiables: mapping out your layout, understanding the steel you're buying, picking the right upgrades, and tackling the all-important foundation and permit process.
Plan Your Space and Workflow
One of the most common mistakes people make is picking a size based only on the equipment they have right now. A truly useful shop isn’t just about storage; it's designed around workflow.
Grab a piece of paper and sketch out a rough floor plan. Figure out where your biggest tools will live and how much elbow room they need to operate safely. More importantly, think about the path a project takes from start to finish. You need wide, clear lanes for moving things—whether that's rolling an engine hoist across the floor or backing in a truck. A building that feels massive when it's empty can get tight and frustrating real quick once it's full.
A well-planned shop isn't just about storage; it's about movement. Your layout should minimize unnecessary steps and create dedicated zones for different tasks, such as fabrication, assembly, and finishing. This foresight saves immense frustration down the road.
Decode Steel Gauge and Structural Strength
Here’s a secret: not all steel is the same. The real strength and longevity of your building come down to its steel gauge. The system is a little backward, so pay attention: the lower the gauge number, the thicker and stronger the steel. It's that simple.
For instance, 26-gauge steel panels are a common choice for high-quality kits because they hit a sweet spot between strength and cost. A cheaper kit might use thinner 29-gauge panels, which are far more likely to get dented or damaged over the years.
When you're looking at the frame, you'll hear terms like "red iron," which refers to heavy-duty I-beams coated with a red oxide primer. These solid steel frames are what allow for those huge, wide-open interiors without any columns in the way. Knowing these terms helps you ask the right questions about how your building will hold up over the long haul.
Choose Customizations That Add Value
The basic steel shell is just your starting point. The right accessories and upgrades are what turn that shell into a comfortable and practical workspace.
- Insulation: This might be the single most important upgrade you can make. Insulating your walls and roof is crucial for keeping the temperature stable, stopping condensation from dripping on everything, and slashing your energy bills. You can choose from traditional fiberglass, spray foam, or rigid panels.
- Doors and Windows: Don’t just plan for one way in and out. Large roll-up or overhead doors are a must for getting vehicles and big equipment inside. Placing windows and skylights strategically can flood the space with natural light, making it a better place to work and cutting down on your electricity use.
- Ventilation: If you're doing any welding, painting, or running engines, proper airflow isn't just about comfort—it's about safety. Make sure to consider adding ridge vents, louvers, or powered exhaust fans to your design to keep the air clean.
Understand Foundation and Permit Requirements
This is the step that trips up a lot of first-time buyers. A permanent metal building isn't a garden shed you can plop down anywhere. It's a serious structure that legally requires a proper foundation and a green light from your local government.
First, your building supplier will provide engineered foundation plans, sometimes called anchor bolt plans. These aren't generic suggestions; they are highly specific blueprints for your building's exact size, weight, and the local wind and snow loads it needs to handle. You'll need to hire a local concrete contractor to pour a foundation—usually a reinforced slab—that follows these plans to the letter.
Second, before you even think about ordering a kit, you must talk to your local building department. Every town, county, and city has its own set of rules and permit requirements. You’ll have to submit your building plans for their approval before any work can start. Trying to skip this step is a recipe for disaster that can lead to hefty fines or even an order to tear down your new building.
For a deeper dive into this critical stage, check out our complete guide on buying a metal building, which breaks down the entire process.
A Realistic Breakdown of Project Costs
Getting a handle on the true cost of your metal shop building project is the most important step in planning. The price you see on the building kit is a big number, for sure, but it’s really just the first piece of a much larger financial puzzle. If you want to avoid those surprise expenses that can completely derail your budget, you have to look at the total investment in three distinct parts.
Thinking of your project this way—the kit package, the site work, and the finishing—gives you a clear and honest roadmap. It helps you account for every dollar from the moment you break ground to the day you finally flip on the lights. Let’s break down each category to paint a realistic picture of what this will actually cost.
The Kit Package and Delivery
This is the most straightforward part of the budget. The cost here is tied directly to the size, design, and specific features of the metal shop building kit you choose. A simple, no-frills 30×40 kit is naturally going to cost less than a huge 60×100 structure loaded with custom options.
The initial price is shaped by a few key factors:
- Building Size: Square footage is the main cost driver. As the length, width, and height go up, so does the amount of steel needed.
- Customizations: Every upgrade adds to the bottom line. This includes things like adding roll-up doors, walk-in doors, windows, skylights, and premium color finishes.
- Engineering Requirements: If you live somewhere with heavy snow or high winds, your building will need thicker steel and beefier framing, which adds to the price.
- Delivery Fees: Your kit is made off-site and delivered on big trucks. The distance from the factory to your property will determine the shipping cost.
For a more detailed look at specific building sizes and their associated kit prices, you can explore our comprehensive guide on steel building kit prices.
Site Preparation and Foundation Work
This is where a lot of people underestimate the costs. Long before your kit shows up, the land itself has to be prepped, and that means bringing in professional contractors and heavy machinery. This phase is non-negotiable; it ensures your building has a stable, level base to stand on for decades to come.
Typical expenses you'll see in this category include:
- Excavation and Grading: Clearing the build site of trees, rocks, and whatever else is in the way, then leveling the ground to create a flat building pad.
- Concrete Foundation: This is a major expense. You’ll need to hire a concrete contractor to form, pour, and finish a reinforced slab based on the engineered plans that come with your kit. A standard concrete slab can run anywhere from $5 to $10 per square foot.
The foundation is the literal bedrock of your entire project. Cutting corners here is a recipe for serious, long-term structural problems. Always follow the manufacturer’s engineered plans to the letter.
For a broader understanding of the financial side of construction, you might find a comprehensive guide to construction cost breakdown helpful.
Assembly and Interior Finishing
This final category covers the labor to actually put the building up and all the work needed to turn that empty steel shell into a fully functional shop. The choices you make here will have a huge impact on your final budget.
This phase includes costs for:
- Erection Labor: Are you going to tackle assembly yourself (DIY), or will you hire a professional erection crew? Hiring a crew costs more, but it dramatically speeds up the process and ensures it’s built right.
- Utilities: Running electrical wiring for lights and outlets, plus any plumbing for sinks or a bathroom, requires licensed professionals.
- Insulation: Insulating your shop is a smart move for climate control and energy efficiency, but it does add to the upfront material and labor costs.
- Interior Finishes: This covers anything from interior walls and flooring treatments to shelving and organizational systems you plan to install.
These structures are part of the larger pre-engineered metal building (PEMB) industry. The global PEMB market was valued at around USD 40.6 billion and is projected to hit nearly USD 66.7 billion by 2035, growing at a compound annual growth rate of about 4.62%. This growth is fueled by the cost-effectiveness and quick assembly times that make these kits such a compelling option for so many different uses.
Your Step-by-Step Assembly Guide
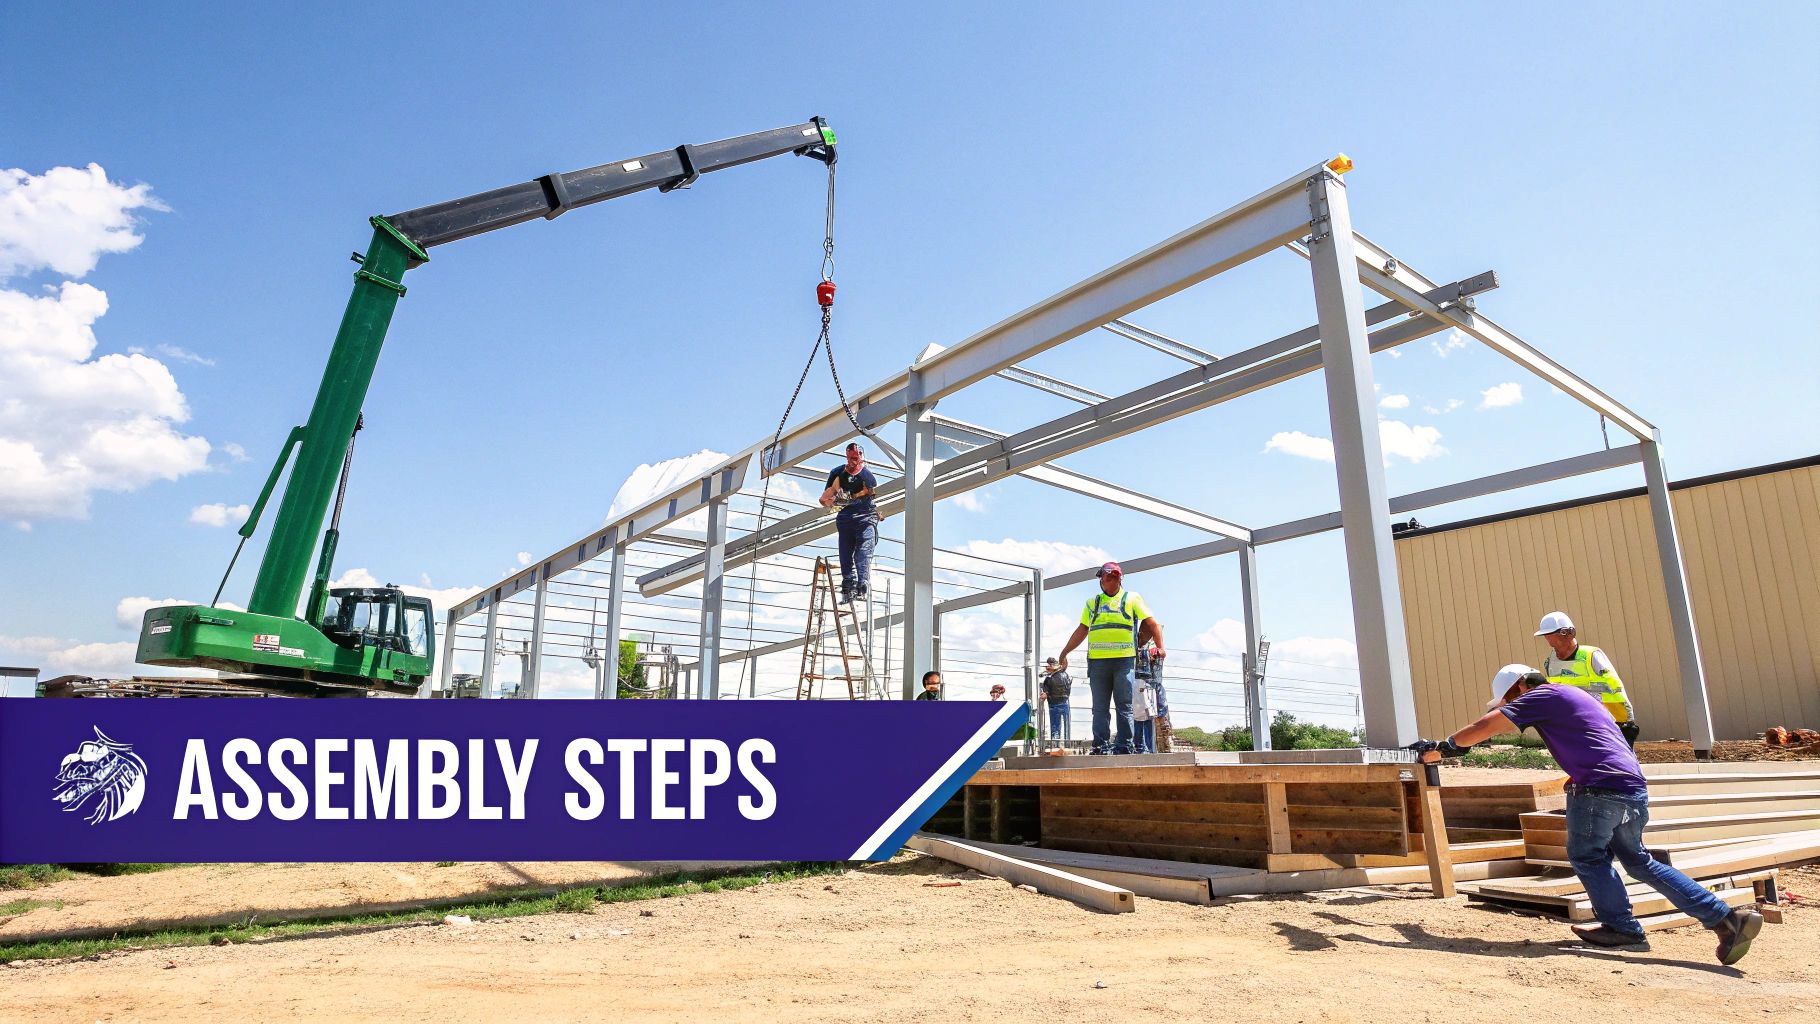
Watching a stack of steel components transform into a fully functional workshop can feel like a huge undertaking. But the truth is, the process is surprisingly straightforward and manageable. A metal shop building kit is designed for a systematic build, turning what looks like a complex construction project into a series of clear, achievable steps. Let’s break down that journey, from the moment the delivery truck arrives to the final bolt being tightened.
The real work starts long before you ever lift a steel frame. You’ll want to make sure your land is properly graded and prepared by following an expert guide to site preparation excavation. Once your concrete foundation is cured and ready, the fun begins.
The very first thing you need to do? A thorough inventory. Lay out all the delivered parts and meticulously check them against the packing list. You want to be absolutely sure every beam, panel, and fastener is present and accounted for before you start.
The Main Phases of Erection
With all your parts confirmed, the assembly process follows a logical sequence. Think of it like building a skeleton, adding the protective skin, and then installing all the functional features. Each phase builds right on top of the last, creating a strong, cohesive structure.
Your assembly journey is broken down into these key stages:
- Main Frame Assembly: This is where your building really starts to take shape. You’ll assemble the big guns first—the primary I-beam columns and rafters—while they’re still on the ground. Then, you lift them into place and secure them to the anchor bolts already embedded in your foundation.
- Secondary Support Installation: Next up are the girts (for the walls) and purlins (for the roof). These smaller steel pieces run between the main frames, creating the crucial connection points for all your exterior sheeting.
- Wall and Roof Paneling: Once the full frame is up, you can start attaching the metal wall and roof panels. This is the step that encloses the structure, making it weathertight and giving it that finished look.
- Doors, Windows, and Trim: The final step involves installing all the framed openings, like your roll-up doors and windows. You'll also add corner trim, eave trim, and other finishing pieces that seal up all the joints and give your building a clean, professional appearance.
For a much deeper dive, you can follow our complete instructions on how to erect a metal building, which provides a more detailed walkthrough for each phase.
DIY or Hire a Pro?
One of the biggest decisions you'll make is whether to assemble the kit yourself or bring in a professional crew. A DIY approach can save you a serious chunk of change on labor costs, but it definitely requires the right tools, some construction know-how, and a good amount of time.
Hiring a certified contractor or a local erection crew costs more upfront but offers peace of mind. Experienced pros work faster, are equipped to handle heavy components safely, and will make sure the building is assembled exactly to engineering specs—which is often critical for validating your warranty.
The global market for metal building materials, which includes every component in these kits, was valued at USD 30.5 billion and is on track to hit around USD 48 billion by 2032. North America is leading the charge, making up roughly 30.4% of that market thanks to strong infrastructure investment and the wide adoption of efficient building methods like these kits. This growth really highlights just how reliable and popular pre-engineered steel construction has become.
Still Have a Few Questions?
As you get closer to pulling the trigger on your new metal shop building kit, a few final questions usually pop up. It's completely normal. Getting these last details ironed out is the final step before you can move forward with confidence. Let's tackle some of the most common ones we hear from buyers just like you.
How Long Until My Kit Arrives?
From the day you finalize your order to the moment it’s delivered to your property, you can generally expect a timeframe of 4 to 8 weeks. This window gives us the time needed for the detailed engineering work, the precision fabrication of every component, and coordinating all the shipping logistics.
Of course, a highly customized or unusually complex design might add a little extra time to that schedule. It's a good idea to factor this lead time into your overall project plan to keep everything running smoothly.
Are These Buildings Really Tough Enough for Rust and Bad Weather?
You bet they are. They're specifically engineered from the ground up to stand strong against whatever nature throws at them. The steel components are treated with advanced protective coatings, like Galvalume, which is a powerful blend of zinc and aluminum designed to fight off corrosion for decades.
On top of that, every single kit is designed to meet or even exceed the local building codes for wind and snow loads right where you live. This isn't a one-size-fits-all approach; it ensures your shop is ready to handle the toughest weather in your specific region.
The engineering that goes into these kits is about more than just dimensions. It's a science focused on long-term resilience. Your building is pre-validated to handle specific environmental stresses, which takes all the guesswork out of the equation compared to traditional construction.
Can I Insulate My Metal Shop Building?
Absolutely—and we strongly recommend it. Insulating your shop is the difference between having a simple steel shell and a comfortable, functional workspace you can use all year round. Plus, you’ll see some serious long-term energy savings.
You’ve got a few great options to choose from, depending on your budget and needs:
- Fiberglass Batts: The classic, cost-effective choice that gets the job done.
- Spray Foam: For a superior air seal and a higher R-value, this is top-of-the-line.
- Rigid Board Insulation: A durable and highly efficient thermal barrier.
Many suppliers, including us, can even provide pre-cut insulation packages that are made to fit your building’s panels perfectly. It makes the installation process a whole lot simpler.
Ready to get a precise quote for a structure that meets your exact needs? The team at Icon Steel Buildings is here to help you design the perfect workshop. Get your custom quote today by visiting us at https://iconsteelbuildings.com.