
Building a horse barn is a huge undertaking, and I can tell you from experience: the real work happens long before the first shovel hits the dirt. Thoughtful planning is more critical than the construction itself. This is where you translate your vision into a practical, safe, and efficient blueprint for your equine partners, avoiding headaches down the road.
Planning Your Perfect Horse Barn Before You Build
The journey to your dream barn starts with a clear vision matched to your specific needs. Are you picturing a cozy two-stall barn for a pair of beloved companions, or are you scaling up for a full-blown training facility? Your answer will shape every single decision, from the overall layout right down to the stall hardware.
This initial planning phase is your chance to prevent future frustrations. A well-designed barn doesn't just keep your horses safe and comfortable; it streamlines your daily chores, saving you precious time and energy for years to come.
Matching Barn Design to Your Needs
First things first, get honest about your current and future equestrian activities. A private owner's needs are worlds apart from a commercial boarding operation.
Think through these key factors:
- Number of Horses: Always plan for your current herd plus any potential additions. A good rule of thumb is to add at least one or two extra stalls for flexibility—you’ll thank yourself later.
- Discipline and Use: A dressage training facility has different needs than a trail riding barn. You might need space for a larger arena, dedicated grooming bays, or specific farrier areas.
- Storage Requirements: How much hay do you really need to store? Where will your tractor, implements, and bedding live? Carving out dedicated space for these is non-negotiable for an organized and fire-safe environment.
The layout is the backbone of your barn’s functionality. While a classic centerline aisle barn is efficient and timeless, don't be afraid to think outside the box. L-shaped and U-shaped barns, for instance, are great for creating a sheltered central courtyard perfect for turnout or equipment staging. These designs offer excellent protection from the elements and can seriously improve your daily workflow.
A common mistake I see all the time is underestimating storage. You will always need more room for hay, bedding, and equipment than you think. Plan for at least 25% more storage space than you think you need right now.
Navigating Zoning Laws and Permits
Before you get too attached to a particular design, it's time for the less glamorous but absolutely essential step: checking local regulations. Every town, county, and municipality has its own set of rules for agricultural structures.
Start by calling your local planning or zoning department. You need to ask about:
- Setback Requirements: How far does your barn need to be from property lines, wells, septic systems, and existing homes?
- Building Permits: What paperwork do they need? This often includes engineered blueprints, a detailed site plan, and sometimes even soil reports.
- Agricultural Zoning: Are there specific restrictions or, better yet, allowances for equine facilities in your area?
Skipping this step can lead to disaster—costly fines, forced demolition, or months of project delays. It's always better to have all your permits in hand before you even think about breaking ground.
Creating a Realistic Budget
Building a horse barn is a major financial investment. A detailed budget isn't just a good idea; it's your roadmap to a successful project without sleepless nights. Costs can swing wildly based on size, materials, location, and how much custom work you want.
Take a look at this breakdown. It gives you a pretty good idea of where the money goes on a typical horse barn project.
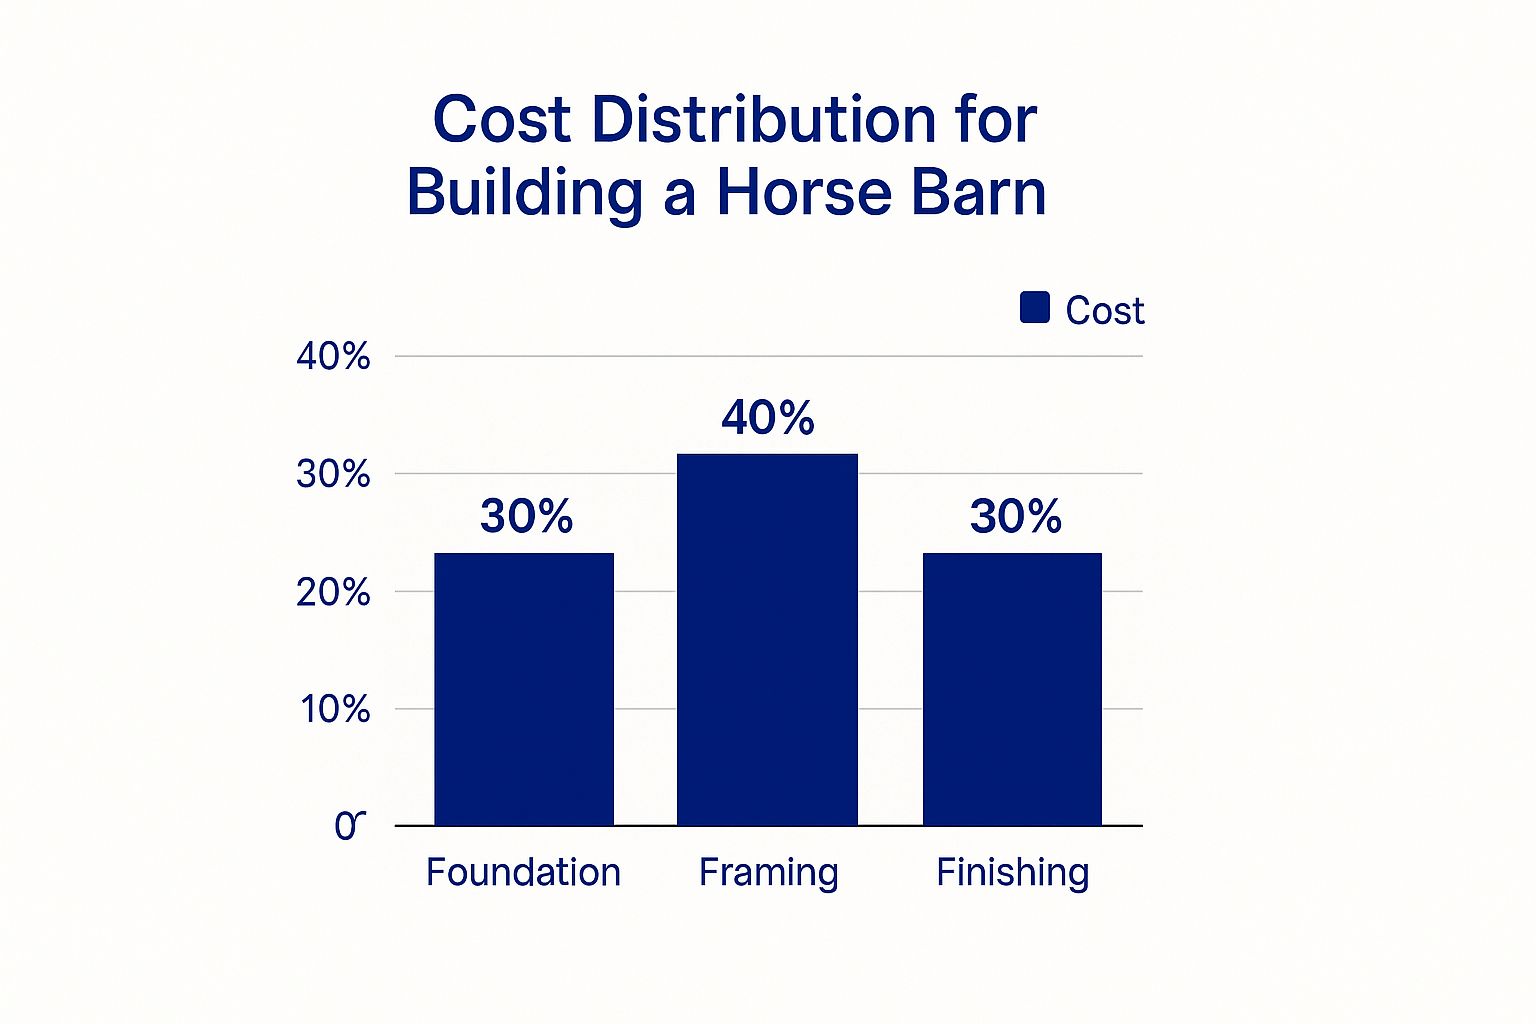
As you can see, the building shell itself is a huge chunk, but don't overlook what it takes to get the site ready and finish out the inside. Those costs add up fast.
To help you get a handle on the numbers for your own project, it’s useful to see how different construction types stack up.
Horse Barn Project Cost Breakdown
This table provides a snapshot of estimated costs per square foot for different horse barn construction methods. It's a great starting point for figuring out which approach aligns with your budget and long-term goals.
| Construction Type | Average Cost per Sq. Ft. | Key Features |
|---|---|---|
| Pole Barn (Wood Frame) | $25 – $75 | Economical upfront cost, versatile design, good for DIYers. Susceptible to rot and pests over time. |
| Steel Building Kit | $40 – $100 | Highly durable, fire-resistant, low maintenance. Faster construction time and customizable layouts. |
| Traditional Stick-Built | $70 – $150+ | Fully custom design, high-end finishes, traditional aesthetic. Slower construction and higher labor costs. |
Keep in mind that these are just ballpark figures. Your final cost will depend heavily on your specific location, interior finishes, and any custom features you add.
When you're ready to build out your own budget, break it down into these main categories:
- Site Preparation: This covers excavation, grading, and running trenches for utilities.
- Foundation: Whether you’re pouring a full slab, piers, or footers, this is a critical line item.
- The Building Shell: This is the cost of the steel building kit or the raw lumber and materials. Many companies offer a wide range of customizable options for your steel building kit.
- Labor: Don't forget to factor in costs for the erection crew, foundation work, and interior finishing.
- Interior Components: Stalls, mats, tack room fixtures, and wash stall equipment all need to be in the budget.
- Utilities: This includes all electrical wiring, plumbing, and lighting fixtures.
- Contingency Fund: This one is non-negotiable. Always, always set aside 10-15% of your total budget for the unexpected. Trust me, something will come up.
Choosing the Right Site and Preparing the Ground
Where you decide to build your horse barn is a whole lot more permanent than the color you paint it—and far more critical. The perfect spot on your property isn't just about the view; it’s about setting your barn and your horses up for health, safety, and convenience for decades to come. A bad choice now can mean a constant, frustrating battle with mud, wind, and logistical headaches down the road.
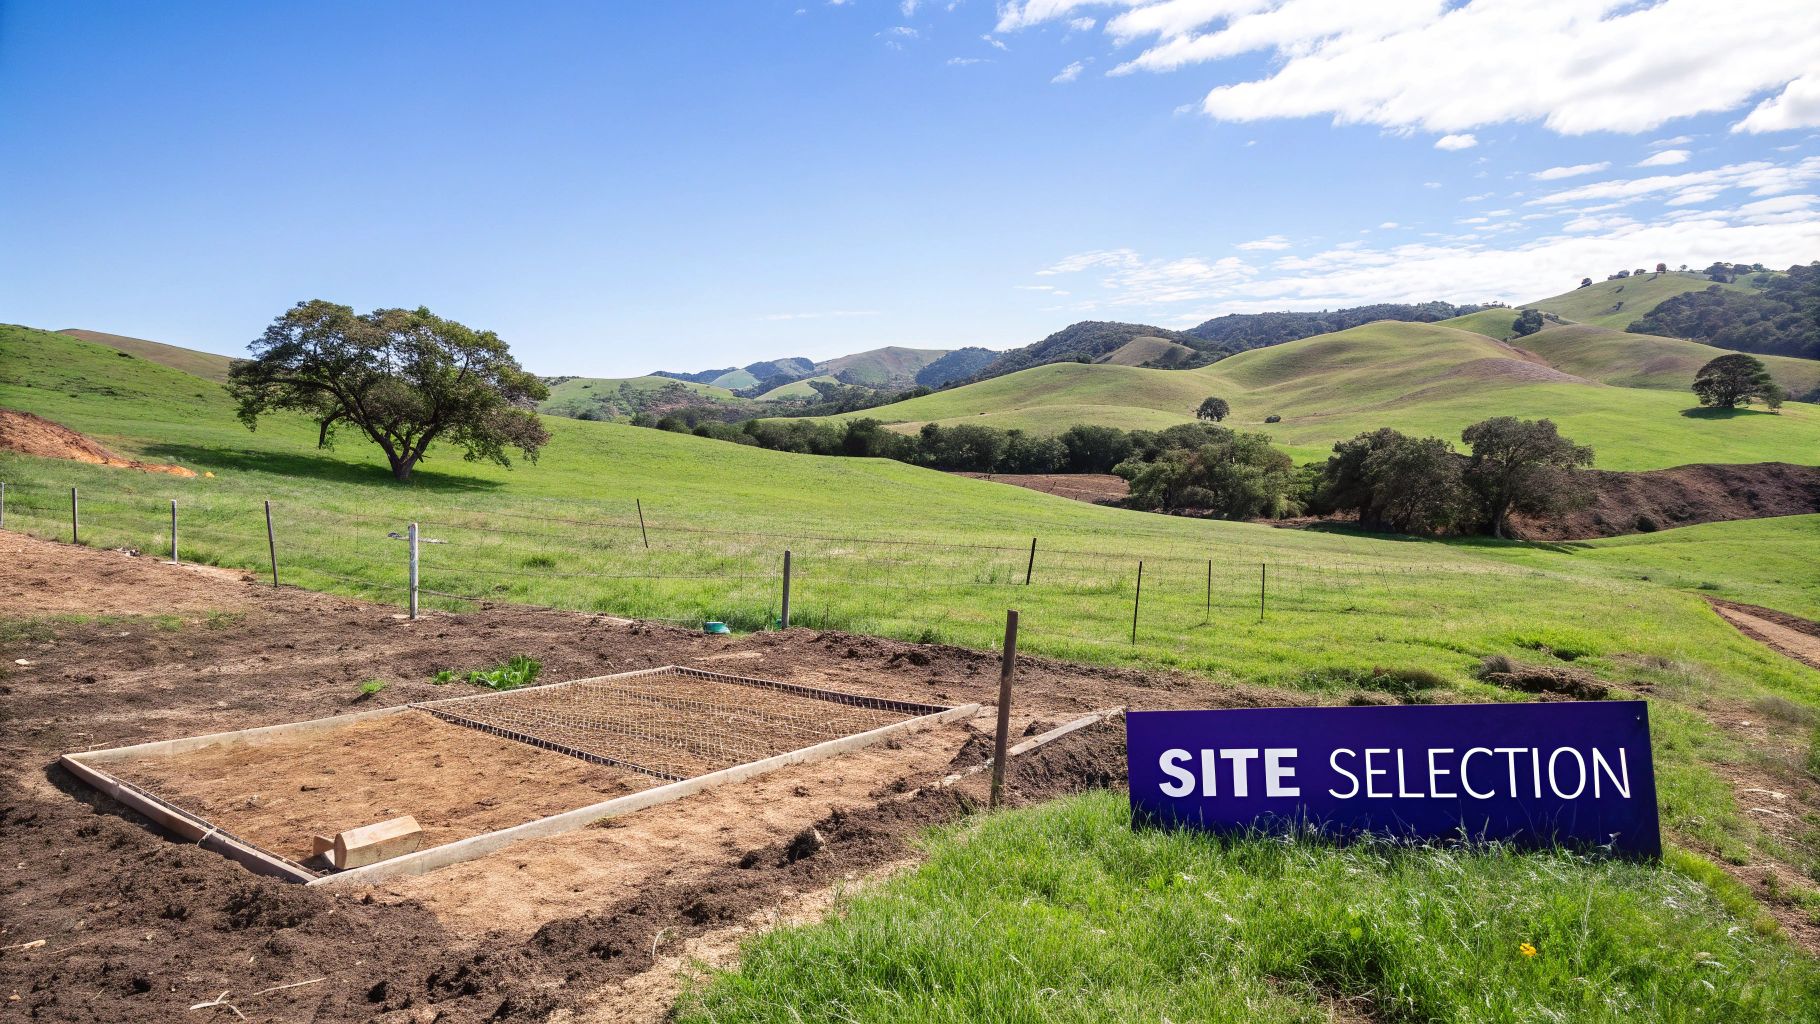
It all starts with a simple walk around your property, but with a different set of eyes. Look for a spot that’s slightly elevated. You want to avoid any low-lying areas where water naturally wants to pool. That one decision alone will save you from a world of drainage nightmares.
Conducting Your Site Assessment
Before you drive a single stake into the ground, you need to think like an engineer and a horse person. The best site is always a balance between what the landscape offers and what you need for daily operations.
Get out there and evaluate potential locations with this checklist in mind:
- Drainage: This one is non-negotiable. The ground must have a gentle, natural slope moving away from your barn's future footprint. A 2-5% grade is the sweet spot—just enough to shed water without being noticeably steep.
- Accessibility: How easily can a large truck and trailer get to and from the barn? Think about hay deliveries, vet visits, and your own rig. You need wide, clear paths that can handle heavy vehicles, even when the ground is soft.
- Wind and Sun Orientation: Pay close attention to your prevailing winds. By orienting the narrowest side of the barn to face the harsh winter winds, you can dramatically cut down on drafts. In the summer, positioning the long side to catch cross-breezes is a huge plus for ventilation.
- Proximity to Utilities: How far are you from your water and electric lines? The longer the run, the more it’s going to cost you in trenching and materials.
From Raw Land to a Stable Base
Once you've zeroed in on the perfect location, the real work begins. Site prep is more than just clearing some brush; it’s about sculpting the land to create a solid, dry foundation for your entire investment. This is the unsung hero of every great barn build.
Proper site grading is your best defense against water infiltration. It’s far cheaper to move dirt now than it is to deal with foundation damage or a perpetually muddy barn aisle later.
First things first, clear the entire area of vegetation, rocks, and any other debris. If you’re dealing with old trees, you'll need to figure out how to efficiently remove tree stumps to create a clean slate. After clearing, the land is graded to establish that all-important slope, forcing water to flow away from your foundation.
Choosing the Right Foundation for a Steel Barn
The foundation is the critical link between your steel building and the ground it sits on. For a steel horse barn, you really have two go-to options, and each one shines in different situations.
| Foundation Type | Best For | Key Considerations |
|---|---|---|
| Monolithic Concrete Slab | Level sites and all-in-one floor/foundation needs. | Provides a durable, easy-to-clean interior floor. Requires significant groundwork and concrete. |
| Pier Foundation | Sloped or uneven terrain, or for raised-floor designs. | More cost-effective for challenging sites. Footers are placed at key structural points, requiring a separate interior floor material. |
A monolithic concrete slab gives you a seamless, rodent-proof, and bomb-proof floor for your aisleways, tack room, and wash stall. On the other hand, concrete piers are a fantastic, often more budget-friendly solution for uneven ground. They can be set at different heights to create a level building plane without massive excavation.
Your final choice will depend on your site's topography, your budget, and how you plan to use the interior spaces. For a deeper look at the technical specs, our guide on steel building foundation requirements has you covered. At the end of the day, a solid, well-drained foundation pad is what your entire investment rests on. Don't cut corners here.
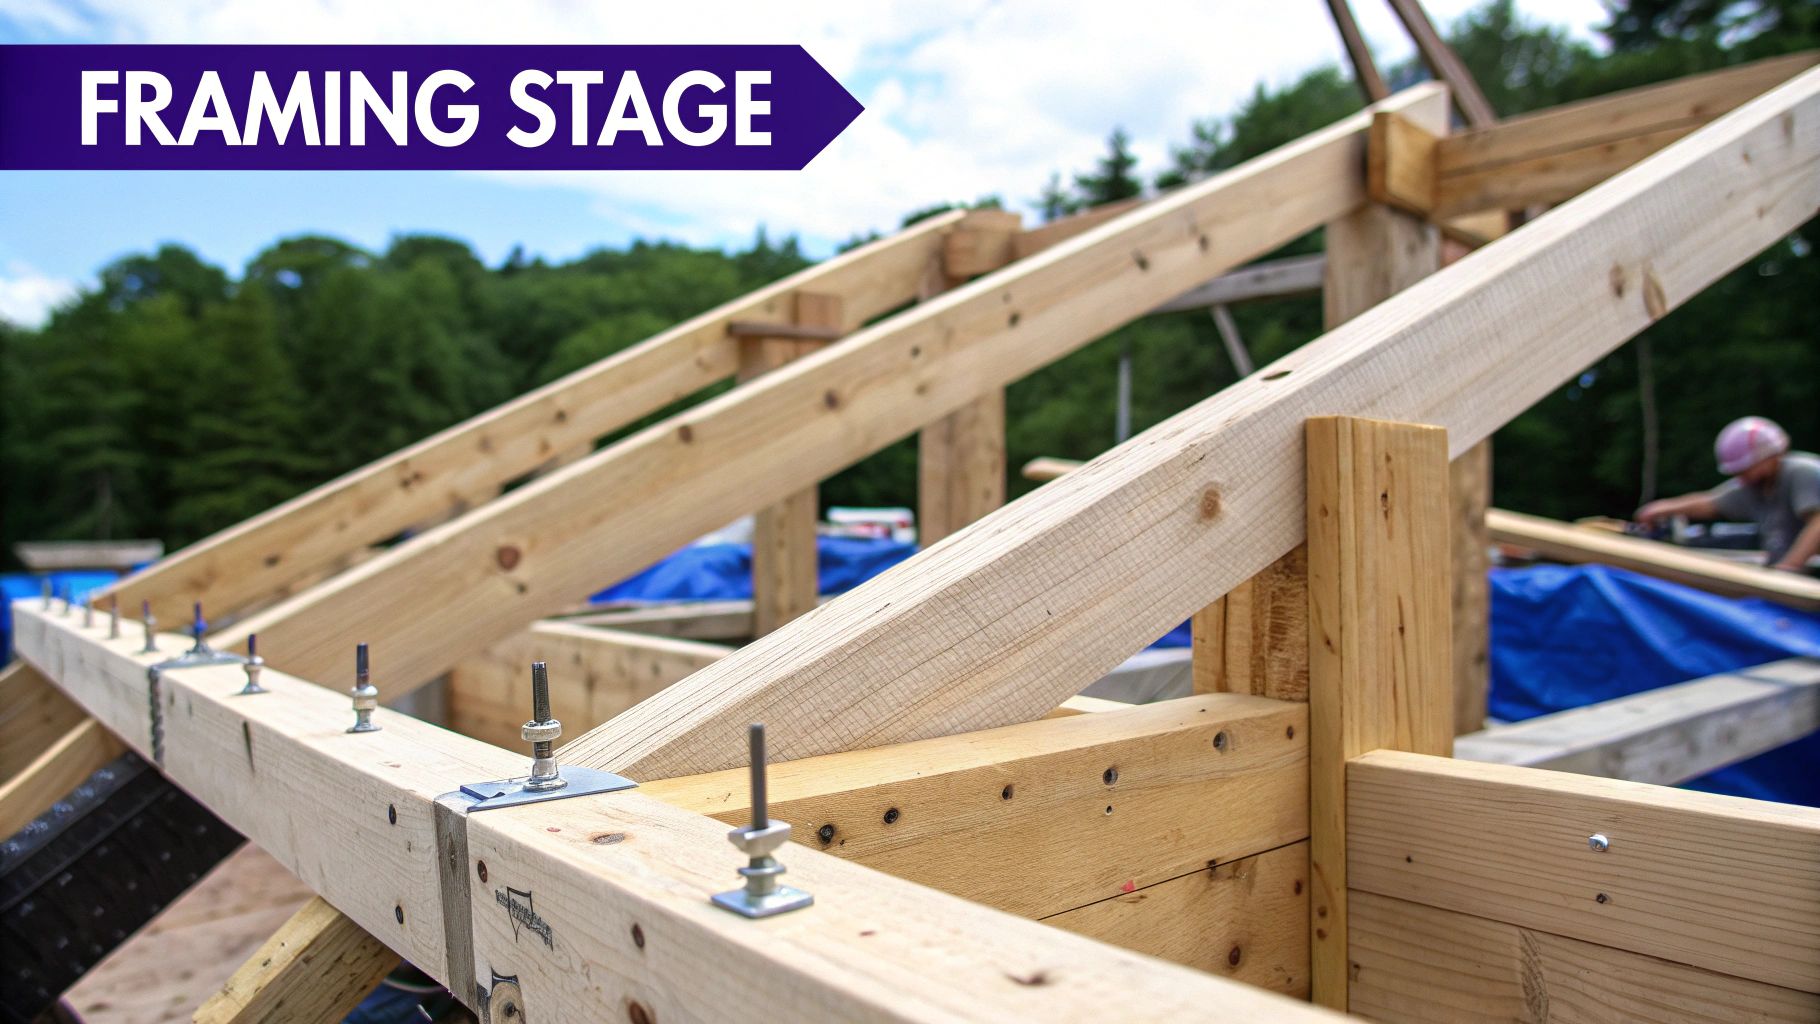
Assembling the Barn Frame and Walls
With the foundation cured and ready, it’s time for the most rewarding part of the job: watching your barn rise from the ground. This is where all that planning shifts from paper to reality, and you finally get to see the structure take shape. For most of us building today, this means working with a pre-engineered steel building kit.
These kits are a game-changer. Every single component arrives on-site, precision-cut and ready to go, which blows traditional stick-building out of the water in terms of speed. Think of it as a life-sized erector set—a very heavy, very precise erector set that demands your full attention to get everything strong, safe, and perfectly square.
Erecting the Steel Skeleton
First up: raising the primary steel columns. These massive I-beams form the backbone of the entire barn. They’re carefully lifted into position and anchored directly to the bolts you embedded in the concrete foundation. This connection is everything. Get it right, and the rest of the build goes smoothly.
Once the columns are standing tall and secure, the rafters are hoisted up and bolted to the columns, spanning the width of the building and creating the roof's peak. You’ll need a good lift for this step; these steel rafters aren't light. With the main frames connected, you’ll solidify the whole skeleton by adding purlins across the roof and girts along the walls. These smaller steel pieces run horizontally between the main frames and are what you'll eventually attach your roofing and siding panels to.
Safety check before proceeding: Always double and triple-check that every connection is tightened to the manufacturer's specified torque. Use a level and string lines constantly to ensure the entire frame is square. A building that's even slightly out of square will cause major headaches when you start attaching wall panels.
If you’re tackling this yourself, a good set of instructions makes all the difference. Our detailed guide on how to erect a metal building provides a visual walkthrough that helps take the guesswork out of the process.
Choosing and Installing Your Barn’s Cladding
The steel frame gives your barn its shape, but the cladding is what gives it a skin. These are the roofing and wall panels that shield the interior from the elements and give the building its final look.
Steel siding is the go-to choice for a metal horse barn, and for good reason. It's incredibly tough, fire-resistant, and asks for almost zero maintenance. Most kits include 26-gauge steel panels, which hit the sweet spot between strength and value. Plus, you get a huge range of color options to match your barn to the rest of your property.
When you're ready to install the panels, just start at one corner and work your way across the structure. Make sure each panel overlaps the previous one correctly to create a tight, weatherproof seal. Using the right fasteners is also crucial for the barn's integrity. If you plan on mixing in any custom wood elements, a resource on choosing the best screws for woodworking can be a big help.
Enhancing Your Barn’s Exterior Appeal
Standard steel siding is functional, but you don't have to stop there. A few simple additions can add a ton of character and give your barn a more traditional, custom-built look.
- Wainscoting: Adding a three- or four-foot-high band of a different material along the bottom of the walls can transform the appearance. Stone veneer, brick, or classic wood planks are all great choices that not only add visual appeal but also extra durability where the walls are most likely to get bumped or scraped.
- Trim and Overhangs: Never underestimate the power of good trim work. Using a contrasting color for the corners, roofline, and door frames makes the whole structure pop. Adding overhangs or even a lean-to gives you extra shelter from sun and rain while adding some welcome architectural dimension.
This is also the perfect time to think about insulation. While you can always add it later, it’s far easier to install it now, between the frame and the cladding. A good R-value helps keep the barn cooler in the summer and warmer in the winter, creating a much more comfortable space for your horses and potentially saving you money on heating down the road.
Designing a Safe and Functional Interior
The steel shell gives your barn its strength, but the interior is where the real magic happens. This is where your horses live, and it's where you'll spend countless hours. A well-designed interior is truly the heart of any good horse barn—it directly impacts your horses' safety and health, not to mention your own daily sanity.
Creating a functional interior isn't just about putting up stalls. It's about thinking through the daily flow of barn life and strategically placing every component, from the feed room to the wash stall, to make chores a breeze and keep everyone safe.
Crafting the Perfect Stall
The stall is your horse's personal space, so getting the design right is non-negotiable. Size is the first thing to nail down. While a 12'x12' stall is considered the industry standard for an average 16-hand horse, you really need to tailor it to the animal.
- Larger breeds: If you have Warmbloods or draft crosses, they'll be far more comfortable and safer in a 14'x14' or even 16'x16' stall.
- Foaling stalls: These need a lot more room. A 12'x24' double stall is a common and safe bet to give mare and foal plenty of space.
- Ponies and smaller horses: You can comfortably house them in a 10'x10' stall, which also helps you make the most of your barn's footprint.
Flooring is the next big decision. A concrete base might seem like a good idea because it's level and easy to clean, but it should never be the final surface. It's just too hard on a horse's legs and provides zero insulation. The goal is to create a surface that’s comfortable, offers good traction, and drains well.
A really effective and popular method is to use a base of compacted stone dust or screenings, then top it with thick, interlocking rubber stall mats. This combo gives you excellent drainage and a cushioned, supportive surface that’s much kinder to your horse's joints.
A single horse can produce up to 50 pounds of manure and 8-10 gallons of urine every single day. Your flooring choice isn't just about comfort—it's about managing a massive amount of moisture to keep the environment healthy.
Choosing Safe and Smart Partitions
Stall partitions do more than just divide space; they're a huge factor in safety and ventilation. Solid wood walls offer privacy, but they can seriously restrict airflow and prevent horses from socializing.
A fantastic compromise is partitions with steel grillwork on the top half. This allows horses to see each other and, more importantly, promotes the cross-breeze ventilation that’s so critical for respiratory health.
Laying Out Essential Work Zones
A truly functional barn is built around an efficient workflow. How you lay out your core work areas—the aisleways, tack room, feed room, and wash stall—will determine how smoothly your daily chores go.
The Central Aisleway
Think of your main aisle as the barn's central artery. It absolutely must be wide enough for a horse and handler to pass each other safely, and ideally, for small equipment like a wheelbarrow or even a small tractor. Aim for a minimum width of 12 feet, but 14 to 16 feet is even better, especially if you have a busy facility.
The aisle floor has to be non-slip, even when it's wet. Broom-finished concrete is a standard choice, but texturized rubber pavers offer far superior traction and are much quieter and more comfortable to walk on.
Tack and Feed Room Strategy
Your tack and feed rooms need to be secure, organized, and smartly placed.
- Tack Room: This space has to be dry and climate-controlled to protect your expensive leather saddles and bridles from mold and mildew. Good lighting and plenty of wall space for racks are essential.
- Feed Room: This room must be completely rodent-proof. Store all grain in sealed, chew-proof containers. Placing it near the barn entrance makes unloading heavy feed bags a whole lot easier.
Proper climate control starts with good insulation. To make sure your sensitive areas stay protected from temperature swings and moisture, take a look at our guide on steel building insulation options.
Wash and Grooming Stalls
A dedicated wash stall is a game-changer for any serious horse owner. It should have hot and cold water, great drainage with a central drain, and walls made from a waterproof material like concrete block or specialized paneling. Don't skimp on good lighting and cross-ties—they're crucial for safety during bathing.
Likewise, a separate grooming stall gives you a safe, contained spot for daily care, tacking up, and visits from the vet or farrier. Just make sure it has non-slip flooring and is located in a well-lit, draft-free part of the barn.
Installing Utilities and Adding Finishing Touches
With your barn’s structure standing tall, it's time to bring it to life. This is where you graduate from a sturdy steel shell to a fully functional, safe, and comfortable home for your horses. Honestly, the way you handle utilities and finishing details is what separates a pretty good barn from a truly great one—it directly impacts your daily chores and your horses' well-being.
Every decision you make from here on out has to be guided by safety. We're talking about electricity and water around 1,000-pound animals, so there’s absolutely no room for error.
Powering Your Barn Safely and Effectively
Getting electricity into your barn is a must, but it has to be done with your horses' safety as the number one rule. Horses are naturally curious and will chew on anything they can get their mouths on, making exposed wires a massive fire and electrocution risk.
Every single wire must be run through chew-proof metal conduit. This is non-negotiable. Don't even consider plastic conduit or leaving any wiring exposed where a horse could possibly reach it.
Here’s what to focus on for your electrical setup:
- Outlets: Install them high up on support posts in the main aisleway, well out of a horse’s reach. Every outlet needs a weatherproof, sealed cover. This keeps them handy for clippers, fans, and heated water buckets without putting them on the stall fronts where they'd be a hazard.
- Lighting: The right lights improve safety and set the right tone. You want fixtures rated for agricultural use—that means they're sealed against dust, moisture, and impact. Energy-efficient LED high-bay lights are perfect for aisleways, while shatter-proof, caged fixtures are essential inside the stalls.
- Switches: All light switches should be located outside of the stalls. Place them near the main barn entrance or your tack room door so horses can't play with them.
Planning Your Plumbing System
Water is the lifeblood of a barn, and a smart plumbing system will save you hours of back-breaking work. Your goal is year-round water access and an effective way to manage drainage.
For anyone in a cold climate, the frost-free hydrant is your best friend. These genius devices have a long pipe that goes deep underground, below the frost line. After you use it, the standing water drains out, preventing it from freezing solid in the winter. You’ll want at least one of these centrally located.
I've seen this mistake a dozen times: people install a hydrant right by the main barn door, and it creates a permanent ice slick all winter. A much better spot is a few feet away from the entrance, placed on a well-drained gravel pad.
Wash stalls are all about drainage. The floor needs a clear slope that channels water to a large, central drain. Make sure that drain has a trap to catch hair and debris—it will save you from some seriously nasty clogs down the road. Automatic waterers can also be a huge convenience, but they need to be cleaned and checked daily to make sure they're working and your horses are drinking.
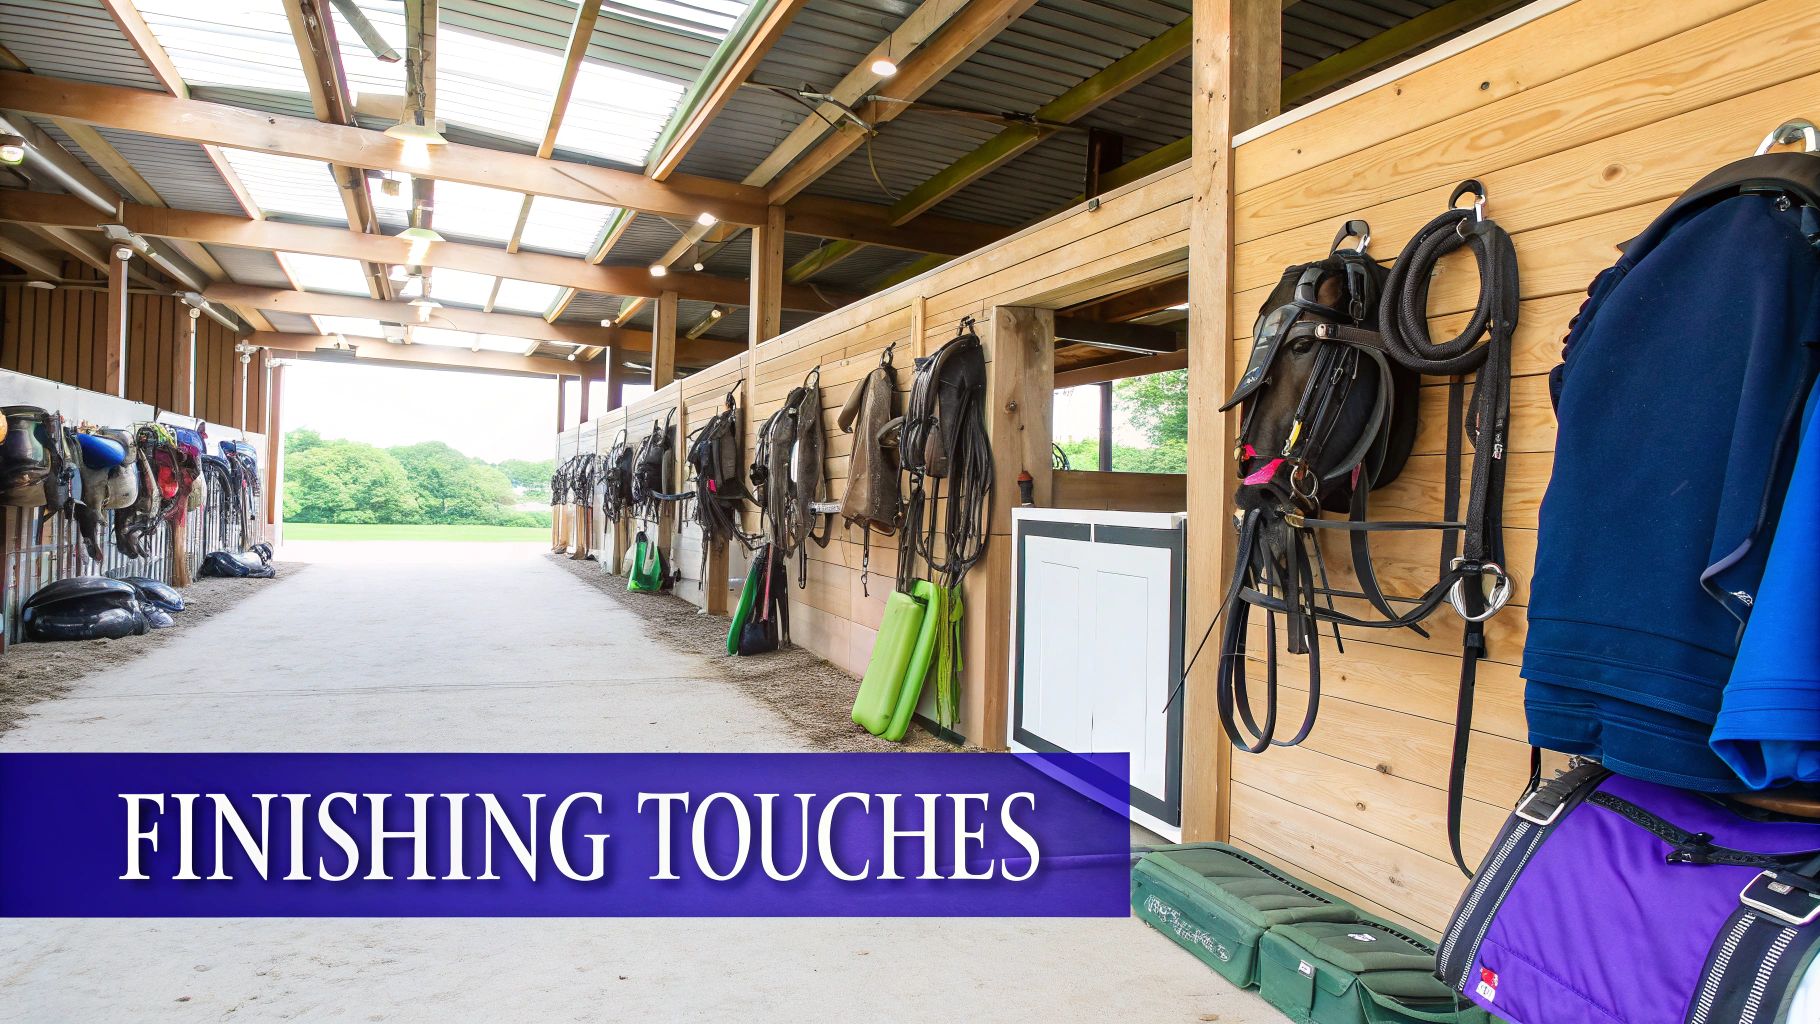
Adding the Essential Finishing Touches
It’s the final details that really make the barn complete. These touches are less about looks and more about functionality, protecting your investment, and making the whole area safer.
- Gutters and Downspouts: These aren't just a suggestion; they're essential. Gutters catch all the rain from that huge roof and channel it away from your foundation. This single feature prevents erosion, stops your barn's perimeter from turning into a mud pit, and protects the integrity of your foundation.
- Entryways and Doors: Your main barn doors need to be wide, tall, and easy to slide. Sliding doors are a great choice because they don't take up aisle space. Invest in heavy-duty hardware to make sure they operate smoothly and can be locked up securely.
- Landscaping and Drainage: You can use simple landscaping to your advantage here. By grading the ground to slope away from the barn and adding a perimeter of crushed stone or gravel, you can keep water and mud away from your entrances. This makes for a much cleaner and safer approach to your new barn.
These final steps, from hooking up utilities to hanging the doors, are often where the pros really shine. If you want to get a better feel for the entire construction journey, our overview of metal building installation offers some great insights on what to expect when working with an experienced crew.
Common Questions About Building a Horse Barn
Even with the perfect blueprint in hand, you’re bound to have questions pop up during a barn build. It’s completely normal. To help you navigate the process with confidence, we’ve put together answers to some of the most common questions we hear from folks building their first horse barn.
Let’s start with the big one: cost. In 2025, the price tag for a new horse barn can range anywhere from $15 to over $200 per square foot. That’s a huge range, I know. It all comes down to factors like the barn's size, what materials you choose, local labor rates, and whether you're adding custom features like wash stalls or a fully finished tack room.
For a deeper dive into all the variables, HomeAdvisor has a great resource where you can read more about barn building expenses.
That wide price range always leads to the next question: how can you build a high-quality barn without breaking the bank?
How Can I Make My Barn More Affordable?
Building on a budget doesn’t mean you have to sacrifice safety or quality. It’s about being smart with your choices. One of the single most effective ways to manage your budget is by opting for a "kit" approach for your interior components, especially the stalls.
Instead of buying fully welded, pre-assembled stall fronts, a kit gives you the stall door, grillwork, and all the hardware. You or your contractor then assemble and frame it on-site. This simple decision can slash the cost of each stall front by as much as 35%—a massive saving when you're building a multi-stall barn.
Stall partitions are another area where you can plan for smart savings.
- Start with wood. You can install solid wood partitions to begin with. They're durable, look great, and are very cost-effective.
- Upgrade down the road. Later on, when your budget allows, it’s easy to remove the top few boards and add steel grillwork. This improves airflow and lets your horses socialize.
Remember, cost-efficiency is about smart planning, not cheap materials. Put your budget into the most critical elements first—like a quality steel frame and a proper concrete foundation—and find savings in components you can upgrade later.
What Is the Best Time of Year to Build?
Timing your build correctly can save you a lot of headaches and money. Generally speaking, the ideal window for building a horse barn is from late spring through early fall. The weather is your friend during these months, giving you the dry conditions you need for pouring concrete and avoiding construction delays from rain or snow.
Just keep in mind, this is prime time for contractors, so their schedules fill up fast. You'll want to book your team well in advance. If you opt to build in the off-season, like late fall, you might find more contractor availability and possibly better labor rates. The trade-off, however, is the risk of weather-related setbacks putting your project on hold.
Ready to turn your vision into a reality with a barn that’s built to last? The team at Icon Steel Buildings is here to help you design the perfect steel horse barn for your needs and budget. Get a quote on our American-made steel buildings today.